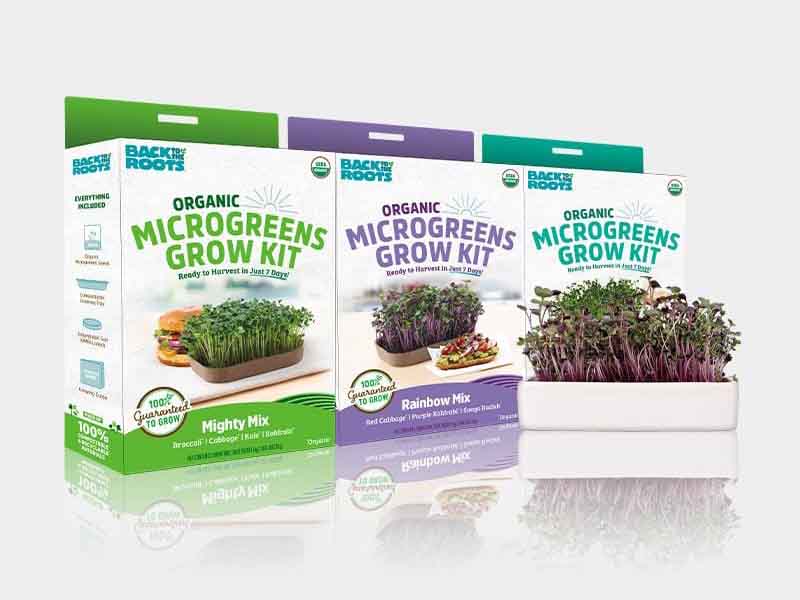

Some kitchen upgrades arrive with instructions, a learning curve, and the emotional weight of assembling furniture with 47 screws left over. A Microgreens Grow Kit (3-Pack) with Ceramic Planter is the opposite. It is small, stylish, surprisingly practical, and just dramatic enough to make your countertop look like it has joined a wellness retreat.
Microgreens are young edible greens harvested shortly after germination, usually when the first leaves have opened and the plants are only a few inches tall. They are not sprouts, and they are not baby salad greens either. Think of them as the “talented middle child” of the plant world: tiny, flavorful, fast-growing, and somehow able to make avocado toast look like it went to private school.
A 3-pack microgreens grow kit with ceramic planters is designed for people who want fresh greens without needing a backyard, greenhouse, or advanced degree in plant whispering. It typically gives you three small growing stations, allowing you to plant different seed varieties or stagger harvests for a steady supply. The ceramic planter adds a clean, modern look, while the compact format makes it ideal for apartments, kitchens, dorm rooms, office windowsills, and anyone whose “garden” is currently a sunny corner beside the coffee maker.
What Is a Microgreens Grow Kit?
A microgreens grow kit is a beginner-friendly setup that helps you grow edible seedlings indoors. Depending on the product, a kit may include ceramic planters, seed packets, growing pads or soil, drainage inserts, labels, and simple instructions. The goal is to remove the guesswork so you can go from dry seeds to fresh, snippable greens in about one to three weeks, depending on the variety.
The “3-pack” format matters because microgreens are quick crops. Instead of growing one tray, harvesting everything, and then staring sadly at an empty pot, you can rotate three planters. For example, you might start broccoli microgreens in one ceramic planter, radish microgreens in the second, and basil or arugula in the third. Or you can plant the same variety every few days so something is always ready to harvest. That is called succession planting, and yes, it sounds much fancier than “I remembered to plant another tray.”
Why Choose a Ceramic Planter for Microgreens?
The ceramic planter is not just there to look cute in product photos, although it does that job beautifully. Ceramic containers are sturdy, reusable, and attractive enough to leave on the counter without making your kitchen look like a science experiment. For indoor gardening, aesthetics matter. If your grow setup looks good, you are more likely to keep it visible, watered, and loved.
Good drainage is still essential. Microgreens need consistent moisture, but they do not want to sit in soggy conditions. Too much trapped water can encourage mold, weak roots, and sad little stems that look like they have lost the will to garnish. The best ceramic planter designs include drainage holes, an insert, or a system that keeps the growing medium moist without turning it into soup.
Best Uses for a 3-Pack Ceramic Microgreens Kit
A three-planter set works especially well for small-batch growing. You can use it for:
- Growing three different microgreen flavors at once
- Starting a new planter every few days for continuous harvests
- Creating a countertop herb-and-greens display
- Teaching kids or beginners how seeds grow
- Adding fresh texture to sandwiches, bowls, soups, eggs, and salads
Because microgreens grow quickly, the kit also gives you a tiny victory every week. This is useful if you have ever owned a houseplant that responded to your care by becoming compost with leaves.
Microgreens vs. Sprouts vs. Baby Greens
Microgreens are often confused with sprouts, but they are grown and eaten differently. Sprouts are usually germinated in water and eaten root, seed, and shoot. Microgreens are grown in a growing medium such as soil mix, coconut coir, or fiber mats, then harvested above the surface. Baby greens are older plants harvested after more leaf development.
This distinction matters for both texture and food safety. Microgreens usually have more leaf structure and a stronger flavor than sprouts. They are also typically cut before serving, leaving the root system behind. That makes them excellent for home growers who want fresh greens but prefer a cleaner, more controlled countertop setup.
Popular Microgreens to Grow in a 3-Pack Kit
One of the best things about a Microgreens Grow Kit (3-Pack) with Ceramic Planter is the chance to experiment. Different seeds bring different colors, flavors, and growth speeds. Here are some strong choices for beginners.
Broccoli Microgreens
Broccoli microgreens are mild, fresh, and easy to add to almost anything. They are popular because they grow reliably and have a gentle flavor that does not shout over your meal. Add them to wraps, grain bowls, scrambled eggs, or smoothies when you want greens without turning lunch into a lawn.
Radish Microgreens
Radish microgreens are the spicy little extroverts of the tray. They grow fast, look vibrant, and deliver a peppery kick. If your sandwich tastes bored, radish microgreens can wake it up without requiring a committee meeting of condiments.
Sunflower Microgreens
Sunflower microgreens are larger, crunchy, and slightly nutty. They usually need more space than tiny varieties, so they are best for a roomier planter. They are excellent in salads and wraps because they bring real bite and substance.
Pea Shoots
Pea shoots are sweet, tender, and beautiful. They can grow taller than many microgreens, so they work nicely when you want something that feels closer to a mini indoor crop. Use them in stir-fries, noodle bowls, or fresh salads.
Arugula, Basil, Cilantro, and Mustard
Herb and spicy greens bring personality. Arugula adds peppery depth, basil brings fragrance, cilantro offers brightness, and mustard greens give heat. These varieties may grow at different rates, so they are perfect for a 3-pack kit where each planter can have its own schedule.
How to Grow Microgreens in a Ceramic Planter
Growing microgreens is simple, but simple does not mean careless. The best results come from clean tools, good seeds, steady moisture, and enough light. Here is a practical step-by-step method for using a ceramic microgreens grow kit.
Step 1: Start Clean
Wash your hands, clean the ceramic planter, and make sure any insert, tray, or growing surface is fresh. Microgreens are eaten young and often raw, so cleanliness matters from the beginning. Use seeds intended for edible gardening, ideally labeled for microgreen use, and avoid seeds treated with fungicides or other chemicals not meant for food crops.
Step 2: Add the Growing Medium
Most kits include a growing pad, coconut coir, or a seed-starting mix. If you are choosing your own, avoid heavy garden soil from outside. Garden soil can compact in small containers, drain poorly, and introduce unwanted organisms. A light, clean seed-starting medium gives roots air, moisture, and space.
Step 3: Moisten Before Seeding
Dampen the growing medium before adding seeds. It should feel evenly moist but not swampy. A good test: if pressing the medium creates a puddle, you have gone too far. Microgreens appreciate moisture; they do not need a personal swimming pool.
Step 4: Sow Seeds Evenly
Sprinkle seeds across the surface in an even layer. Microgreens are seeded more densely than regular garden vegetables because they are harvested young. However, do not pile seeds on top of one another. Overcrowding can reduce airflow and increase the chance of mold. Aim for full coverage with a little breathing room.
Step 5: Cover for Germination
Many microgreen seeds germinate best with a short blackout period. Place a cover over the planter or use the lid recommended by your kit. This helps maintain humidity and encourages the seeds to sprout evenly. Once the seedlings emerge and begin lifting the cover, move them into bright light.
Step 6: Provide Light
Microgreens need strong light to grow compact and healthy. A sunny windowsill can work, especially for fast-growing varieties, but a small grow light often produces more consistent results. If the seedlings stretch toward the window like tiny green yoga instructors, they probably need more light.
Step 7: Water Gently
Watering is where many beginners get enthusiastic in the wrong direction. Keep the medium moist, not soaked. Bottom watering is a smart method if your planter design allows it: add water to the lower tray or reservoir so the roots drink from below. This keeps leaves drier and helps reduce mess.
Step 8: Harvest at the Right Time
Most microgreens are ready when they reach roughly 1.5 to 3 inches tall and have developed their first leaves. Use clean scissors to cut just above the growing medium. Harvest only what you need, or cut the whole planter when the crop is at peak freshness. Rinse gently if needed, dry well, and use quickly.
How Long Do Microgreens Take to Grow?
Many common microgreens can be harvested in 7 to 14 days, while some herbs and larger seeds may take closer to 21 days. Radish and broccoli are quick. Basil, cilantro, and some specialty herbs may take longer. Temperature, light, seed quality, and watering habits all affect timing.
For a 3-pack kit, this is excellent news. You can plant fast growers in one planter for near-instant gratification, medium growers in another, and slower herbs in the third. That way, the kit feels productive instead of like three identical pots waiting around for applause.
Why Microgreens Are Worth Growing at Home
Fresh microgreens are not always cheap at the grocery store. They are delicate, perishable, and often packaged in small containers. Growing them at home gives you better control over freshness and variety. You can harvest minutes before eating, which is about as fresh as food gets unless you are biting the planter, which is not recommended.
Microgreens are also a great entry point into indoor gardening. They require less space than herbs, grow faster than lettuce, and do not demand outdoor weather cooperation. Even people with no garden can grow them on a kitchen counter, windowsill, shelf, or small table.
Flavor Benefits
Microgreens add concentrated flavor. A small pinch can change a dish. Radish adds heat, pea shoots add sweetness, sunflower adds crunch, broccoli adds freshness, and mustard adds sharpness. They are especially helpful when leftovers need a little “I am not leftovers; I am cuisine” energy.
Nutrition Benefits
Microgreens are valued because many varieties contain meaningful amounts of vitamins, minerals, and plant compounds in a small serving. Nutrient levels vary by species, growing conditions, and harvest stage, so it is better to think of them as a smart addition to a balanced diet rather than a magic cape for your sandwich.
Design Benefits
A ceramic planter makes the kit feel like part of the kitchen instead of a temporary project. The 3-pack setup can look clean and intentional, especially when arranged in a row. It is both edible decor and practical gardening, which is a rare combination unless you count the basil plant you bought and forgot to water.
Common Mistakes to Avoid
Using Too Much Water
Overwatering is the classic beginner mistake. Microgreens need moisture, but too much water can lead to weak growth and unpleasant smells. Check the growing medium daily and water only when it begins to feel less moist.
Not Enough Light
Weak light causes leggy seedlings. They may still be edible, but they will be less attractive and less sturdy. Place your ceramic planter near bright light or use a grow light for more predictable results.
Planting Seeds Too Thickly
Dense seeding is normal for microgreens, but there is a limit. Seeds should not be stacked in clumps. Good airflow helps keep the crop healthy, especially in small ceramic containers.
Forgetting Air Circulation
Still, humid air can invite mold. Keep the planters in a spot with gentle airflow. You do not need a wind tunnel. A normal room with some air movement is usually enough.
Harvesting Too Late
Microgreens are best when young and tender. Waiting too long can make them tougher, taller, or less flavorful. Once they look ready, harvest proudly. This is not a houseplant. Its destiny is tacos.
Food Safety Tips for Homegrown Microgreens
Because microgreens are often eaten raw, treat them like fresh produce. Start with clean containers, clean hands, and food-safe growing materials. Use seeds sold for edible growing, not decorative seed packets that may be treated. Keep pets away from the planters, even if your cat believes all new household objects require inspection.
After harvesting, use clean scissors and place the greens in a clean bowl or container. If you rinse them, dry them gently with a salad spinner or paper towel. Store harvested microgreens in the refrigerator and use them soon for the best texture and flavor.
Best Ways to Eat Microgreens
The beauty of microgreens is that they make everyday food look intentional. Add them to sandwiches, wraps, omelets, tacos, burgers, soups, grain bowls, pasta, pizza, and salads. Use delicate greens raw as a finishing touch. Add heartier pea shoots or sunflower greens to warm dishes after cooking so they stay bright and crisp.
Here are a few easy ideas:
- Breakfast: top scrambled eggs with broccoli or radish microgreens.
- Lunch: add sunflower microgreens to turkey, hummus, or veggie wraps.
- Dinner: finish ramen, rice bowls, or tacos with mustard or arugula microgreens.
- Snacks: sprinkle pea shoots over avocado toast or cottage cheese.
- Party food: use colorful microgreens as a garnish for crostini or deviled eggs.
Who Should Buy a Microgreens Grow Kit (3-Pack) with Ceramic Planter?
This type of kit is ideal for beginners, apartment dwellers, home cooks, health-conscious snackers, gift shoppers, and design-minded gardeners. It is also excellent for people who want a low-pressure growing project. Unlike tomatoes, microgreens will not demand staking, pruning, pollination, or emotional support during a heat wave.
A ceramic 3-pack kit is especially useful if you care about appearance. Plastic trays are practical, but they are not always something you want displayed next to your coffee station. Ceramic planters can blend into modern, farmhouse, minimalist, or cozy kitchen styles while still producing real food.
How to Get the Most Value from Your 3-Pack Kit
To make the most of your kit, create a simple planting rhythm. Plant one ceramic planter today, the second in three or four days, and the third a few days after that. By the time the first planter is harvested, the second is almost ready, and the third is on deck. This keeps fresh greens coming without turning your kitchen into a commercial farm operation.
Keep notes on what you plant, when you plant it, and how long it takes to harvest. You can use small labels or a simple phone note. After a few rounds, you will know which varieties grow best in your home and which ones you actually enjoy eating. Gardening success is not just growing things. It is growing things you will not abandon in the fridge like a bag of noble intentions.
Buying Tips: What to Look for in a Quality Kit
Before choosing a microgreens grow kit with ceramic planter, look for practical details. The planter should be easy to clean, stable on a counter, and designed to handle moisture. Drainage is important, whether through holes, inserts, or a controlled watering system. The growing medium should be food-safe and beginner-friendly.
Seed quality matters too. A good kit should include seeds meant for edible microgreen production, with clear labeling and planting instructions. If the kit includes multiple varieties, check whether their growth times are similar. If not, plant each variety in its own ceramic planter rather than mixing slow and fast growers together.
Experience Notes: Living with a Microgreens Grow Kit on the Counter
Using a Microgreens Grow Kit (3-Pack) with Ceramic Planter feels different from starting a traditional garden. There is no digging, no muddy shoes, and no mysterious outdoor insect that looks like it has legal ownership of your tomato plant. Everything happens at eye level, right where you make coffee, pack lunch, or pretend you are going to meal prep this week.
The first experience most people notice is how fast the process feels. Day one looks like nothing. Day two looks like maybe something is thinking about happening. By day three or four, tiny stems begin appearing, and suddenly the ceramic planters feel alive. It is oddly satisfying, like watching popcorn grow in slow motion but with fewer butter-related decisions.
The 3-pack setup also changes the experience in a useful way. With one planter, you tend to obsess over it. Is it wet enough? Is it too wet? Are the seedlings leaning? Do they like me? With three planters, you naturally experiment. One can sit closer to the window. Another can go under a grow light. A third can test a different seed variety. The kit becomes a tiny learning lab, but a very polite one that fits beside the toaster.
Ceramic planters make the habit easier to maintain because they look permanent and intentional. A disposable tray can feel like a project. A ceramic planter feels like part of the room. That small design detail matters more than people expect. When something looks nice on the counter, you leave it there. When you leave it there, you remember to water it. When you remember to water it, you get microgreens instead of a dry rectangle of regret.
Another real-life benefit is how often microgreens rescue boring meals. A plain egg sandwich becomes brighter with radish microgreens. Leftover rice becomes a bowl with pea shoots. Tomato soup looks restaurant-adjacent with broccoli greens on top. Even a frozen pizza can receive a handful of arugula microgreens and suddenly act like it has a culinary résumé.
There are a few honest challenges. Watering takes practice. Too much water can make the growing medium smell stale, while too little water can dry out tender roots quickly. Light can also be tricky in darker kitchens. If the greens stretch and lean dramatically, they probably need stronger light. Luckily, microgreens grow so quickly that every round teaches you something. A mistake is not a season-long tragedy; it is usually a one-week lesson with leaves.
The best experience comes from treating the kit as a rhythm, not a one-time activity. Plant, watch, harvest, clean, repeat. Rotate the three ceramic planters so one is sprouting, one is growing, and one is ready to eat. That rhythm turns fresh greens into a habit instead of a novelty. It also gives your kitchen a steady little reminder that food can be local enough to require only scissors.
In short, the experience is practical, decorative, and quietly rewarding. You get fresh flavor, a cleaner-looking countertop garden, and the small joy of saying, “I grew this,” right before putting it on a taco. That is not just gardening. That is countertop confidence.
Conclusion
A Microgreens Grow Kit (3-Pack) with Ceramic Planter is a smart choice for anyone who wants fresh greens without outdoor space, complicated equipment, or a long wait. It combines the speed of microgreen growing with the beauty of reusable ceramic planters, making it both functional and attractive. With three planters, you can rotate crops, test different seed varieties, and enjoy a more consistent harvest.
The key to success is simple: use clean materials, choose quality seeds, provide steady moisture, give the greens enough light, and harvest while they are young and tender. Do that, and your kitchen can produce fresh flavor all year long. Not bad for a few tiny seeds sitting in a ceramic pot like they own the place.
Note: This article is written for web publishing and is based on real indoor microgreens growing practices, container gardening principles, and food safety guidance from reputable U.S. agricultural and extension resources.


