
Painting a room is satisfying. Cleaning up afterward? That is where enthusiasm often goes to sit quietly in the corner. But here is the truth: your paint tools are only as good as the way you treat them after the last wall, cabinet, fence rail, or “quick touch-up” that somehow became a weekend project.
Good brushes, roller covers, trays, extension poles, scrapers, painter’s tape, and even drop cloths can last through many projects when they are cleaned and stored correctly. Ignore them, and they turn into crunchy little fossils from the Age of Bad Decisions. The good news is that proper paint tool maintenance is not complicated. It is mostly timing, the right cleaning method, and a storage system that does not involve tossing everything into a garage bin labeled “future problem.”
This guide covers practical, homeowner-friendly tips for cleaning and storing all of your paint tools, whether you are using water-based latex paint, oil-based paint, stain, primer, or specialty finishes.
Why Paint Tool Cleaning Matters More Than You Think
Paint tools affect the final finish. A stiff brush leaves drag marks. A dirty roller sheds dried flakes into fresh paint. A tray with old residue can contaminate a new color. Even a bent extension pole or a crusty roller frame can make a simple job feel like wrestling an octopus in overalls.
Cleaning your paint tools properly helps you:
- Extend the life of brushes, rollers, trays, and accessories
- Get smoother paint coverage on future projects
- Save money by reusing quality tools
- Reduce paint waste and unnecessary landfill trash
- Keep your work area safer, neater, and easier to use
Think of cleanup as the final step of painting, not the punishment after painting. A few extra minutes now can save you from buying new supplies every time inspiration strikes.
Start Before the Paint Dries
The number one rule for cleaning paint tools is simple: do not wait. Wet paint is manageable. Dried paint is a stubborn guest who refuses to leave.
As soon as you finish painting, remove excess paint from each tool. Scrape brushes gently against the inside of the can or tray. Roll excess paint from roller covers onto cardboard, newspaper, or the project surface if it still needs coverage. Use a 5-in-1 painter’s tool to squeeze paint from rollers before washing them.
This first step reduces the amount of paint going into your wash water or solvent. It also makes cleaning faster and less messy. Your sink, bucket, and future self will all applaud politely.
Know Your Paint Type Before You Clean
Different paints require different cleanup methods. Using the wrong cleaner can ruin tools, waste time, and create a mess that looks like modern art but smells worse.
Water-Based Paints: Latex and Acrylic
Most interior wall paints today are water-based. Latex and acrylic paints can usually be cleaned from brushes, rollers, and trays with warm water and mild dish soap. Work the soap through the bristles or roller nap until the water runs mostly clear.
Do not blast brushes with high-pressure water directly into the ferrule, which is the metal band that holds the bristles. That can loosen the brush and push paint deeper inside. Instead, rinse from the base of the bristles toward the tip while gently combing through the paint.
Oil-Based Paints, Varnishes, and Stains
Oil-based products require the solvent recommended on the product label, often mineral spirits or paint thinner. Always use solvents in a well-ventilated area, away from flames, sparks, or heat sources. Wear gloves, keep containers closed when not in use, and follow local disposal rules.
Never pour leftover solvent, oil-based paint, or dirty thinner down a storm drain. In many areas, solvent waste and certain leftover products need to be handled through household hazardous waste programs.
How to Clean Paint Brushes
A quality paint brush can last for years if you clean it correctly. The process is not glamorous, but neither is buying the same brush six times because the last one became a decorative brick.
Step 1: Remove Excess Paint
Wipe or scrape extra paint back into the can or tray. Do not mash the bristles flat. Pressing too hard can permanently bend them and ruin the brush shape.
Step 2: Wash Based on Paint Type
For latex or acrylic paint, swirl the brush in warm, soapy water. Massage the bristles gently with your fingers, starting near the ferrule and moving toward the tips. Rinse and repeat until the water is clear.
For oil-based paint, dip the brush into the recommended solvent and work the solvent through the bristles. Use a second clean container of solvent for a final rinse if needed. This “two-bucket” method keeps the second rinse cleaner and helps the brush recover faster.
Step 3: Use a Brush Comb
A brush comb is one of those small tools that feels unnecessary until you use it once. It separates bristles, removes hidden paint, and helps restore the brush’s original shape. Comb from the ferrule outward, not backward like you are trying to scare the brush.
Step 4: Shake, Spin, and Reshape
After washing, remove excess water or solvent. A brush and roller spinner works well, but you can also shake the brush carefully into a bucket. Reshape the bristles with your fingers so the brush dries with a clean edge.
Step 5: Dry and Store Properly
Let brushes dry flat or hang them by the handle. Once dry, store them in their original cardboard sleeve if you still have it. That sleeve is not packaging clutter; it is a tiny tuxedo that keeps the bristles neat. If the sleeve is gone, wrap the brush in heavy paper or cardboard and secure it loosely.
How to Clean Paint Rollers
Roller covers can hold a surprising amount of paint. Cleaning them takes patience, especially thick-nap rollers used on textured walls or exterior surfaces.
Remove the Roller Cover Immediately
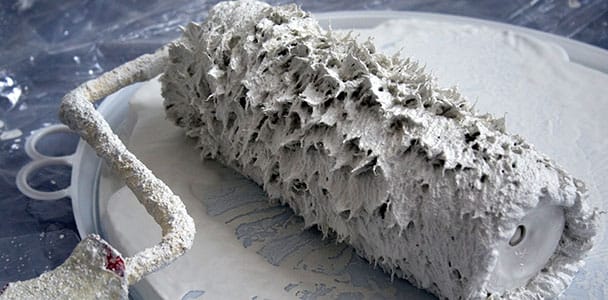
Take the roller cover off the frame as soon as you finish. Do not let it sit on the frame overnight. Paint can dry inside the core and make removal difficult.
Scrape Out Extra Paint
Use the curved side of a 5-in-1 tool or roller scraper to squeeze paint from the cover back into the tray. Roll the cover on scrap cardboard to remove more paint before washing.
Wash Until the Water Runs Clear
For water-based paint, wash the roller cover in warm, soapy water. Work the nap with your hands until paint stops releasing. Rinse several times. Thick roller covers may require more time because paint hides deep in the fibers.
For oil-based coatings, use the recommended solvent and follow the product label carefully. Let the roller dry completely before storing it.
Dry Rollers the Right Way
Stand roller covers on end while drying so the nap is not flattened. Avoid laying a wet roller on its side, where it can develop a flat spot. Once completely dry, store it in a plastic bag or its original package to keep dust away.
What to Do With Rollers Between Coats
If you are painting again within a few hours or the next day, you may not need to wash the roller immediately. Wrap the roller cover tightly in plastic wrap or place it in an airtight plastic bag. Keep air away from the paint so it does not dry on the nap.
For short breaks, the wrapped roller can stay in a cool spot. For longer pauses during the same project, some painters place wrapped rollers in the refrigerator. Just remember: label the bag clearly unless you want someone mistaking “eggshell white” for leftovers. Also, let the roller return to room temperature before painting again.
Cleaning Paint Trays, Buckets, and Liners
Paint trays and buckets are easy to overlook, but old dried paint can break loose and ruin your next finish. Pour unused paint back into the can if it is clean and uncontaminated. Then scrape the tray with a putty knife or 5-in-1 tool.
For water-based paint, wash trays and buckets with warm, soapy water. For oil-based paint, wipe out as much residue as possible before using the correct solvent. Disposable tray liners can make cleanup easier, but do not assume “disposable” means “throw away while wet.” Let paint residue dry completely or follow local disposal rules.
If you paint often, consider using reusable rigid liners or bucket screens. They reduce mess and can be easier to clean than flimsy tray inserts that fold at the worst possible moment, usually while full of paint.
Cleaning Painter’s Tape, Drop Cloths, and Plastic Sheeting
Painter’s tape is not really “cleaned,” but it should be removed correctly. Pull tape while the paint is slightly wet or score along the edge with a utility knife if the paint has dried. This helps prevent peeling fresh paint from the wall.
Canvas drop cloths should be allowed to dry before folding. If they have wet paint on them, leave them spread out in a safe, ventilated area until dry. Folding wet paint inside fabric creates a sticky surprise for your next project.
Plastic sheeting should also dry before disposal or storage. If it is lightly used and still clean, fold it neatly and save it. If it is covered in paint, let it dry and dispose of it according to local guidelines.
Cleaning Scrapers, Putty Knives, and Multi-Tools
Scrapers and putty knives are the unsung heroes of painting prep. Clean them before paint, caulk, spackle, or joint compound hardens on the blade.
Wipe blades with a rag after use. Wash water-based residue with soap and water. For stubborn material, use a stiff brush or fine abrasive pad. Dry metal tools completely to prevent rust. A light wipe with mineral oil can help protect carbon steel blades during long storage.
Store sharp tools with blade guards or in a toolbox compartment where they will not scrape other supplies. A loose putty knife in a drawer is basically a tiny metal shark.
Cleaning Extension Poles and Roller Frames
Roller frames and extension poles collect paint around handles, threads, cages, and locking mechanisms. Wipe them down before paint dries. For water-based paint, use warm water and a rag. For oil-based coatings, use the recommended cleaner sparingly and dry thoroughly.
Pay special attention to the roller cage. If paint builds up where the cover spins, the roller may drag, squeak, or apply paint unevenly. Extension pole threads should also stay clean so attachments twist on smoothly.
Cleaning Paint Sprayer Parts
Paint sprayers need careful cleaning because dried paint can clog tips, filters, hoses, and needles. Always follow the manufacturer’s instructions for your specific sprayer. Flush the system with the recommended cleaner until it runs clear, then clean the tip guard, filters, and removable parts.
Do not poke sprayer tips with random metal objects. You can damage the opening and affect the spray pattern. Use the cleaning tools recommended for the sprayer. Once parts are clean and dry, store them in a labeled container so tiny pieces do not vanish into the same universe as missing socks.
Smart Storage Tips for Paint Tools
Clean tools are only half the story. Storage matters because brushes, rollers, and accessories can be damaged by pressure, dust, moisture, and temperature swings.
Store Brushes Hanging or Flat
Never store brushes standing on their bristles. That bends the tips and ruins the cutting edge. Hang them from the handle hole or lay them flat in a drawer. Keep them wrapped so dust does not settle into the bristles.
Keep Roller Covers Dust-Free
Once dry, place roller covers in plastic bags or original sleeves. Label them by nap size or use: “smooth walls,” “cabinets,” “textured ceiling,” or “the roller that survived the hallway.” This makes your next project easier to set up.
Use a Dedicated Paint Tool Box
A sturdy storage box keeps brushes, rollers, tape, trays, scrapers, sanding blocks, gloves, rags, and openers in one place. Choose a box with compartments so delicate brush bristles are not crushed by heavy tools.
Control Temperature and Moisture
Store paint tools in a dry area away from extreme heat, freezing temperatures, and direct sunlight. Garages can work if they stay reasonably dry. Damp basements can cause rust, mildew, and musty-smelling drop cloths.
Common Paint Tool Cleaning Mistakes
Even careful DIY painters make cleanup mistakes. Here are a few worth avoiding:
- Letting paint dry first: Waiting turns easy cleanup into archaeology.
- Soaking brushes too long: Long soaking can damage handles, bristles, and adhesives.
- Storing wet tools: Moisture can cause mildew, rust, and misshapen bristles.
- Using the wrong solvent: Always check the paint label before cleaning.
- Crushing roller nap: Store roller covers upright or protected.
- Pouring waste carelessly: Follow local rules for paint, solvent, and rinse water disposal.
Eco-Friendly Paint Tool Cleanup
Cleaning paint tools responsibly is good for your home and better for the environment. Start by buying only the paint you need. Pour small amounts into a tray instead of filling it like you are frosting a giant cake. Reclaim extra paint from brushes and rollers before washing.
For latex paint cleanup, use a bucket instead of running water nonstop. Let solids settle when appropriate, then handle residue according to local guidelines. For leftover paint, look for recycling or stewardship programs in your area. Many communities offer drop-off options for usable or unwanted paint.
Oil-based paint, solvents, and some stains require extra caution. Store them in labeled containers and take them to a household hazardous waste collection site when required. Responsible cleanup may take a little more effort, but it keeps harmful materials out of drains, soil, and waterways.
When to Replace Paint Tools
Not every tool deserves a heroic rescue mission. Replace a brush when bristles are permanently bent, falling out, or clumped with dried paint near the ferrule. Replace a roller cover when the nap sheds, mats down, or leaves texture you did not ask for.
Trays, frames, and poles can last a long time, but replace them if they are cracked, rusted, bent, or difficult to clean. A damaged tool can cost more in frustration than a replacement costs in dollars.
Real-World Experience: What Actually Works When Cleaning and Storing Paint Tools
After enough painting projects, you learn that cleanup success depends less on fancy tricks and more on habits. The best experience-based tip is to set up your cleanup station before you start painting. Put a bucket, mild soap, rags, a brush comb, a 5-in-1 tool, gloves, and plastic wrap nearby. When cleanup supplies are already waiting, you are less likely to abandon your brush in the tray “for five minutes,” which somehow becomes tomorrow morning.
Another useful habit is using the right tool for the job from the beginning. Cheap brushes can work for rough projects, but they often shed bristles and lose shape quickly. A better brush cleaned immediately after use is usually cheaper over time. The same goes for roller covers. A good roller cover holds paint evenly, releases it smoothly, and survives washing better than a bargain-bin roller that begins molting halfway across the wall.
One practical trick is to keep separate brushes for different jobs. For example, use one angled sash brush for trim, one wider brush for doors or furniture, and one older brush for primer or rough surfaces. Labeling brushes may sound overly organized, but it prevents the tragic moment when your best trim brush gets used for gritty exterior primer.
For rollers, the most helpful experience is learning not to overwash them under running water forever. First scrape out as much paint as possible. That step matters more than people think. A roller loaded with paint can take ages to rinse, but a roller that has been scraped thoroughly cleans much faster. Stand it on end to dry, and do not put it into a sealed bag until it is fully dry. Sealing a damp roller is how you grow a science project, not how you prepare for the next accent wall.
Plastic wrap is excellent during short breaks, but it is not a long-term storage plan. If you are continuing the same color the next day, wrap the brush or roller tightly and keep it cool. If the project is finished, clean the tool properly. Future-you does not want to unwrap a mystery bundle that smells like regret and semi-gloss.
Storage also becomes easier when everything has a home. Keep brushes in sleeves, rollers in labeled bags, tape in a dry container, and metal tools wiped clean. Store drop cloths folded only after paint spots are dry. Keep solvents, leftover paint, and cleaning chemicals out of reach of children and pets, and follow local rules for disposal.
The biggest lesson is this: paint cleanup is part of craftsmanship. A clean brush cuts a sharper line. A clean roller leaves a smoother finish. Organized tools make the next project feel less like starting from chaos. Take care of your paint tools, and they will reward you by not sabotaging your walls.
Conclusion
Cleaning and storing paint tools is not the most exciting part of home improvement, but it is one of the most valuable. Wash water-based paint before it dries, use the correct solvent for oil-based products, remove excess paint before rinsing, dry everything completely, and store tools so they keep their shape.
Whether you are painting one bookshelf or giving the whole house a personality upgrade, well-maintained tools help you work faster, paint cleaner lines, reduce waste, and save money. Treat your brushes and rollers like reusable tools instead of disposable victims, and they will be ready the next time a wall starts looking at you funny.


