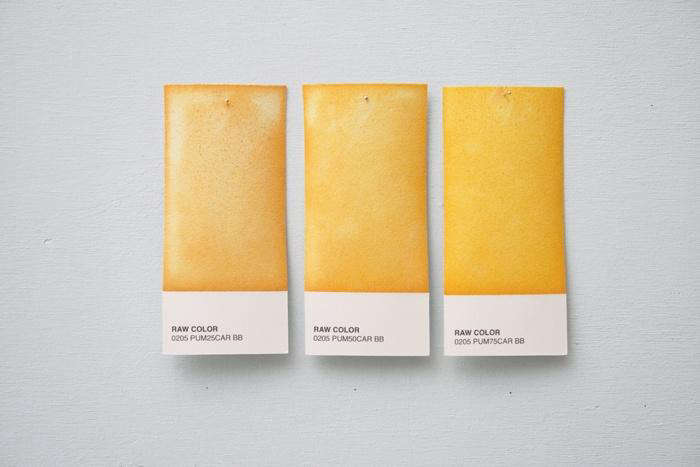

There is something almost suspiciously satisfying about turning a pile of onion skins, marigold petals, walnut hulls, or garden weeds into fabric that looks like it came from an expensive artisan studio. Natural dyeing is part science experiment, part kitchen alchemy, and part reminder that nature has been showing off its color palette long before paint stores existed.
Creating the ultimate organic dye is not about chasing one “perfect” formula. It is about learning how fibers, plants, water, heat, and mordants work together. A yellow flower may create golden wool, olive cotton, or muddy beige depending on the process. That is not failure. That is the dye pot having opinions.
With the right preparation and a little patience, you can create rich, layered, and surprisingly long-lasting color from botanical materials. This guide explains how to build reliable natural dye recipes, choose the right fibers, improve colorfastness, and enjoy the slightly unpredictable magic of raw color.
What Is Raw Color in Natural Dyeing?
Raw color is the color hidden inside natural materials before they become fabric dye. It can come from flowers, roots, bark, leaves, food scraps, insects, minerals, and even certain fungi. Historically, textile makers used ingredients such as indigo leaves for blue, madder root for red, cochineal insects for scarlet, walnut hulls for brown, and plant-based yellows from flowers or bark.
In modern craft language, “organic dye” usually means a dye made from natural or plant-based materials rather than synthetic chemical colorants. However, it is important to understand that natural does not automatically mean harmless, food-safe, or certified organic. A plant dye may be natural, but mordants and dye additives still need to be handled responsibly.
The best natural dye projects combine creativity with a little record-keeping. Think of yourself as a color detective. You are not merely boiling leaves. You are investigating how raw materials reveal color under different conditions.
Why Natural Dyes Feel So Different From Synthetic Color
Synthetic dyes are often designed for consistency. You follow a formula, and the color is usually close to what the package promised. Natural dyes are more like weather forecasts. They offer useful clues, but every batch has personality.
The final color can change based on the season when plants were harvested, how old the material is, whether it was dried or fresh, the mineral content of your water, the fiber type, the mordant, and even the metal of the pot. That may sound inconvenient, but it is also why handmade naturally dyed textiles feel alive.
A marigold dye bath may create bright butter yellow on wool, warmer gold on silk, and a softer wheat tone on cotton. Walnut hulls can produce browns that range from caramel to deep espresso. Black beans may surprise you with smoky blue-gray shades instead of the black you expected. Natural dyeing loves a plot twist.
Start With the Right Fiber
Before choosing flowers or vegetable scraps, choose your fabric carefully. Natural dyes generally bond more easily with natural fibers than with polyester, acrylic, nylon, or other synthetics.
Protein Fibers
Protein fibers come from animals and usually absorb natural dye beautifully. These include wool, silk, alpaca, mohair, cashmere, and feathers. Wool is especially friendly for beginners because it often accepts color readily and develops rich tones.
Use gentle heat with wool and silk. Sudden temperature changes, rough stirring, or aggressive handling can cause wool to felt. Silk is delicate too, but it can produce brilliant color with a lovely sheen.
Cellulose Fibers
Cellulose fibers come from plants. Cotton, linen, hemp, bamboo, and rayon are common examples. These fibers can be dyed naturally, but they often need more preparation and may produce softer, more muted shades than wool or silk.
That does not mean cellulose fibers are boring. A muted oatmeal linen dyed with onion skins can look more sophisticated than a neon shopping bag having a midlife crisis.
Blends and Synthetic Fabrics
Fabric blends can be unpredictable. A cotton-polyester shirt may dye unevenly because the cotton absorbs color while the polyester mostly watches from the sidelines. For your first projects, choose 100 percent wool, silk, cotton, linen, or hemp.
The Core Ingredients of an Organic Dye Project
You do not need a laboratory full of mysterious bottles to begin natural dyeing. A basic setup can be simple, affordable, and easy to improve over time.
- Natural fiber fabric or yarn: Wool, silk, cotton, linen, or hemp.
- Dye material: Onion skins, marigolds, avocado pits, walnut hulls, black beans, madder root, indigo, or other botanical ingredients.
- Dedicated dye pot: Use a pot only for dyeing, not future food preparation.
- Water: Filtered, distilled, rainwater, or tap water depending on your experiment.
- Strainer: Helpful for removing plant material before dyeing fabric.
- Gloves and tongs: Because “rustic artisan hands” are less charming when they are permanently walnut brown.
- Mordant or tannin source: Used to help color attach to fibers and influence the final shade.
- Notebook or dye journal: Essential if you want to recreate your favorite color later.
Understanding Mordants Without Making It Weird
A mordant is a substance that helps dye molecules attach more securely to fabric. The word comes from an old term meaning “to bite,” which sounds dramatic, but the goal is simply to help color stay put.
Common mordants include alum, iron, and tannin-rich botanical materials. Alum is often used to brighten shades and improve dye uptake. Iron can darken colors or shift them toward gray, olive, brown, or black. Tannins found in materials such as oak galls, pomegranate peel, tea, sumac, and some barks can be especially helpful for cellulose fibers.
Use mordants carefully and follow supplier directions. Avoid treating every natural dye project like a chemistry free-for-all. Strong metal mordants can affect fabric durability, and some older dyeing practices used substances that are not appropriate for casual home use. The goal is beautiful color, not becoming the neighborhood’s accidental textile laboratory.
How to Create an Organic Dye Step by Step
1. Scour the Fabric
Scouring means washing fabric or yarn before dyeing to remove oils, dust, sizing, and manufacturing residue. Even brand-new fabric may carry invisible coatings that prevent dye from bonding evenly.
Wash cellulose fibers with a mild detergent and warm water. Handle wool and silk more gently with cooler water and minimal agitation. Clean fiber is the foundation of even color. Skip this step, and your dye may create blotches that look less “artisan” and more “laundry mystery.”
2. Mordant the Fiber
For many natural dye recipes, mordanting happens before the dye bath. The fabric is soaked in a prepared mordant solution, then rinsed lightly or moved directly into the dye bath depending on the technique.
Some dye materials, especially walnut hulls and certain tannin-rich barks, may naturally create fairly long-lasting color without much additional mordant. Others, such as flower petals, often benefit from careful preparation if you want better wash and light resistance.
3. Extract the Dye
Place your plant material in a dedicated pot, cover it with water, and gently heat it. Avoid turning every dye bath into a violent boil. Slow simmering usually gives plant pigments time to release without shredding delicate materials into swamp soup.
Fresh flowers, dried leaves, roots, bark, and food scraps all behave differently. Roots and bark often need longer extraction. Flower petals may release color faster. Onion skins are wonderfully generous and can produce rich gold, orange, or copper tones with relatively little effort.
4. Strain and Add the Fiber
Once your dye bath has developed a strong color, strain out plant material if you want a more even finish. Then add your wet, prepared fiber. Keeping the fabric wet before dyeing helps it absorb color more evenly.
Gently move the fiber through the dye bath with tongs or a wooden spoon. Avoid aggressive stirring, especially with wool. Let the material heat slowly and remain in the bath until the desired shade develops.
5. Cool, Rinse, and Let the Color Rest
Natural dyes often deepen as fabric cools and dries. Remove the fiber carefully, let it cool, and rinse it with water until the runoff is mostly clear. Then dry it away from direct sunlight.
Some natural dyers let fabric rest for several days before washing it again. This gives the color time to settle and may improve the overall appearance of the finished textile.
Best Natural Materials for Rich Organic Dye
Onion Skins
Onion skins are a beginner favorite because they are inexpensive, easy to collect, and surprisingly powerful. Yellow onion skins can create warm yellows, golds, burnt orange, and soft brown tones. Red onion skins can produce rust, rose-brown, and muted plum shades depending on the fiber and mordant.
Marigolds
Marigolds are like tiny solar panels for the dye pot. Their petals often create cheerful yellow, gold, and orange shades. Dried marigolds store well, which makes them a great garden-grown dye material for future projects.
Walnut Hulls
Walnut hulls are famous for earthy brown tones. They can produce colors ranging from tan and caramel to dark chocolate. Their natural tannins make them especially useful for rustic-looking fabric, yarn, paper, and basket materials.
Avocado Pits and Skins
Avocado pits and skins can create unexpected blush pink, peach, dusty rose, or warm coral shades. The color often looks nothing like the green fruit that started the whole operation, which is part of the fun.
Black Beans
Black beans can produce cool gray-blue and smoky slate tones when soaked and used carefully. They are not a shortcut to jet black fabric, but they are excellent for creating soft, moody shades that look right at home in handmade textiles.
Madder Root and Indigo
Madder root has long been valued for reds, brick tones, coral shades, and earthy orange-red color. Indigo is famous for blue, but it behaves differently from most other natural dyes because it requires a special reduction process before the color develops on fabric.
Indigo-dyed fabric often emerges from the dye bath greenish or yellow-green before it turns blue as oxygen reaches the fibers. It is one of those moments that makes natural dyeing feel like a very polite science-fiction movie.
How to Build a Repeatable Dye Recipe
Natural dyeing becomes much easier when you stop guessing and start recording. You do not need a laboratory spreadsheet worthy of NASA. A simple dye journal can save you from saying, “I made the perfect mustard yellow once, but now it has vanished into the void.”
For every dye batch, record:
- The fiber type and weight.
- The dye material and whether it was fresh or dried.
- The amount of dye material used.
- The water source.
- The mordant or tannin treatment.
- The heating time and temperature range.
- The final color while wet and dry.
- Any after-bath modifiers used.
Weighing your fiber is especially useful. Natural dyers often use “weight of fiber” as a reference point. For example, if you have 100 grams of wool yarn, you can compare your dye materials and mordants against that fiber weight. This makes your process more repeatable without turning your kitchen into a paperwork department.
Color Modifiers: The Secret to More Shades
One natural dye ingredient can create multiple colors when paired with different modifiers. An after-bath with iron may turn golden yellow into olive. A slightly acidic rinse may shift some colors warmer. Tannin-rich materials can deepen or dull certain shades.
Use modifiers on small samples before treating your entire project. One tiny test skein can prevent a full scarf from becoming a dramatic shade of “regret green.”
It is also worth remembering that water matters. Hard water, soft water, mineral-rich water, and filtered water can all influence results. Rather than fighting this variable, embrace it. Your local water may become part of your signature color palette.
Colorfastness: Will Your Natural Dye Last?
Colorfastness refers to how well a dye resists fading, washing, rubbing, and exposure to light. Natural dyes vary widely. Some are remarkably durable, while others are better suited for wall art, decorative textiles, or low-wash items.
To test colorfastness, cut a small sample from your dyed fabric. Wash one sample gently and keep another unwashed. Place a third sample near indirect sunlight for several weeks. Compare the results. This simple test tells you far more than guessing based on the color of the dye bath.
Keep naturally dyed pieces away from prolonged harsh sunlight when possible. Even durable dyes can fade over time, especially bright botanical yellows and some flower-based shades.
Sustainable Harvesting and Responsible Dyeing
The most sustainable natural dye material is often something you already have: onion skins, avocado pits, garden trimmings, fallen leaves, spent flowers, or walnut hulls from a local tree. Using food scraps and garden leftovers gives ordinary waste a second life.
Do not harvest protected plants, rare species, or large quantities from public lands. Never strip bark from living trees just to make a dye bath. Collect fallen materials, grow dye plants, buy from responsible suppliers, or use kitchen scraps whenever possible.
Natural dyeing is most rewarding when it respects the landscape that inspired it. A beautiful scarf is not worth damaging a tree, disturbing wildlife, or treating a public trail like your personal craft store.
Note: Use dedicated dye equipment, wear gloves when working with mordants, avoid unidentified plants, and follow all supplier safety directions. Natural dyeing materials should not be treated as food once they have been used in a dye project.
Raw Color Field Notes: Experiences That Make Natural Dyeing Memorable
The first experience many people have with natural dyeing is surprise. You expect onion skins to create pale yellow, then pull out fabric that looks like warm sunset gold. You expect avocado pits to produce beige, but the yarn slowly becomes dusty pink. Natural dyeing has a gift for making ordinary ingredients look far more talented than they did in the compost bowl.
One of the best moments happens when you begin seeing your surroundings differently. A walk through a yard becomes a color survey. You notice fallen leaves, spent flowers, seed pods, walnut shells, bark fragments, and the faded remains of garden plants. Suddenly, the world looks less like scenery and more like a giant pantry for textile color.
Another memorable experience is learning that the dye bath does not always match the fabric. A pot may look like dark swamp water but produce soft lavender-gray yarn. A bright orange liquid may create a gentle cream shade. This can be frustrating at first, especially if you are trying to recreate a specific Pinterest-worthy color. Eventually, it becomes part of the charm. Natural dyeing rewards curiosity more than control.
Many beginners also discover the importance of patience. Fabric that looks dull in the pot can deepen beautifully while drying. A color that seems weak after one hour may become richer after resting overnight. Some of the most satisfying results happen after you stop hovering over the pot every five minutes like a worried parent at a school recital.
Natural dyeing also creates a stronger connection to handmade objects. When you wear a naturally dyed scarf, knit with botanical-dyed yarn, or use linen colored with garden flowers, you remember where the color came from. A golden napkin may remind you of summer marigolds. A brown tote bag may come from walnut hulls gathered after a windy afternoon. A pink skein may begin with avocado toast leftovers.
There is a practical lesson too: imperfect color can still be beautiful. Uneven tones, speckles, soft variations, and subtle shifts often make naturally dyed textiles more interesting. The goal is not always factory-level uniformity. Sometimes the goal is a color that feels like weather, soil, leaves, sunlight, or smoke.
Perhaps the best experience is sharing the process. Natural dyeing is easy to turn into a small group activity, especially with family members, friends, art students, gardeners, or fiber enthusiasts. Everyone can bring scraps, flowers, yarn, or fabric, then compare results from the same dye bath. It is a reminder that color is not only something we buy. It is something we can grow, gather, observe, and make together.
That is the real beauty of raw color. It is not just a craft technique. It is a slower way of looking at materials, a more curious way of using leftovers, and a reminder that nature has been quietly making extraordinary color all along.
SEO Metadata


