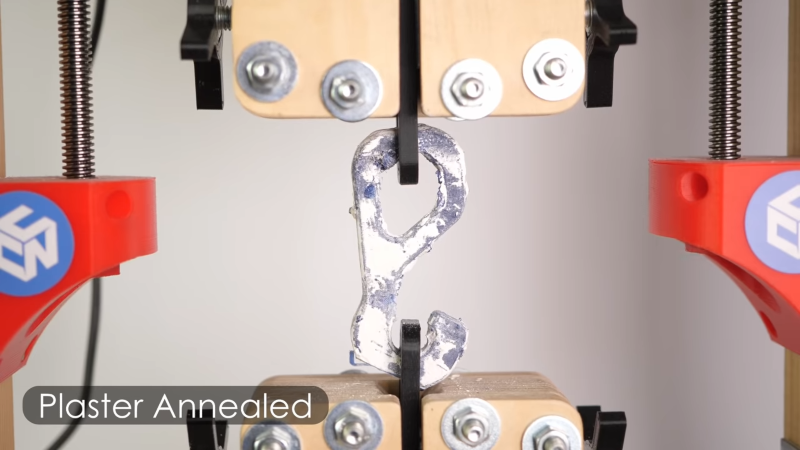

Every 3D printing hobbyist eventually reaches the same humbling moment: a freshly printed bracket looks like it could hold up a bridge, then snaps with the emotional durability of a stale breadstick. FDM 3D printing is wonderfully useful, but layer lines, internal stress, and heat sensitivity can limit how strong a printed part really is. That is where plaster annealing 3D prints for strength becomes an intriguing post-processing method.
Annealing is a heat-treatment process that changes the internal structure of a material. In 3D printing, it is most often discussed with PLA because PLA can become more crystalline when heated under controlled conditions. More crystallinity usually means better heat resistance, improved stiffness, and sometimes stronger parts. The problem? Heat also makes printed parts shrink, warp, twist, sag, or transform into something that looks like it escaped from a toaster accident.
Plaster annealing tries to solve that problem by surrounding the print with hardened plaster before heating it. The plaster works like a supportive mold, helping the part hold its shape while the plastic relaxes and reorganizes. It is a little like sending your 3D print to a spa, except the robe is gypsum and the sauna is an oven.
What Is Plaster Annealing?
Plaster annealing is a variation of traditional 3D print annealing. Instead of placing a printed part directly into an oven, the part is embedded in plaster, allowed to set, dried carefully, and then heated. The plaster supports the model from all sides, reducing deformation during the heat-treatment cycle.
The method is especially interesting for PLA prints because normal PLA softens near its glass transition temperature, commonly around the low 60°C range. When PLA is heated beyond that point, the polymer chains become more mobile. Given enough time and the right temperature, they can settle into a more ordered structure. That structural change can improve heat resistance and increase stiffness, although the exact strength gain depends on the filament, print settings, temperature, hold time, and part geometry.
In plain English: annealing can make PLA less wimpy in hot environments, but it can also make it dimensionally moody. Plaster is used to calm the drama.
Why 3D Printed Parts Break in the First Place
To understand why annealing matters, it helps to understand why FDM parts fail. A printed object is not a solid chunk of plastic in the same way an injection-molded part is. It is built line by line and layer by layer. That creates visible layer lines and invisible boundaries between extruded roads of plastic.
Layer Adhesion Is the Weak Link
When molten filament leaves the nozzle, it bonds to the previous layer. If temperature, speed, cooling, and extrusion are well tuned, that bond can be strong. If not, the part may split between layers under load. This is why print orientation matters so much. A hook printed flat may survive a heavy pull, while the same hook printed upright may snap along the Z-axis.
Internal Stress Builds During Printing
FDM printing involves rapid heating and cooling. Different areas of the part cool at different rates, leaving behind residual stress. That stress may not be obvious when the part leaves the build plate, but it can show up later as warping, cracking, or premature failure.
PLA Has Limited Heat Resistance
PLA is popular because it prints easily, smells less offensive than many materials, and behaves nicely on desktop printers. But standard PLA does not love heat. A PLA part left in a hot car can soften, sag, or lose its carefully modeled dignity. Annealing can raise heat resistance, making PLA more suitable for functional parts that see warmth but not extreme temperatures.
How Plaster Helps During Annealing
When a PLA part is heated without support, it may shrink in the X and Y directions and grow slightly in the Z direction. Thin walls can curl. Holes can become oval. Flat surfaces may bow. Tolerances can become more “interpretive jazz” than engineering.
Plaster helps by surrounding the print with a rigid shell. Once the plaster sets, the part is physically restrained. During heating, the plastic still tries to move, but the plaster resists major distortion. This can allow the part to reach annealing temperatures that would otherwise be too risky for unsupported prints.
The plaster also adds thermal mass. That means heat moves into the print more slowly and evenly. Sudden temperature changes are bad news for precision parts, so the slower heat transfer can be helpful. However, this also means the process takes longer. Patience is not optional; it is part of the recipe.
Best Materials for Plaster Annealing
PLA
PLA is the main candidate for plaster annealing. It can respond well to heat treatment because it is capable of increasing crystallinity. Annealed PLA may become stiffer, more heat resistant, and sometimes stronger depending on the test direction and geometry. For brackets, jigs, fixtures, fan ducts, and light-duty mechanical parts, this can be useful.
HTPLA and Specialty PLA
High-temperature PLA blends are often designed specifically for annealing. These filaments can deliver better results than basic PLA because their formulations encourage improved thermal performance after heat treatment. If your goal is a functional part that must survive warmer conditions, HTPLA is often a smarter starting point than bargain-bin PLA.
PETG
PETG can be annealed in some cases, but it does not behave like PLA. It is already tougher and more temperature-resistant than standard PLA, yet it may not gain the same crystallinity benefits. It can also become gummy or deform if overheated. Plaster support may help with shape retention, but PETG annealing needs cautious testing.
ABS and ASA
ABS and ASA are more often associated with stress relief than crystallinity improvement. They can benefit from controlled heating, especially after printing large parts, but plaster annealing is less commonly the go-to method. A heated chamber, vapor smoothing, or better print-temperature control may be more relevant depending on the application.
Nylon and Engineering Filaments
Nylon, polycarbonate, PEEK, and carbon-fiber-filled materials are serious engineering filaments, but they also require serious process control. Some can benefit from heat treatment, but moisture, high temperatures, and manufacturer-specific recommendations matter. Do not treat them like PLA unless you enjoy expensive disappointment.
Step-by-Step: How to Anneal 3D Prints in Plaster
1. Print Test Coupons First
Do not begin with the one part you desperately need for a deadline. Print a few small test pieces using the same filament, layer height, wall count, infill, and orientation as your final part. Measure them before and after annealing. Record length, width, height, hole diameter, and weight. A cheap digital caliper is your best friend here.
2. Choose the Right Plaster
Plaster of Paris or gypsum casting plaster is commonly used. You want something that can flow around the part, capture details, and harden into a supportive block. Avoid plaster mixes with mystery additives unless you know how they behave when heated. Mystery chemistry is fun in cartoons, not inside your oven.
3. Prepare the Print
Clean the print and remove loose strings, supports, dust, or oily residue. If the part has deep cavities, consider whether plaster will lock inside them permanently. For complex shapes, you may need a release strategy, sacrificial access points, or a different support medium such as fine salt or ceramic powder.
4. Embed the Part
Mix plaster according to the manufacturer’s instructions. Pour a base layer into a heat-safe container, place the part, and then cover it fully with plaster. Tap the container gently to release bubbles. The goal is complete contact without air pockets around delicate features.
5. Let the Plaster Cure and Dry Thoroughly
This step matters more than impatient people want it to. Fresh plaster contains water. If heated too quickly, trapped moisture can turn to steam and cause cracks, bubbles, brittleness, or messy failure. Let the plaster cure fully, then dry it slowly. Some makers use a low-temperature pre-dry cycle before the real annealing cycle.
6. Heat Slowly
Use a dedicated workshop oven or lab oven, not the same oven used for pizza night. Add an oven thermometer because many household ovens overshoot their settings. Start low, ramp gradually, and avoid sudden heat shocks. For PLA, many experiments begin around 80°C to 100°C, but the right temperature depends on the filament. Specialty PLA may use different recommendations.
7. Hold, Then Cool Slowly
Once the plaster block reaches the target temperature, hold it long enough for heat to penetrate the part. Small pieces may need less time; thick plaster blocks need more. After the hold, turn off the oven and let everything cool gradually inside. Fast cooling can reintroduce stress or crack the plaster.
8. Break Out the Print
After cooling, carefully break away the plaster. Rinse or brush off residue. Re-measure the part and compare it with the original dimensions. If the part is stronger but no longer fits, congratulations: you made a very confident paperweight.
Benefits of Plaster Annealing 3D Prints
Better Heat Resistance
The most reliable benefit of annealing PLA is improved heat resistance. A properly annealed PLA part can often survive temperatures that would soften untreated PLA. This makes the process useful for parts near motors, electronics, warm enclosures, sunlight-exposed fixtures, or automotive-adjacent uses where standard PLA would normally panic.
Improved Stiffness
Annealed PLA can become stiffer because increased crystallinity reduces molecular mobility. For parts that must resist bending, this is helpful. For parts that need impact resistance or flexibility, it may not be ideal. Stronger does not always mean tougher.
Reduced Warping Compared With Unsupported Annealing
The main reason to use plaster is dimensional control. Unsupported annealing may turn a precise part into a warped sculpture. Plaster helps the part retain its shape, especially when the print has thin walls, overhangs, or features that soften easily.
Low-Cost Experimentation
Plaster is inexpensive and widely available. You do not need a pressure chamber, industrial oven, or wizard license. For makers, repair hobbyists, and small shops, that makes plaster annealing an attractive experiment.
Limitations and Risks
Moisture Can Hurt Results
Water in plaster can cause problems if it is not removed before annealing. Moisture may affect surface quality, increase brittleness, or create voids. Drying the plaster is not a fussy extra step; it is part of the process.
Strength Gains Are Not Guaranteed
Annealing is not magic glue for weak layer adhesion. It may improve some mechanical properties, but results vary. Print orientation, nozzle temperature, extrusion width, wall count, infill pattern, and filament chemistry still matter. A badly printed part does not become an aerospace component just because it took a hot plaster bath.
Dimensional Accuracy Still Changes
Plaster reduces deformation; it does not cancel physics. Expect some dimensional shift. If you are making parts with tight tolerances, print test pieces and compensate in the model. Holes, pins, snap-fits, and bearing seats need special attention.
Safety Requires Common Sense
Use ventilation, wear a dust mask when handling dry plaster, and avoid food-preparation equipment. Do not overheat unknown plastics. Do not seal wet plaster in a way that traps steam pressure. And do not walk away from an experimental oven process as if it were a slow cooker full of chili.
Design Tips for Stronger Annealed Prints
Plaster annealing works best when combined with good print design. Increase wall count before relying on high infill. Orient the part so major loads run along filament paths rather than across layer lines. Use generous fillets instead of sharp internal corners. Add ribs where stiffness matters. Avoid thin unsupported tabs that can soften and distort.
For functional parts, consider printing slightly oversized features that can be drilled, sanded, or machined after annealing. Holes are especially likely to shift, so post-processing them to final size often gives better results than trying to print perfect holes from the start.
If the part must hold screws, use heat-set inserts after annealing rather than before. The annealing cycle may loosen or shift embedded hardware. For brackets or fixtures, design access surfaces so plaster can be removed cleanly.
Plaster Annealing vs. Salt Annealing
Salt annealing is another popular approach. Instead of wet plaster, the print is packed in fine salt. Salt supports the part, withstands heat, and does not introduce water. It can be easier to remove from simple parts, but fine grains may leave texture on the surface. Plaster can provide more complete support and a closer mold-like shape, but it requires curing, drying, and more cleanup.
For simple shapes, salt may be faster. For parts where surface support is critical, plaster can be more stable. For hollow parts, both methods can be tricky because unsupported internal cavities may collapse or deform. The best method depends on the geometry, material, and tolerance requirements.
When Plaster Annealing Makes Sense
Use plaster annealing when you need better heat resistance, improved stiffness, or stronger functional PLA parts and can tolerate some experimentation. Good candidates include shop jigs, light-duty brackets, tool holders, electronics mounts, motor-adjacent covers, RC parts, and replacement components that see moderate warmth.
Skip plaster annealing when the part has extremely tight tolerances, delicate internal channels, food-contact requirements, or safety-critical duties. A 3D printed ladder rung, brake component, or load-bearing ceiling mount should not depend on hobby-level annealing optimism. In those cases, choose a better material, a stronger manufacturing process, or a professional service.
Practical Experience Notes: What Makers Learn After a Few Tries
The first practical lesson is that measuring matters. Many beginners anneal a part, feel that it is stiffer, and declare victory. Then they try to install it and discover the screw holes moved just enough to cause a small emotional collapse. A better approach is to print a calibration bar, a hole-size test, and a small version of the real geometry. Measure everything before and after. Write the numbers down. The notebook does not need to be beautiful; it just needs to exist.
The second lesson is that plaster drying is the unglamorous hero of the process. Fresh plaster may look solid while still holding moisture inside. Heating it too aggressively can create steam, cracking, chalky residue, or poor surface results. A slow pre-dry at low temperature often improves consistency. The part may not care about your schedule. The plaster definitely does not.
The third lesson is that part geometry decides whether the process feels brilliant or ridiculous. A chunky PLA bracket with thick walls may come out looking almost unchanged and noticeably more heat resistant. A thin decorative shell with unsupported cavities may come out looking like modern art made by a tired raccoon. Plaster supports external surfaces well, but it cannot support empty internal air unless the design allows plaster or another medium to fill that space.
The fourth lesson is that temperature control is everything. Oven dials are often optimistic little liars. A setting marked 90°C may swing higher, especially in small countertop ovens. Use a thermometer or temperature probe. Better yet, run an empty test cycle and observe the oven’s behavior. The difference between “annealed” and “sad plastic pancake” can be surprisingly small.
The fifth lesson is that stronger is not one single property. A part may become stiffer and more heat resistant while also becoming more brittle. That trade-off matters. A rigid electronics mount may benefit from annealing. A snap clip that needs flex may break sooner after annealing. Before choosing the process, ask what kind of strength you actually need: tensile strength, layer strength, bending stiffness, heat resistance, impact toughness, or dimensional stability.
The sixth lesson is that plaster annealing rewards repeatability. Use the same filament, same print settings, same plaster mix, same drying time, same oven, and same cooling routine when comparing results. Changing five variables at once creates a mystery novel, not an experiment. Once you find a recipe that works, label it clearly. Future you will be grateful, and future you is already busy looking for the 2.5 mm hex key.
Finally, plaster annealing is best treated as a workshop technique, not a miracle. It can turn ordinary PLA prints into more capable functional parts, especially where heat resistance matters. It can reduce warping compared with unsupported annealing. It can make a cheap desktop print behave more like a serious component. But it still has limits. Good design, proper material selection, and careful printing remain the foundation. Annealing is the upgrade, not the rescue helicopter.
Conclusion
Plaster annealing 3D prints for strength is one of the more creative ways to push FDM parts beyond their default limits. By embedding a print in plaster before heat treatment, makers can reduce warping while improving the thermal performance and stiffness of PLA parts. The method is affordable, accessible, and genuinely useful when applied carefully.
That said, it is not a universal fix. The best results come from testing, measuring, drying the plaster properly, controlling temperature, and choosing the right part geometry. For functional PLA parts that need to survive heat or resist bending, plaster annealing is worth exploring. For precision assemblies or safety-critical components, it should be tested thoroughly or replaced with a more suitable material or manufacturing method.
Note: This article is written as original web-publishing content based on established 3D printing post-processing knowledge, maker experimentation, and material-science principles. It contains no source-link markup or citation placeholders inside the publishable HTML.


