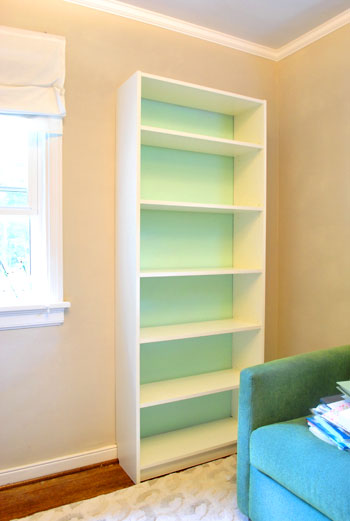

An IKEA bookcase is affordable, practical, and wonderfully willing to hold your books without asking complicated questions. Straight out of the box, however, it still looks like freestanding furniture. The little gaps, exposed sides, standard toe kick, and suspiciously perfect rows of shelf-pin holes tend to announce, “Hello, I arrived in a flat package.”
The good news is that making an IKEA bookcase look built in does not require a full cabinetmaking apprenticeship. The transformation mostly depends on planning, secure installation, strategically placed lumber, carefully fitted trim, and paint that visually connects everything. Done well, a basic BILLY bookcaseor another similarly sized IKEA shelving unitcan resemble custom millwork designed specifically for the room.
Why the Built-In Illusion Works
True built-ins appear to belong to the architecture. They meet the floor, side walls, and ceiling without awkward gaps. Their face frames are substantial, their seams are hidden, and their finish matches the surrounding trim or wall color.
A convincing IKEA built-in bookcase uses those same visual signals. You are not trying to disguise every molecule of the original furniture. You are simply giving the eye enough architectural details that it stops thinking “bookcase” and starts thinking “library wall.”
The most important visual upgrades
- A level platform or raised base
- Bookcases secured together and anchored to the wall
- Vertical trim covering joints between units
- Filler panels closing gaps along adjacent walls
- Baseboard running continuously across the bottom
- Crown molding or top trim meeting the ceiling
- Caulked seams and filled nail holes
- One coordinated paint color and sheen
DIY built-in projects featured by design and home-improvement publications repeatedly use MDF strips, skirting boards, braces, hardboard panels, and molding to disguise the original joints. The materials are not especially glamorous, but after paint, they become architectural magic tricks.
Plan the Bookcase Wall Before Buying Anything
The fastest way to make this project difficult is to begin by purchasing six bookcases and then discovering that the wall contains an outlet, a floor vent, an aggressively crooked corner, and a ceiling that changes height halfway across the room.
Measure the complete space
Measure the wall width at the floor, middle, and ceiling. Older houses are rarely perfectly square, and even newer houses sometimes enjoy a little geometric mischief. Use the smallest width when planning the installation so your finished unit will fit.
Measure ceiling height in several places as well. If the bookcase plus its height extension nearly reaches the ceiling, confirm that you will still have enough room to assemble, position, and anchor it.
Choose a balanced bookcase arrangement
Combine wide and narrow units when necessary to fill the wall attractively. The BILLY line, for example, is commonly arranged using wider and narrower cases to create a more customized fit.
Try to keep the arrangement symmetrical around a fireplace, television, window, or doorway. On a plain wall, an odd number of bookcases often creates a clear center. On an asymmetrical wall, filler panels can absorb leftover space without making one bookcase look strangely wider than its neighbors.
Check obstacles and utilities
Locate studs, outlets, switches, vents, thermostats, and cable connections. Decide whether outlets will remain accessible through cutouts in the back panels or be relocated by a qualified electrician. Never permanently bury an electrical box behind the built-in.
Tools and Materials
The exact shopping list depends on the room, but most IKEA bookcase built-in projects use the following supplies:
- IKEA bookcases and optional height extensions
- Two-by-fours or plywood strips for the platform
- MDF, plywood, or primed pine for fillers and face trim
- Baseboard and optional crown molding
- Construction adhesive and wood glue
- Finish nails or brad nails
- Appropriate wall anchors and screws
- Wood filler, lightweight spackle, and paintable caulk
- Bonding primer and durable furniture or trim paint
- Tape measure, level, stud finder, drill, and driver
- Miter saw or circular saw with a guide
- Jigsaw for outlet openings or decorative arches
- Sanding sponges, mini roller, brush, and safety equipment
A nail gun makes trim work faster, but it is not mandatory. A hammer, nail set, patience, and perhaps a motivational snack can accomplish the same job.
How to Make an IKEA Bookcase Look Built In
Step 1: Remove or modify the existing baseboard
Freestanding bookcases usually sit in front of the room’s baseboard, leaving a visible gap behind them. Built-ins should appear to meet the wall directly.
The cleanest approach is to carefully remove the section of baseboard behind the installation. Save it if you need matching pieces for the exposed sides. Another option is to notch the bookcase or platform around the baseboard, although that can be more tedious.
Baseboard installation rewards careful measuring and test-fitting, particularly at angled joints. “Measure twice, cut once” is not merely a charming workshop proverb; it is considerably cheaper than “measure casually, buy more trim.”
Step 2: Build a level platform
A platform raises the bookcases so new baseboard can run across their fronts without covering useful shelf space. It also provides solid material for fastening trim.
Build a shallow rectangular frame from two-by-fours or strips of plywood. Size it slightly smaller than the finished bookcase footprint so the platform disappears behind the face trim. Position the frame, check it with a long level, and use shims wherever the floor dips.
This step deserves more attention than it appears to. If the platform is not level, every case above it will lean, the shelf lines will drift, and the top molding will reveal the problem like a very judgmental ruler.
Step 3: Assemble the bookcases carefully
Follow the assembly instructions for the specific IKEA model and confirm that each unit is square before tightening everything. Install the back panels neatly because they help stabilize the cases and keep them square.
If you intend to paint the units, you can paint either before or after assembly. Painting before assembly gives easy access to flat components, but freshly painted pieces can be scratched during construction. Painting after assembly reduces handling damage and helps the new trim and original bookcase receive the same final finish. Many DIYers find the second method easier when space is limited.
Step 4: Position, connect, and anchor every unit
Place the bookcases on the platform and clamp neighboring units together. Check that their front edges are flush and their shelf-pin rows align. Screw the cases together through discreet locations near the top, middle, and bottom, using hardware suitable for the bookcase material.
Next, secure the entire installation to wall studs or appropriate anchors. IKEA specifically warns that many shelving units must be anchored with fasteners suitable for the wall material. Anchoring is not an optional decorative flourish, especially in homes with children, pets, or enthusiastic shelf climbers.
Step 5: Close gaps at the walls
Few rooms accommodate stock furniture with millimeter-level perfection. Instead of trying to force the cases tightly between uneven walls, leave manageable gaps and cover them with scribed filler panels.
Cut MDF or plywood strips slightly wider than each gap. Hold a strip plumb against the bookcase, then use a compass to transfer the wall’s irregular shape onto the filler. Cut or sand along that line until the panel fits the wall closely. Attach it to blocking or to the side of the bookcase.
Once caulked and painted, a properly scribed filler makes a crooked wall look innocent.
Step 6: Cover vertical seams with face trim
Install narrow MDF or primed-wood strips over the joints between bookcases. These strips create the appearance of a continuous face frame and give the shelves more visual weight.
Use trim wide enough to cover both the seam and any visible hardware, but do not make it so wide that it interferes with doors or reduces access to the shelves. Check door clearances before fastening anything permanently.
Some polished IKEA hacks also add thin strips to the front edges of adjustable shelves. This makes the shelves appear thicker and more substantial, although it requires careful placement so the shelves remain removable.
Step 7: Add a continuous baseboard
Run baseboard across the platform and bookcase fronts, matching the profile already used in the room. Continue the molding from the surrounding wall whenever possible. That uninterrupted line is one of the strongest signals that the shelving is part of the architecture.
Attach the baseboard to the wooden platform or added blocking rather than relying on the thin edge of the bookcase. Miter outside corners and cope or carefully fit inside corners for a clean result.
Step 8: Finish the top
If the bookcases stop below the ceiling, build a simple top frame or header from lumber and cover it with MDF. You can finish it with flat trim for a modern look or crown molding for a traditional library effect.
Tall bookcases placed close to the ceiling generally create a more believable built-in appearance because less filler is required. Design guides commonly recommend extending trim to the ceiling to eliminate the floating-furniture look.
In rooms with uneven ceilings, do not force rigid trim into a widening gap. Install the molding level, then use a scribed filler or appropriately sized caulk joint to manage minor variations.
Step 9: Hide adjustable shelf holes selectively
Rows of unused shelf-pin holes are useful, but they can make the finished unit look more obviously manufactured. Fill only the holes you are confident you will not need. Lightweight spackle or removable hole plugs can create a cleaner background.
Leave enough adjustment points to accommodate future books, baskets, art, and the mysterious oversized vase you may purchase five years from now.
Step 10: Fill, caulk, sand, and inspect
Fill nail holes and larger imperfections with wood filler. Use paintable caulk where trim meets walls, ceilings, or adjacent pieces. Wood filler is better for creating a sandable surface; caulk is better for narrow joints that may experience slight movement.
After everything dries, sand the filled areas smooth and inspect the unit under strong side lighting. Side lighting has an extraordinary ability to reveal every dent you were emotionally prepared to ignore.
How to Paint an IKEA Built-In Bookcase
Paint is what finally blends the IKEA components, new lumber, filler panels, and molding into one unified installation. Unfortunately, laminate and foil-coated furniture surfaces are smooth and nonporous, so ordinary wall paint may scratch or peel without proper preparation.
Clean the surfaces
Remove dust, grease, adhesive residue, and fingerprints with a mild cleaning solution. Avoid soaking exposed particleboard edges, which can swell when they absorb moisture.
Scuff-sand without damaging the finish
Lightly sand the surfaces to reduce gloss and give the primer more texture to grip. Do not aggressively sand through the thin decorative coating. Vacuum thoroughly and wipe away remaining dust.
Use a bonding primer
Choose a primer specifically labeled for difficult surfaces such as laminate, plastic, or glossy finishes. Sherwin-Williams recommends an adhesion-focused bonding primer for laminate furniture, followed by light sanding after the primer has hardened.
Apply a durable topcoat
Use a cabinet, furniture, or trim enamel rather than basic flat wall paint. A satin or eggshell sheen is often forgiving while still being washable. Semi-gloss creates a more traditional millwork appearance but highlights surface imperfections.
Apply thin coats with a quality mini roller on broad surfaces and a brush in corners. Respect the manufacturer’s drying and recoat times. Paint may feel dry before it has fully cured, so avoid loading the shelves immediately with heavy books, metal objects, or decorative accessories that could stick to the finish.
Design Details That Make the Result Look Custom
Paint the back panels a contrasting color
A darker or warmer color behind the shelves adds depth and highlights books and objects. For a quieter effect, paint the backs the same color as the wall while painting the face frames and trim in a coordinated millwork shade.
Add doors to the lower section
Closed storage makes a built-in more functional in living rooms, offices, and playrooms. It provides a dignified hiding place for cables, paperwork, toys, and other objects that do not share your commitment to visual harmony.
Consider arches or decorative headers
Arched panels cut from MDF or hardboard can give the installation a furniture-like or traditional European appearance. Create one accurate template and use it for every opening so the curves match. Decorative IKEA transformations frequently use hardboard, plywood, or MDF to create these repeated architectural shapes.
Install lighting thoughtfully
LED tape, puck lights, or picture lights can make the shelving feel professionally designed. Plan wiring before closing the top and side gaps. Use listed electrical products and keep drivers, plugs, and connections accessible.
Style the shelves with breathing room
Do not fill every inch unless the unit is a working library and your books have already unionized. Mix vertical and horizontal book stacks with framed art, bowls, plants, boxes, and meaningful objects. Vary heights and leave occasional open areas so the display feels intentional rather than overcrowded.
Common Mistakes to Avoid
Skipping the platform
Placing the cases directly on the floor can make it difficult to add substantial base molding. A platform also makes leveling and fastening easier.
Using caulk to hide large gaps
Caulk is not structural lumber in a squeezable tube. Use filler strips for wide openings and reserve caulk for narrow finish joints.
Painting without adhesion primer
Paint applied directly to a slick IKEA finish may look fine initially and then chip when shelves are adjusted. Proper cleaning, light sanding, and bonding primer dramatically improve the chances of a durable finish.
Attaching heavy trim only to particleboard
Add lumber blocking wherever substantial molding, a header, or crown will be installed. Blocking provides a reliable fastening surface and reduces the risk of splitting or loosening the bookcase material.
Forgetting future access
Keep electrical connections, cable boxes, lighting transformers, and necessary fasteners accessible. Photograph wiring and anchor locations before covering them so future-you does not have to investigate the wall with the emotional confidence of an archaeologist.
Real-World Experience: What Makes This Project Succeed
The most surprising part of making an IKEA bookcase look built in is that assembling the furniture is usually the easy portion. The slow work happens around the bookcases: leveling, fitting fillers, adjusting trim, filling holes, sanding, and repainting the spots you accidentally touched while checking whether the paint was dry.
On a typical installation, the first bookcase may appear perfectly straight until the second one is positioned beside it. Then you discover that the floor slopes slightly, the wall bows inward, and the ceiling apparently belongs to a different building. This is normal. The solution is not to force the cases into alignment with increasingly dramatic screws. Start with the platform, use shims, and repeatedly check level and plumb.
It also helps to treat the bookcases as cabinet boxes rather than finished furniture. The IKEA units provide the shelves and basic structure, but the custom look comes from the outer shell you build around them. Once vertical face strips cover the joints and continuous trim crosses the top and bottom, the individual boxes visually disappear.
Another practical lesson is to test every trim piece before painting or nailing it. Walls are rarely straight, and a piece measured at the top may not fit at the bottom. Mark the back of each board with its locationsuch as “left filler,” “center seam two,” or “top return”because five nearly identical white boards become surprisingly anonymous when placed on the floor.
Painting requires even more patience than carpentry. The temptation is to rush because the unit already looks impressive after trim is installed. Resist it. Paint reveals rough filler, swollen edges, dried caulk ridges, and tiny gaps that were practically invisible in raw MDF. A careful sanding and inspection between stages saves more time than frantic touch-ups after the shelves are loaded.
Using the same finish on the bookcases, fillers, baseboard, and crown is usually the moment the project begins to look genuinely built in. Before paint, the structure may resemble a lumberyard leaning against IKEA furniture. After paint, the eye reads it as one object.
Shelf placement should be finalized before styling, but it does not need to be permanently fixed. Maintain several useful pin positions so the storage can evolve. Tall openings are excellent for framed art and lamps, while tighter spacing works for paperbacks, baskets, and office supplies. A mix of shelf heights tends to look more custom than perfectly identical rows.
Finally, allow the finish to cure before celebrating by immediately loading every shelf with encyclopedias. Fresh paint can remain soft even when it feels dry. Give it time, add felt pads beneath abrasive objects, and place the heaviest books on lower shelves. Your built-in will look better, perform better, and be less likely to greet you one morning with a collection of mysterious paint scars.
Final Thoughts
Making an IKEA bookcase look built in is less about complicated woodworking and more about controlling the details. A level base establishes the foundation. Anchors and connectors make the installation secure. Fillers, face trim, baseboard, and crown erase gaps and seams. Bonding primer and durable paint turn mixed materials into one polished piece of architectural storage.
The project can be adapted to a small reading nook, a full home library, a fireplace surround, a media wall, or an office. Keep the design consistent with the room’s existing trim, take your time with measurements, and remember that caulk is helpful but not magical. The final result can deliver the character of custom cabinetry without requiring you to build every shelf from scratch.
Note: Always anchor tall bookcases securely and select screws or anchors appropriate for the specific wall material. Consult a qualified professional when electrical work, structural modifications, or unfamiliar wall construction is involved.
SEO Information