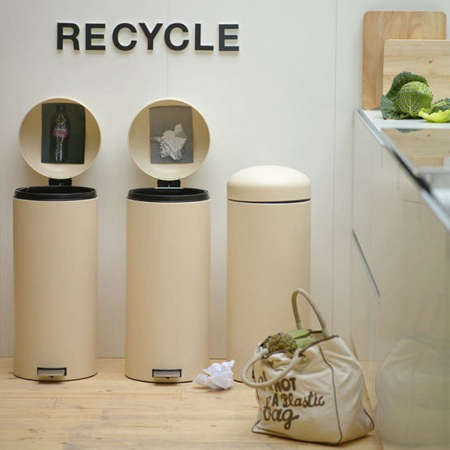

The kitchen is where good intentions go to either thrive or quietly smell like last Tuesday’s takeout. It is the busiest room in many American homes, the headquarters for coffee, leftovers, homework, snack negotiations, and, of course, packaging. Boxes, cans, jars, paper bags, yogurt cups, milk cartons, and suspiciously immortal plastic lids all pass through the kitchen before they go somewhere else. That “somewhere else” depends heavily on one humble household hero: the kitchen recycling bin.
A well-planned kitchen recycling bin does more than collect empty containers. It shapes habits. It reduces mess. It keeps recyclable materials cleaner. It helps prevent “wish-cycling,” the hopeful but harmful habit of tossing random items into the recycling stream and whispering, “Good luck, little spoon.” Most importantly, the right recycling setup makes sustainable living feel less like a lecture and more like muscle memory.
Whether you have a wide family kitchen, a rental apartment galley, a tiny condo kitchenette, or a pantry that moonlights as a storage obstacle course, choosing the right kitchen recycling bins can make daily waste sorting easier, cleaner, and surprisingly satisfying.
Why Kitchen Recycling Bins Matter More Than You Think
Recycling works best when materials are sorted correctly before they leave the house. The kitchen is the first checkpoint. If bottles, cans, paper, and cardboard are kept clean, dry, and loose, they have a better chance of being processed properly. If they are covered in food, sealed in plastic bags, or mixed with batteries, cords, or greasy mystery objects, they can contaminate the load or create problems at recycling facilities.
That is why a recycling bin is not just a container. It is a system. A good kitchen recycling station answers three questions quickly: Where does this item go? Is it clean enough? Do I need to check local rules? When those answers are obvious, people recycle better. When they are not obvious, everything becomes “trash-ish,” which is not a technical term but definitely a household reality.
The Best Types of Kitchen Recycling Bins
Kitchen recycling bins come in many styles, and the best choice depends on your space, your local recycling rules, your cooking habits, and how many people are generating waste. A household that cooks every night and orders groceries online will need a different setup from someone who mostly reheats soup and emotionally supports the local coffee shop.
1. Dual-Compartment Recycling Bins
Dual-compartment bins combine trash and recycling in one unit. They are especially useful for kitchens where floor space is limited but convenience matters. One side can hold landfill waste, while the other side holds recyclables such as cans, bottles, clean containers, and paper products. Some models use color-coded buckets or removable inner pails, making it easier to empty each side separately.
The biggest advantage is simplicity. When trash and recycling are side by side, people are less likely to toss everything into the nearest bin. The downside is capacity. Dual bins often split space into smaller compartments, so a family that goes through cereal boxes like a tiny cardboard factory may need to empty recycling more often.
2. Pull-Out Cabinet Recycling Bins
Pull-out recycling bins are installed inside a base cabinet, usually near the sink or prep area. They slide out on rails and disappear behind a cabinet door when not in use. This is the “I recycle, but I do not need my bin to be part of the decor” option.
Pull-out systems are excellent for modern kitchens because they keep waste hidden, reduce visual clutter, and place bins exactly where food prep happens. Many setups include two containers, one for trash and one for recycling. Some homeowners add a third small bin for food scraps if local composting or backyard composting is available.
3. Stackable Recycling Bins
Stackable bins work well in pantries, mudrooms, garages, or narrow kitchen corners. They use vertical space instead of floor space, which is helpful when your kitchen footprint is roughly the size of a cutting board. Separate stacked compartments can be labeled for paper, containers, glass, or redeemable bottles depending on local recycling rules.
The key is accessibility. If the top bin is too high or the lower bin requires yoga-level bending, people will stop using the system. Choose stackable bins with angled openings, front access, or removable containers so recycling does not become an upper-body workout.
4. Countertop Food Scrap Bins
Food scraps do not belong in most curbside recycling bins, but they may belong in a compost bin, municipal food-waste collection bin, or food scrap pickup service if available in your area. A countertop food scrap bin is useful for fruit peels, vegetable trimmings, coffee grounds, eggshells, and other compostable materials accepted by your program.
Look for a small bin with a tight-fitting lid, easy-clean interior, and optional charcoal filter. The goal is to make food scrap collection convenient without turning the counter into a science experiment. Empty it often, rinse it regularly, and remember that meat, dairy, oils, and cooked foods may not be suitable for backyard composting even if some municipal programs accept them.
5. Slim Freestanding Recycling Bins
Slim bins fit beside a refrigerator, at the end of a cabinet run, or in a narrow pantry gap. They are ideal for apartments and small kitchens. A rectangular shape usually uses space more efficiently than a round bin, and a foot pedal keeps hands cleaner when you are cooking.
If the bin will be visible, choose one that matches the kitchen’s style. Stainless steel, matte black, white, or soft neutral finishes can help a recycling bin blend in instead of announcing itself like a guest who arrived too early.
What Actually Goes in a Kitchen Recycling Bin?
Recycling rules vary by city, county, hauler, and processing facility, so the first rule is simple: check your local recycling guide. That said, many U.S. curbside programs commonly accept clean and empty paper, cardboard, metal cans, glass bottles and jars, and rigid plastic containers. Some programs accept cartons, aluminum foil, plastic tubs, and certain lids. Others do not.
In many households, the most reliable kitchen recyclables include empty metal food cans, aluminum beverage cans, glass jars, glass bottles, cardboard boxes, paperboard boxes, newspapers, magazines, office paper, paper bags, and many plastic bottles or containers. Cardboard should usually be flattened. Containers should be empty, and a quick rinse is smart when food residue is present.
Items that commonly do not belong in the kitchen recycling bin include plastic bags, plastic film, batteries, electronics, cords, food waste, liquids, diapers, greasy napkins, paper towels, ceramics, drinking glasses, clothing, foam packaging, and hazardous materials. Plastic bags are especially troublesome because they can wrap around sorting equipment. Recyclables should generally be placed loose in the bin, not tied inside a garbage bag.
Clean, Dry, and Loose: The Golden Recycling Rule
If kitchen recycling had a motto, it would be “clean, dry, and loose.” Clean does not mean dishwasher-level spotless. Nobody is asking you to lovingly polish a peanut butter jar under dramatic lighting. It means empty enough that food residue will not ruin paper, attract pests, or contaminate other materials. Dry matters because wet paper and cardboard can become difficult to process. Loose matters because bagged recyclables can be mistaken for trash or cause problems during sorting.
A practical routine is to scrape food into the trash or compost, give containers a quick rinse when needed, let them drain briefly, and place them loose in the recycling bin. For pizza boxes, remove leftover food and any heavily soiled sections. Light grease on cardboard may be accepted in some programs, but cheese, crusts, and sauce puddles are not recyclable no matter how inspirational your attitude is.
How to Choose the Right Kitchen Recycling Bin
Buying a kitchen recycling bin seems simple until you realize there are more options than there are opinions about loading a dishwasher. To choose well, focus on how your kitchen actually works.
Size and Capacity
A small household may do well with a 30-liter to 45-liter bin. A larger family may need 50 liters or more, especially if the bin handles both trash and recycling. If you cook often, host guests, buy bulk groceries, or receive many deliveries, choose more capacity than you think you need. Overflowing recycling bins create clutter, smells, and that charming household tradition of balancing one more box on top until the whole tower collapses.
Number of Compartments
One bin may be enough if your local program uses single-stream recycling, where common recyclables go into one container. If your area requires separation of paper from containers, or glass from other materials, you may need two or three compartments. Separate containers can also help households collect redeemable bottles and cans, compostable scraps, or special drop-off items.
Lid Style
Step-pedal lids are convenient when hands are messy. Touch-top lids can look sleek but require contact. Motion-sensor lids reduce touching but require batteries and can occasionally behave like they have a flair for drama. Open-top bins are fast but may show clutter and release odors. For recycling only, an open or swing-top lid may work well because clean recyclables should not smell much. For trash or food scraps, a tighter lid is better.
Material and Cleanability
Stainless steel looks polished and resists odors, but fingerprints can be a nuisance unless the finish is fingerprint-resistant. Plastic bins are lightweight, affordable, and easy to rinse, but they may absorb odors over time. Inner buckets are a major convenience because they let you lift out materials, rinse spills, and avoid wrestling with liners like you are trying to fold a fitted sheet.
Footprint and Placement
Measure before buying. This sounds obvious, yet many bins are purchased with optimism rather than a tape measure. Check width, depth, height, and lid clearance. A step can with a tall lid may hit the counter. A pull-out bin may need room for rails. A dual-bin unit may be wider than expected. Your recycling bin should fit your kitchen, not turn it into an obstacle course.
Best Kitchen Recycling Bin Ideas by Space
For Small Apartments
Use a slim dual-compartment bin or two narrow bins stacked vertically in a pantry. Add clear labels so guests do not panic and throw everything in the trash. If floor space is tight, hang a reusable recycling bag inside a pantry door or place a small bin under the sink for daily items, then empty it into a larger cart outside.
For Family Kitchens
Choose a large dual-compartment freestanding bin or a pull-out cabinet system with two full-size containers. Families benefit from labels with pictures, especially if kids are helping. A simple sign showing “bottles, cans, paper, cardboard” can prevent many mistakes. Children are surprisingly good recyclers when the system is clear, although they may also attempt to recycle half a sandwich, so supervision remains useful.
For Pantry-Based Recycling
A pantry can become a tidy recycling hub if you use stackable bins, labeled baskets, or rolling carts. Place frequently recycled items at waist height and less common categories below. Keep a paper bag or bin for flattened cardboard and a separate container for store drop-off items such as plastic bags, if your local retailers accept them.
For Renovated or Custom Kitchens
If you are planning new cabinetry, include a pull-out trash and recycling cabinet near the sink or prep zone. A double-bin pull-out is one of the most useful kitchen upgrades because it hides waste while keeping it exactly where you need it. For larger kitchens, consider a second small recycling point near the beverage station or pantry.
Labels: The Small Detail That Saves the System
Labels are not just for offices and people who own label makers with suspicious enthusiasm. They are essential for recycling. A recycling bin labeled only “recycling” is better than nothing, but specific labels work better. Use words and icons: “Paper & Cardboard,” “Bottles & Cans,” “Trash,” “Food Scraps,” or “Store Drop-Off Plastic Bags.”
Good labels reduce decision fatigue. They also help guests, children, babysitters, roommates, and that one uncle who insists every plastic item is recyclable because “it has a triangle on it.” Recycling symbols can be confusing because the number inside the triangle identifies resin type, not automatic recyclability. Local acceptance matters more than the symbol alone.
Common Kitchen Recycling Mistakes
The most common mistake is wish-cycling. People throw in items they hope are recyclable, such as plastic utensils, greasy paper plates, coffee cups, snack wrappers, and broken glassware. Unfortunately, hope is not a sorting technology. When in doubt, check local rules or throw the item away if it could contaminate the recycling stream.
Another mistake is bagging recyclables. Many curbside programs ask residents to place materials loose in the recycling cart. Plastic bags and film can jam equipment, and bagged materials may be treated as trash. If you collect recyclables in a kitchen liner, empty the loose contents into the outdoor cart and reuse or discard the bag according to local guidance.
Food contamination is also a problem. A few drops of liquid in a soda can are not the end of civilization, but half-full containers, yogurt-coated tubs, and sauce-covered paper can make recycling messy and less valuable. Keep a small rinse-and-dry routine near the sink. It takes seconds and prevents your recycling bin from developing a personality.
Should Your Kitchen Have a Compost Bin Too?
A compost or food scrap bin can be a smart companion to your recycling setup. Food waste is not recyclable in the same way as cans or cardboard, but many communities offer food scrap collection, and many homeowners compost at home. Separating food scraps can reduce trash odors and keep wet organic waste away from dry recyclables.
For backyard composting, stick to accepted materials such as fruit and vegetable scraps, coffee grounds, tea leaves, eggshells, and yard trimmings. Avoid meat, dairy, fats, oils, and greasy foods unless your composting method or municipal program specifically allows them. A countertop bin should be small enough to empty frequently and easy enough to clean that you actually clean it.
Odor Control and Cleaning Tips
A recycling bin should not smell like a swamp with ambition. Odor usually means food residue, trapped moisture, or an overdue cleaning. Rinse containers before recycling when needed. Let wet items drain. Wipe the bin weekly with mild soap and water. For stainless steel bins, use a soft cloth to avoid scratches. For plastic bins, rinse outdoors or in a utility sink if possible.
Use liners only if they match your local recycling process. For indoor collection, a reusable washable liner or removable bucket may be better than a disposable plastic bag. If you use a bag for convenience, empty recyclables loose into the outdoor cart. For food scrap bins, line the bottom with a piece of newspaper, a paper towel, or an approved compostable liner if your program accepts it.
Design Tips: Make Recycling Look Like It Belongs
The best kitchen recycling bins are easy to use and easy to live with. Choose finishes that coordinate with appliances, cabinets, or hardware. Rectangular bins usually tuck neatly against walls or cabinet ends. Raised bins with legs can look more like furniture, while cabinet pull-outs disappear completely. If the bin is visible, treat it like part of the kitchen design rather than a guilty afterthought.
For open kitchens, a quiet soft-close lid can be worth the upgrade. No one wants a trash lid slamming during breakfast like a tiny metal thunderstorm. For households with pets, choose a lid that locks or closes firmly. Dogs are talented researchers, and many consider recycling bins a buffet of forbidden smells.
Experience-Based Tips for Living With Kitchen Recycling Bins
After years of seeing how kitchens actually function, one truth stands out: the recycling system people use is always better than the perfect system they ignore. A beautiful four-bin sorting station in the garage is not helpful if everyone drops cans on the counter because the garage feels too far away. Convenience wins. Put the primary recycling bin where packaging waste is created, usually near the sink, prep counter, pantry, or trash can.
One practical experience is to start with a simple two-zone setup: trash and recycling. Once that habit is solid, add a food scrap bin or special drop-off container. Trying to launch a five-category zero-waste command center overnight can overwhelm the household. People need to build the habit first. Sustainability should feel like a smooth routine, not like filing taxes while holding a banana peel.
Another useful trick is to create a “decision shelf” or small holding bin for confusing items. This is where questionable packaging goes until someone checks the local recycling guide. It prevents random mistakes from entering the main bin. Examples include plastic clamshells, coffee bags, black plastic trays, coated paper cups, and unusual packaging. Once you look up the answer, update the label or household rule. Over time, the confusing pile gets smaller.
Cardboard management deserves its own mini-strategy. Delivery boxes can overwhelm a kitchen fast. Keep a box cutter or safety cutter near the recycling area and flatten boxes immediately. Remove plastic air pillows, foam, and tape when required by local guidance. A tall paper bag or narrow basket can hold flattened cardboard until collection day. This prevents the classic “box mountain beside the door” situation, which starts as organization and ends as indoor topography.
For families, pictures work better than long instructions. Place a label with drawings or simple icons on each bin. Kids can learn quickly that cans and bottles go in one side while food wrappers go in the other. Make it a small daily job rather than a lecture. A child who knows where the cereal box goes is one step closer to becoming the kind of adult who does not put batteries in curbside recycling. Society thanks you in advance.
For shared apartments, agree on rules early. Recycling problems often happen when each roommate follows the rules from a different hometown. One person rinses jars. Another bags everything. A third believes pizza boxes are a philosophical gray area. Print or screenshot the local rules and tape them inside a cabinet door. It is less awkward than arguing over a tuna can at 11 p.m.
In small kitchens, the best experience often comes from using multiple small containers instead of one bulky bin. A slim bin under the sink, a hanging bag for paper, and a small countertop compost pail may work better than one large recycling station. The goal is to reduce friction. If you have to move a chair, open three doors, and negotiate with a mop to recycle a can, the system will fail.
Finally, review your recycling setup every few months. Kitchens change. Diets change. Local recycling programs change. A new coffee habit may create more cartons. A baby may add packaging chaos. A home office may produce more paper. Adjust bin size, labels, or placement as needed. Recycling bins are not glamorous, but when they work well, the whole kitchen feels calmer, cleaner, and more intentional.
Conclusion
A kitchen recycling bin is a small object with a big job. It keeps valuable materials out of the trash, helps your household follow local recycling rules, and makes the kitchen easier to manage every day. The best bin is not necessarily the most expensive or high-tech. It is the one that fits your space, supports your habits, stays clean, and makes the right choice obvious.
Choose a bin that matches your kitchen layout. Use clear labels. Keep recyclables clean, dry, and loose. Separate food scraps when your household has a composting option. Avoid wish-cycling, especially with plastic bags, batteries, electronics, and food-soiled materials. Most of all, design a system that real people can use on a busy morning before coffee. That is the true test of kitchen organization.
When recycling is convenient, it becomes automatic. And when it becomes automatic, your kitchen stops being a packaging traffic jam and starts becoming a cleaner, smarter, more sustainable space. Not bad for a bin.


