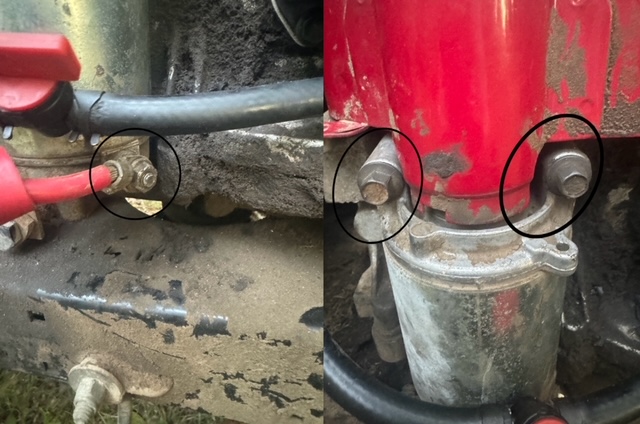

A lawn mower that refuses to start has a special talent for ruining a perfectly productive Saturday. One minute you are ready to tame the backyard jungle, and the next you are staring at a machine that only clicks, groans, spins lazily, or does absolutely nothing. Before you blame the universe, the weather, or that one neighbor who somehow mows at sunrise, it is worth learning how to test a lawn mower starter the right way.
The starter system on most electric-start riding mowers and lawn tractors is not wildly complicated. It usually includes a battery, ignition switch, safety switches, fuse, starter solenoid, heavy starter cable, ground connection, and starter motor. When everything works, turning the key sends low-current power through the control circuit, the solenoid closes, and battery power flows to the starter motor. The starter then turns the engine fast enough for fuel, air, compression, and spark to do their thing. When something fails, the mower may click but not crank, crank slowly, or stay as silent as a garden gnome with secrets.
This guide walks you through 12 practical steps to test a lawn mower starter without guessing or replacing parts just because they look guilty. You will learn how to check the battery, inspect cables, test the solenoid, verify voltage at the starter, recognize bad starter symptoms, and decide when the problem is likely in the starter motor itself.
Before You Start: Safety and Tools
Starter circuits use low voltage, but they can deliver high current. That means careless testing can create sparks, hot wires, burns, or damaged electrical parts. Work in a well-ventilated area, remove the key, set the parking brake, disengage the blades, shift to neutral, and keep hands, tools, jewelry, and loose clothing away from belts, pulleys, and the flywheel. Disconnect the spark plug wire before inspecting anything near the engine. If your mower has a battery under the seat, lift the seat carefully and avoid placing metal tools across the battery posts.
You will need a digital multimeter, safety glasses, work gloves, a battery charger, a small wire brush or battery-terminal cleaner, basic wrenches, and your mower’s operator manual. Clip-on multimeter leads are extremely helpful because they let you take readings while turning the key without doing a one-person circus act.
How to Test a Lawn Mower Starter in 12 Steps
Step 1: Identify the Symptom Before Touching Anything
Start by listening carefully. A single sharp click usually points toward the solenoid engaging but the starter not receiving enough usable power. Rapid clicking often suggests a weak battery or poor connection. A slow, dragging crank can mean low battery voltage, a bad ground, thick oil in cold weather, internal engine resistance, or a tired starter. No click at all may indicate a dead battery, blown fuse, faulty ignition switch, bad safety switch, or failed solenoid control circuit.
This first step matters because “won’t start” is not specific enough. A mower that cranks but will not fire may have a fuel, spark, carburetor, compression, or ignition problem. A starter test is mainly for a no-crank or slow-crank condition.
Step 2: Confirm the Battery Is Actually Charged
Many starter problems are battery problems wearing a fake mustache. Set your multimeter to DC volts and touch the red probe to the positive battery terminal and the black probe to the negative terminal. A healthy, fully charged 12-volt mower battery usually reads around 12.6 volts at rest. Around 12.4 volts means it is partly discharged. A reading close to 12.0 volts or lower usually means the battery needs charging before any starter diagnosis is trustworthy.
Charge the battery according to the battery and mower manual. After charging, let it sit for a short period and test again. If it cannot hold a charge, the starter may be innocent. Replacing a starter when the battery is weak is like buying new running shoes because you forgot breakfast.
Step 3: Load-Check the Battery During Cranking
A battery can show decent voltage at rest and still collapse under load. Keep the multimeter connected to the battery and turn the key to the start position for only a few seconds. Watch the voltage. If the voltage drops sharply and the starter barely turns, the battery may be weak, sulfated, or internally damaged. If the voltage stays strong but the starter does not respond, the problem may be farther down the starter circuit.
Do not hold the key in the start position for a long time. Starter motors are designed for short bursts, not marathon spinning. If the engine does not crank, stop and let the starter cool before testing again.
Step 4: Clean and Tighten Battery Terminals
Corrosion can block current like a tiny green troll sitting on the battery post. Look for white, blue, or green powder on the terminals and cable ends. Disconnect the negative cable first, then the positive cable. Clean both battery posts and cable clamps with a wire brush or battery-terminal cleaner. Reconnect the positive cable first, then the negative cable, and tighten both securely.
A loose terminal can mimic a bad starter, bad solenoid, or weak battery. After cleaning, try the key again. If the mower suddenly cranks normally, congratulationsyou fixed the problem with elbow grease instead of a parts receipt.
Step 5: Inspect the Ground Cable
The starter circuit must have a clean path back to the battery negative terminal. Follow the negative battery cable to where it bolts to the frame or engine block. That connection should be tight, clean, and free from rust, paint buildup, oil, and grass-packed grime. Remove and clean the connection if necessary.
A poor ground can cause clicking, slow cranking, intermittent starting, or confusing voltage readings. Many people chase the positive side of the circuit while the real problem is the return path. Electricity is picky: it wants a full loop, not a scenic detour through rust.
Step 6: Check the Main Fuse and Wiring Harness
Most riding mowers have a fuse in the wiring harness between the battery and ignition switch area. If the mower is completely silent when you turn the key, inspect the fuse before blaming the starter motor. Pull the fuse and check whether the metal strip inside is broken. You can also test continuity with a multimeter.
Look over the wiring harness for chewed wires, loose connectors, melted insulation, or rubbed spots where wires pass near metal brackets. Mowers vibrate for a living, so connectors can loosen over time. Rodents also enjoy wiring with the enthusiasm of tiny electricians with terrible intentions.
Step 7: Verify Safety Switch Positions
Riding mowers usually have safety interlocks for the seat, brake, clutch, transmission, and blade engagement system. These switches are designed to prevent the mower from cranking in unsafe conditions. Before testing deeper, make sure the parking brake is set, the blades are disengaged, the transmission is in neutral or park, and you are seated if your model requires it.
Do not permanently bypass safety switches. If a safety switch is suspected, test it according to the service manual or have a qualified technician inspect it. A mower that starts with the blade engaged or the operator absent is not “convenient.” It is a bad idea with wheels.
Step 8: Locate the Starter Solenoid
The starter solenoid is usually near the battery, mounted to the frame, firewall, or close to the starter cable route. It often has two large terminals and one or two small terminals. The large terminals carry high-current power from the battery to the starter motor. The small terminal receives the start signal from the ignition switch and safety circuit.
If you hear a click when turning the key, that click often comes from the solenoid. A click does not automatically mean the solenoid is good; it only means part of it is moving. The internal contacts may still be burned, corroded, or unable to pass enough current.
Step 9: Test for Voltage at the Solenoid Input
Set the multimeter to DC volts. Touch the black probe to a clean engine or frame ground and the red probe to the large solenoid terminal connected directly to the battery positive cable. You should see battery voltage. If you do not, the positive battery cable, battery terminal, or connection between the battery and solenoid is faulty.
This test confirms whether power is reaching the solenoid. If there is no voltage here, the starter motor cannot possibly work. Do not skip this step just because the cable looks fine. Cables can corrode inside the insulation where the damage is harder to see.
Step 10: Test the Solenoid Output While Turning the Key
Now test the large solenoid terminal that leads to the starter motor. Keep the black probe on a clean ground and place the red probe on the starter-side solenoid terminal. Turn the key to the start position for a brief moment. If the solenoid clicks and you see battery voltage on the output terminal, the solenoid is sending power toward the starter. If the solenoid clicks but little or no voltage appears on the output terminal, the solenoid is likely faulty.
If the solenoid does not click at all, the issue may be in the control circuit: ignition switch, safety switch, fuse, wiring, or the solenoid coil itself. Some solenoids can be tested for coil resistance or continuity, but specifications vary by model. Use the service manual for exact values.
Step 11: Check Voltage at the Starter Motor Terminal
If the solenoid output has power, test the starter end of the cable. Place the black multimeter probe on the starter housing or engine block and the red probe on the starter motor’s power terminal. Turn the key briefly. If the solenoid sends voltage but the starter terminal does not receive it, the cable between the solenoid and starter is damaged, loose, or corroded.
If the starter terminal receives strong battery voltage and the ground is good, but the starter does not turn, the starter motor becomes the prime suspect. If the starter turns very slowly while receiving proper voltage, it may have worn brushes, dirty internal contacts, failing bushings, or excessive mechanical drag from the engine.
Step 12: Decide Whether the Starter Motor Is Bad
A bad lawn mower starter may show several signs: no movement even with proper voltage, slow cranking despite a charged battery and clean cables, grinding noises, smoke or overheating, intermittent operation, or a starter gear that fails to engage the flywheel. Some starters can be removed and bench-tested by a repair shop or parts supplier. This is often safer and more reliable than improvising a high-current test at home.
Before replacing the starter, double-check the basics: battery health, cable condition, ground connection, solenoid output, and engine rotation. Try turning the engine by hand according to your manual, with the spark plug wire disconnected. If the engine is seized, hydrolocked, or mechanically jammed, a new starter will not solve the problem. It will simply become the newest victim.
Common Lawn Mower Starter Problems and What They Mean
The Mower Clicks Once but Does Not Crank
This usually means the solenoid is trying to engage, but the starter motor is not turning. Possible causes include a weak battery, dirty terminals, bad ground, burned solenoid contacts, damaged starter cable, or failed starter motor.
The Mower Clicks Rapidly
Rapid clicking often points to low battery voltage or poor connections. Charge and test the battery first, then clean the terminals and ground connection. Do not replace expensive parts until the battery passes a basic load test.
The Starter Spins but the Engine Does Not Turn
If the starter motor spins without turning the engine, the starter drive gear may not be engaging the flywheel. The gear may be dirty, worn, stuck, or damaged. Inspect the starter gear and flywheel teeth if your mower design allows safe access.
The Engine Cranks Slowly
Slow cranking can come from a weak battery, poor cable connections, thick oil in cold weather, internal starter wear, or excessive engine resistance. If the starter receives proper voltage and the ground is clean, the starter may be wearing out.
Nothing Happens When the Key Turns
No click and no crank usually means the start signal is not reaching the solenoid. Check the battery, fuse, ignition switch, brake or clutch switch, seat switch, PTO switch, and wiring harness. Always keep safety systems functional.
When to Replace the Starter Solenoid Instead of the Starter
The solenoid is a common failure point because it handles repeated high-current switching. Replace or professionally test the solenoid if it receives the correct start signal, clicks, but does not pass battery voltage to the starter terminal. Also suspect the solenoid if starting is intermittent and the battery, cables, and starter all test normally.
However, do not assume every click is a bad solenoid. A weak battery can make a good solenoid chatter. A corroded cable can prevent current from reaching the starter. A poor ground can make the whole system act dramatic. Diagnosis beats guessing every time.
When to Call a Professional
Call a small-engine technician if the wiring diagram is unclear, the mower uses an electronic control module, the starter smokes, wires get hot, the engine seems locked, or you are uncomfortable testing live electrical circuits. Professional help is also smart if the mower is under warranty. Random testing can create damage that warranty departments may not find charming.
A technician can perform voltage-drop testing, starter current draw testing, solenoid control-circuit testing, and bench testing. These tests quickly separate a weak battery from a bad cable, a bad solenoid from a bad starter, and an electrical problem from a mechanical engine problem.
Extra Experience: Real-World Lessons From Testing Lawn Mower Starters
Experience teaches one lesson quickly: the starter is often blamed before it is proven guilty. In many real-world mower repairs, the actual villain is a weak battery, a loose cable, or a corroded ground. The starter motor sits there looking expensive, so people naturally suspect it. But a starter needs a strong battery and clean current path before it can do its job. Testing the battery first saves money, time, and a surprising amount of muttering in the driveway.
One practical habit is to take voltage readings in order, moving from the battery to the solenoid and then from the solenoid to the starter. This creates a clean diagnostic trail. If battery voltage is strong at the battery but missing at the solenoid, the cable or connection between them is the problem. If voltage enters the solenoid but does not leave when the key is turned, the solenoid is suspicious. If voltage reaches the starter and the ground is clean but the starter refuses to move, the starter motor finally has a fair reason to be accused.
Another useful lesson is that corrosion is not always obvious. A cable end may look acceptable from the outside while corrosion hides between the terminal and clamp. Ground connections can also fail quietly because they are bolted to painted, rusty, or dirty metal. Cleaning both sides of the connection often makes a bigger difference than expected. A mower starter circuit is not impressed by “mostly clean.” It wants shiny metal contact.
Temperature also matters. In cold weather, oil thickens and the battery becomes less energetic. A starter that cranks fine in summer may struggle in early spring. That does not automatically mean the starter is bad. Use the correct oil viscosity recommended for your mower, keep the battery charged, and avoid long cranking attempts. Short tests with cooling breaks protect the starter from overheating.
Safety switches deserve patience, too. Many starting complaints happen because the PTO is still engaged, the brake pedal is not fully pressed, or the operator is not seated properly. Before opening the toolbox, reset the mower as if you were starting from scratch: blades off, brake on, transmission in neutral or park, key off, then try again. It sounds too simple, but simple checks often win.
Finally, keep notes. Write down battery voltage at rest, voltage while cranking, solenoid input voltage, solenoid output voltage, and starter terminal voltage. These numbers make the diagnosis clearer and help if you later talk to a repair shop. Instead of saying, “It kind of clicks and acts weird,” you can say, “The battery reads 12.6 volts, the solenoid output drops to zero when the key turns, and the starter never receives voltage.” That is the language of useful troubleshooting.
Conclusion
Testing a lawn mower starter is not about replacing parts until the mower gives up and starts out of pity. It is about following the electrical path logically: battery, terminals, ground, fuse, safety circuit, solenoid, starter cable, and starter motor. A digital multimeter turns a mystery into a sequence of clear yes-or-no answers.
Start with the battery because it is the most common cause of slow cranking and clicking. Clean the terminals because corrosion loves pretending to be a major repair. Test the solenoid because it controls power to the starter. Then verify voltage at the starter motor before deciding the starter is bad. With patience, clean connections, and careful testing, you can often diagnose the problem without buying parts you do not need.
Note: Always follow your specific mower manual. If your test results do not match the manual, if wires become hot, or if the engine seems mechanically stuck, stop testing and get professional service.


