
Preserving flowers with fingernail polish sounds like one of those craft ideas invented at midnight by someone holding a bouquet in one hand and a bottle of clear top coat in the other. Surprisingly, it can work beautifullywhen used the right way. Clear nail polish can create a thin, glossy protective layer over pressed or fully dried flowers, helping them stay intact for cards, bookmarks, frames, ornaments, jewelry-style crafts, phone cases, and other small keepsakes.
Here is the important part: fingernail polish does not magically preserve fresh flowers. It is not a time machine in a tiny glass bottle. If you brush clear polish onto a fresh rose petal, moisture can get trapped inside, leading to browning, limp texture, or mold. The best results come from drying or pressing the flowers first, then using clear nail polish as a sealant. Think of it as the finishing coat, not the whole preservation process.
In this guide, you will learn how to preserve flowers with fingernail polish step by step, which flowers work best, what mistakes to avoid, and how to turn your delicate blooms into long-lasting craft pieces without creating a sticky botanical disaster.
What Does Fingernail Polish Actually Do to Flowers?
Clear fingernail polish acts like a small-scale varnish. When brushed over a dried flower, it forms a hard, shiny film that helps hold fragile petals in place. It can reduce flaking, add a glossy finish, and protect the flower from light handling. It is especially useful for flat pressed flowers that will be attached to paper, glass, wood, plastic, or ceramic surfaces.
However, nail polish is not the same as resin, archival sealant, or professional floral preservation. It will not keep a flower looking freshly picked forever. Colors may still fade over time, especially if the finished piece sits in direct sunlight. White flowers may yellow slightly. Red and purple flowers may darken. But for small DIY projects, clear polish is affordable, easy to find, and surprisingly handy.
Best Flowers to Preserve With Fingernail Polish
The best flowers for this method are thin, small, and already dry. Thick, juicy blooms are harder to preserve because they hold more moisture. If a flower feels soft, cool, or flexible, it probably needs more drying time before polish enters the chat.
Good flower choices include:
- Pansies
- Violets
- Daisies
- Baby’s breath
- Forget-me-nots
- Fern leaves
- Small rose petals
- Pressed lavender sprigs
- Hydrangea petals
- Queen Anne’s lace
These flowers press well, dry fairly evenly, and do not become bulky under polish. If you want to preserve a rose, peony, or carnation, use individual petals rather than the whole bloom. A full rose head plus nail polish is usually a recipe for disappointment, unless your goal is “sad salad in gloss.”
Supplies You Will Need
Before starting, gather everything in one place. Dried flowers are fragile, and once you begin moving them around, you do not want to go hunting for tweezers while a petal quietly crumbles from anxiety.
- Pressed or fully dried flowers
- Clear fingernail polish or clear top coat
- Small soft brush or the brush inside the polish bottle
- Tweezers
- Wax paper, parchment paper, or a silicone craft mat
- Craft glue or clear-drying glue
- Your project surface, such as cardstock, glass, wood, plastic, or ceramic
- Toothpick for adjusting tiny petals
- Paper towel for spills
- Good ventilation
Choose a clear polish that dries hard and does not have a heavy tint. A regular glossy top coat works well. Avoid quick-dry formulas if you are new to this craft because they can become tacky before you finish smoothing the flower.
Step 1: Dry or Press the Flowers First
The most important rule in flower preservation is simple: moisture is the enemy. Flowers must be fully dry before sealing. If they are not dry, clear nail polish can trap water inside the petals. That trapped moisture may cause discoloration, bubbling, mold, or a strange wilted texture.
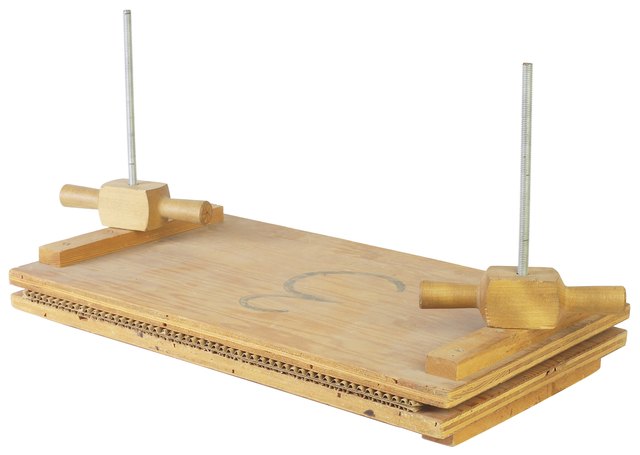
For flat crafts, pressing is usually best. Place flowers between absorbent paper, then press them inside a heavy book or flower press. Leave them for one to three weeks, depending on thickness and humidity. Thin petals may dry faster; thicker blooms need patience. Yes, patience is annoying. Unfortunately, flowers do not care about our craft schedule.
For flowers with more shape, use air drying or silica gel before sealing small sections. Air drying works well for lavender, baby’s breath, and small sturdy stems. Silica gel is better for preserving shape and color in fuller blooms, but the finished flowers may still be too dimensional for nail polish coating unless you use only petals or small pieces.
Step 2: Choose the Right Project Surface
Clear nail polish works best when the flower is attached to a surface first. This gives the delicate petals support while you brush on the polish. Good surfaces include cardstock, bookmarks, handmade cards, wood slices, glass jars, photo frames, phone cases, ornaments, and small ceramic dishes used for decoration.
Avoid using this method on surfaces that will touch food or hold hot drinks. Nail polish is not food-safe, and heat can soften or damage the finish. If you are making coasters, decorative trays, or anything exposed to moisture, consider using a proper craft varnish or resin instead.
Step 3: Arrange the Flowers Before Gluing
Lay your dried flowers on the project surface and experiment with placement before adding glue. Move them around until the design feels balanced. A single pressed pansy can look elegant on a bookmark. A cluster of tiny petals can turn a plain card into something that looks boutique-level fancy, minus the boutique-level price tag.
Use tweezers to position small blooms. If petals overlap, make sure they lie flat. Raised edges are more likely to catch on the brush when you apply polish. Take a photo of your layout before gluing if the design is complex. This is especially helpful when your arrangement involves many tiny pieces that all look “basically the same but somehow not.”
Step 4: Glue the Flowers Down
Apply a tiny amount of clear-drying craft glue to the back of each flower. A toothpick is helpful for placing small dots of glue exactly where needed. Do not drown the flower in glue. Too much adhesive can make petals curl, wrinkle, or darken.
Press the flower gently onto the surface. Use a clean piece of wax paper over the top if you need to flatten it lightly with your finger. Let the glue dry completely before adding fingernail polish. Waiting at least one hour is a good starting point, but thicker glue spots may need longer.
Step 5: Apply the First Thin Coat of Clear Nail Polish
Once the glue is dry, open the clear nail polish and wipe excess polish from the brush. You want a thin coat, not a dramatic puddle. Start at the center of the flower and brush outward with gentle strokes. Extend the polish slightly beyond the edge of the flower onto the surrounding surface. This creates a sealed border that helps hold the petals down.
For very delicate flowers, dab rather than drag. Dragging the brush too firmly can tear petals or lift them from the surface. If the flower shifts, stop immediately and use tweezers or a toothpick to nudge it back into place.
Let the first coat dry fully. Drying time depends on the polish brand, humidity, and coat thickness, but 30 to 60 minutes is common for a light coat. If it still smells strong or feels tacky, give it more time.
Step 6: Add a Second Coat for Strength
A second coat gives the preserved flower a stronger finish and a smoother shine. Apply it in the same direction as the first coat, using light pressure. Make sure the edges are sealed. If the flower is on a bookmark, card, or framed art piece, two coats are usually enough.
For items that will be handled more often, such as phone cases or ornaments, you may want a third thin coat. Do not apply one thick coat instead of several thin coats. Thick polish can bubble, yellow, dry unevenly, or make the petals look like they were laminated by a raccoon with enthusiasm.
Step 7: Let the Finished Piece Cure
Even when nail polish feels dry to the touch, it may still be curing underneath. Leave the finished piece in a dust-free area overnight. For the best result, wait 24 hours before handling it heavily or placing it in a frame.
Keep the project away from direct sunlight, open flames, heaters, and humid rooms. A bathroom may seem like a cute place for floral decor, but humidity is not kind to pressed flowers. A bedroom, office, hallway, or shaded shelf is usually better.
Creative Project Ideas for Preserved Flowers
Once you know how to preserve flowers with fingernail polish, the method opens the door to dozens of easy DIY projects. Because the finish is thin and glossy, it works especially well on small decorative items.
Pressed Flower Bookmarks
Glue pressed flowers onto cardstock or a blank bookmark, then seal them with clear polish. Add a tassel, ribbon, or handwritten quote. This makes a thoughtful gift for readers, teachers, students, or anyone who still believes books smell better than screens.
Floral Greeting Cards
Attach tiny pressed blooms to handmade cards for birthdays, weddings, sympathy notes, or thank-you messages. A clear polish coat helps protect the flowers from flaking while giving the card a polished, finished look.
Phone Case Decoration
Place pressed flowers on a plain phone case, glue them down, and seal carefully with multiple thin coats. For heavy daily use, resin is more durable, but nail polish can work for a simple decorative case if you handle it gently.
Glass Jar Lanterns
Decorate the outside of a clean glass jar with pressed flowers and clear polish. Add a battery-operated tea light inside. Do not use real candles near nail polish-coated decorations because nail products can be flammable.
Framed Botanical Art
Arrange pressed flowers on acid-free paper, seal with polish, and frame behind glass. This is one of the best ways to display sentimental flowers from a garden, wedding, anniversary, graduation, or memorial bouquet.
Common Mistakes to Avoid
The fingernail polish method is simple, but a few small mistakes can ruin the final result. Luckily, most are easy to avoid.
Using Fresh Flowers
Fresh flowers contain too much moisture. Always dry or press flowers first. If the flower is not papery, crisp, or fully dried, it is not ready.
Applying Too Much Polish
Heavy coats can create bubbles, smears, and sticky patches. Thin coats look cleaner and dry harder.
Working in a Humid Room
Humidity slows drying and may affect the flower’s color. Choose a dry, well-ventilated workspace.
Skipping the Glue
Do not rely on polish alone to attach the flower. Glue gives the flower stability before sealing.
Using Dark or Tinted Polish
Even slightly tinted polish can change the flower’s color. Clear polish is safest for natural-looking results.
Safety Tips When Using Fingernail Polish for Crafts
Clear nail polish may be small, but it is still a chemical product. Use it in a well-ventilated room, keep it away from flames or heat sources, and close the bottle when you are not using it. Avoid breathing fumes directly. If you are sensitive to nail product smells, wear gloves and take breaks.
Do not let children use nail polish for crafts without adult supervision. Also, do not use nail polish on items that will touch food, drinks, skin for long periods, or pet supplies. This method is best for decorative keepsakes, not functional kitchenware.
How Long Do Nail Polish-Preserved Flowers Last?
When properly dried, glued, sealed, and stored away from sunlight and moisture, nail polish-preserved flowers can last for years as decorative items. They may not remain perfectly colorfast forever, but they can stay attractive for a long time. The lifespan depends on the flower type, drying method, polish quality, display location, and how often the item is handled.
For maximum longevity, frame the finished piece behind glass or store it in a dry, shaded place. If the project begins to look dull after a year or two, a very light additional coat of clear polish may refresh the shine.
Fingernail Polish vs. Resin vs. Mod Podge
Fingernail polish is best for small, flat, decorative crafts. It is inexpensive and easy to apply, but it is not the most durable option. Resin creates a hard, glass-like finish and is better for jewelry, coasters, trays, and long-term keepsakes. However, resin requires more supplies, careful measuring, and safety precautions.
Mod Podge and other craft sealers are useful for paper crafts, framed art, wood signs, and decoupage projects. They are easier to brush over larger areas than nail polish. The downside is that water-based sealers may sometimes darken or wrinkle delicate flowers if applied too heavily.
If you are making one bookmark or a small framed piece, clear nail polish is a smart choice. If you are preserving a wedding bouquet or creating heirloom jewelry, consider silica drying plus resin or professional preservation.
Real-Life Experience: What Actually Works Best
After trying this method on different flowers, the biggest lesson is that small, thin flowers behave far better than thick ones. Pressed pansies, violets, and baby’s breath are cooperative little angels. They lie flat, accept polish smoothly, and keep enough color to look charming. Rose petals work well too, but only when separated and pressed individually. Whole miniature rosebuds look tempting, but they tend to become bulky and awkward under nail polish.
Another experience worth noting: the first coat is where most mistakes happen. If the brush is overloaded, the flower can float, wrinkle, or shift. A nearly dry brush gives more control. It may feel too light at first, but that is exactly the point. The goal is to seal the flower slowly, not bury it under a shiny lake.
Color changes are normal. Yellow flowers often stay cheerful. Blue and purple flowers can deepen. Pink petals may fade or turn slightly beige, especially if they were pale to begin with. White flowers are the trickiest because clear polish may make them look translucent or slightly creamy. That does not mean the project failed; it simply means natural materials keep being natural, even after we politely ask them to behave.
For beginners, bookmarks are the easiest project. They are flat, small, and forgiving. Start with one or two pressed flowers on heavy cardstock. Glue them down, let them dry, then apply two thin coats of clear polish. Once you succeed with a bookmark, move on to greeting cards, framed art, or glass decorations.
Phone cases are fun but less predictable. Because phones are handled constantly, polish can scratch or peel over time. If you want a decorative case for occasional use, nail polish is fine. If you want a daily-use case that survives pockets, purses, and accidental drops, resin or a commercial clear case insert is more reliable.
The most satisfying project is framed botanical art. Press flowers from a meaningful bouquet, arrange them on neutral paper, seal them lightly with clear polish, and frame them behind glass. The result feels personal without being overly complicated. It is also a lovely way to save flowers from events that matter: a first date, a graduation, a wedding, a memorial service, or a garden bloom that appeared exactly when you needed a tiny miracle.
One final lesson: label your flowers before you forget what they are. Write the date, occasion, and flower name on the back of the project or frame. Months later, “cute purple thing from the yard” may not feel quite as poetic as “violet from Grandma’s spring garden.” Preservation is not only about keeping petals intact. It is about keeping the story attached to them.
Conclusion
Learning how to preserve flowers with fingernail polish is a simple, budget-friendly way to turn dried blooms into keepsakes. The method works best when you start with fully dried or pressed flowers, glue them securely to a surface, and seal them with thin coats of clear polish. It is not the right choice for fresh flowers, food-contact surfaces, or heavy-use items, but it is perfect for bookmarks, cards, framed art, ornaments, and small decorative crafts.
With patience, ventilation, and a gentle hand, clear nail polish can help fragile flowers last far longer than they would on their own. It gives petals a glossy finish, reduces crumbling, and turns ordinary pressed flowers into meaningful handmade pieces. In other words, your favorite blooms do not have to disappear after a week in a vase. They can retire gracefully into art, which is honestly a better career plan than most of us had at age eighteen.


