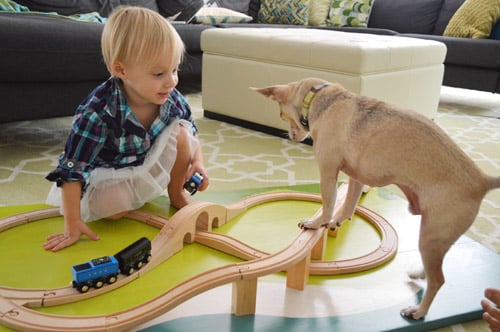

A kids train board is one of those magical DIY projects that looks simple, saves your carpet from becoming a permanent wooden-railway continent, and gives children a dedicated place to build, imagine, crash, rebuild, negotiate track rights, and proudly announce that the 4:15 express is delayed because a stuffed dinosaur is blocking the tunnel.
The best part? You do not need to be a master carpenter. A good DIY train board can be made with basic materials, a practical layout, careful sanding, safe finishes, and a little patience. Think of it as a mini world on a board: part toy storage, part play table, part city-planning exercise, and part parenting strategy for keeping 73 tiny train pieces from migrating under the sofa.
In this guide, you will learn how to make a kids train board that is sturdy, safe, attractive, easy to move, and flexible enough for wooden train tracks, cars, blocks, LEGO-style play, farm scenes, city layouts, or whatever your child decides the railroad company is doing today.
What Is a Kids Train Board?
A kids train board is a flat, portable play surface designed for toy train tracks. Unlike a full train table, which usually has legs and built-in height, a train board can sit on the floor, slide under a bed, rest on a low table, or be placed on top of storage bins. It gives children a defined area for building train layouts without permanently taking over the living room. In other words, it is peacekeeping furniture.
Most DIY train boards are made from plywood, MDF, or a sanded project panel. The surface may be painted with roads, rivers, grass, stations, mountains, and parking areas. Some families keep it plain so kids can change the layout every day. Others create a detailed play mat design with fixed scenery and removable tracks. Both approaches work well.
Why Make a DIY Train Board Instead of Buying One?
Store-bought train tables are convenient, but a homemade train board has several advantages. First, you can choose the exact size. If your playroom is tiny, a 2-foot by 4-foot board may be perfect. If your child has enough track to connect three imaginary states, a 3-foot by 4-foot board may be better. Second, a DIY board is easier to store than a bulky table. Third, you can customize the design to match your child’s favorite themes, whether that means a mountain town, a city loop, a farm, a beach, or a dramatic volcano that should probably not be located next to the schoolhouse.
A homemade kids train board also teaches children something subtle but powerful: toys can be built, repaired, redesigned, and improved. That is a great lesson hiding inside a fun weekend project.
Best Size for a Kids Train Board
The right size depends on your space, your child’s age, and how the board will be stored. A 2-foot by 4-foot board is one of the most practical choices because many home improvement stores sell project panels close to that size. It fits in many cars, is manageable to carry, and works well for a basic wooden train layout.
A 3-foot by 4-foot train board gives more room for bridges, stations, roads, and scenery. This size feels generous without becoming ridiculous. A 4-foot by 4-foot square can be excellent for a playroom, but it is harder to slide under a bed or move around. If you want an under-bed train board, measure the available clearance first, including wheels or handles if you plan to add them.
Recommended Sizes
- Small spaces: 24 inches by 36 inches
- Most homes: 24 inches by 48 inches
- Large layouts: 36 inches by 48 inches
- Under-bed storage: custom size based on bed clearance
Materials You Will Need
Choose materials that are sturdy, smooth, and appropriate for indoor play. A sanded plywood project panel is a popular option because it is strong enough for normal play and easier to finish than rough construction plywood. MDF gives a very smooth surface, but it is heavier and more vulnerable to moisture. For a kids train board, lightweight and durable usually beats heavy and fancy.
Basic Materials
- One sanded plywood project panel, ideally 1/2 inch thick
- Fine-grit sandpaper or sanding block
- Wood trim or rounded molding for raised edges
- Wood glue
- Short wood screws or brad nails
- Primer
- Water-based interior paint
- Clear water-based protective topcoat, optional
- Felt pads, rubber feet, or small locking casters, optional
- Drawer pulls or rope handles, optional
Tools
- Measuring tape
- Pencil
- Straightedge
- Drill or screwdriver
- Clamps
- Paint roller and small brush
- Safety glasses
If cutting is needed, have a responsible adult handle the saw work or ask the store to cut the panel. Many stores can cut plywood to size, which is a beautiful thing because it means fewer power tools, less sawdust, and fewer moments where the garage suddenly looks like a beaver convention.
Step 1: Plan the Layout Before You Build
Before painting anything, place the train tracks on the board and test a few layouts. This prevents a classic DIY mistake: painting a perfect river exactly where the bridge does not fit. Let your child help with this step. Kids often understand play flow better than adults because they are the actual project managers of the toy railroad.
Try one large loop first. Then add a station, a road crossing, a small town, a farm area, or a mountain corner. Leave open space for blocks, buildings, trees, and vehicles. The board should invite flexible play, not force every train into the same route forever.
Step 2: Prepare and Sand the Board
Sanding is not the glamorous part, but it is one of the most important steps. Kids will lean on the board, slide trains across it, and occasionally treat it like a launchpad for stuffed animals. Smooth every edge, corner, and surface. Slightly round the corners if possible. Sharp corners and splinters have no place in a children’s play project.
Start with medium-grit sandpaper if the panel has rough spots, then finish with fine-grit sandpaper. Wipe away dust with a clean, slightly damp cloth and let the board dry before priming. Do not rush this stage. A smooth board feels better, paints better, and lasts longer.
Step 3: Add Raised Edges
Raised edges are optional, but they are extremely useful. A low border helps keep trains, cars, trees, and tiny cargo pieces from rolling off the board. Use narrow wood trim, lattice strips, or rounded molding around the perimeter. Keep the border low enough that children can reach across the board comfortably.
Attach the trim with wood glue and short screws or brad nails. Make sure fasteners do not poke through the underside. Fill any small holes, sand again, and check every corner with your hand. If it feels scratchy to you, it will feel like a cactus to a child.
Step 4: Prime the Surface
Primer helps paint stick and creates a more even surface. Use a water-based primer suitable for indoor wood projects. Apply a thin coat with a roller, using a brush for edges and corners. Let it dry according to the product instructions, then lightly sand any raised grain. Wipe away dust before painting.
Primer is especially helpful if you are painting roads, grass, water, or detailed scenery. It prevents the wood from absorbing paint unevenly and gives your design a cleaner, brighter finish.
Step 5: Paint the Train Board Design
This is where the project gets fun. You can paint a simple green base for grass, add gray roads, blue rivers, tan beaches, black train tunnels, and white crosswalks. Keep the design bold and simple. Children do not need museum-level realism. A blue squiggle becomes a river. A gray stripe becomes a highway. A green blob becomes a park. Childhood has excellent graphics processing.
Easy Design Ideas
- Classic town: roads, parking lot, station, pond, and park
- Farm layout: barn area, fields, fences, pond, and dirt road
- Mountain adventure: tunnel zone, lake, forest, and bridge path
- City board: streets, train station, airport strip, and construction area
- Minimal board: plain green or natural wood surface for maximum flexibility
Use painter’s tape for straight roads and clean edges. For curves, sketch lightly with pencil first. If your child wants to help, give them a small section such as flowers, clouds, signs, or a pond. The board does not need to look perfect; it needs to feel loved and playable.
Step 6: Seal the Board
After the paint dries fully, consider adding a clear water-based protective topcoat. This helps the surface resist scratches and makes cleaning easier. Choose a finish made for indoor use and allow it to cure completely before play. Dry-to-touch is not always the same as fully ready for kids, especially kids who treat toy trains like high-speed engineering experiments.
A satin or semi-gloss finish is practical because it wipes clean better than a flat finish. Avoid thick, sticky coatings that may make wooden tracks slide poorly or collect dust.
Step 7: Add Handles, Feet, or Wheels
If the train board will be moved often, add handles to the sides. Simple drawer pulls work well. If the board will sit on the floor, felt pads or rubber feet protect flooring and help prevent sliding. For under-bed storage, small low-profile casters can be useful, but check the height carefully. Nothing is more tragic than building a beautiful under-bed train board that is exactly one inch too tall to go under the bed.
If you add wheels, use locking casters or make sure the board is only moved by an adult. A rolling board should not become a ride-on toy. It is a train board, not a skateboard with scenery.
Step 8: Set Up the Tracks
Once the board is dry and safe to touch, build the track layout again. Many wooden train systems are designed with similar track styles, but not every brand fits perfectly with every other brand. Test bridges, switches, slopes, tunnels, and train cars before deciding whether to glue anything down.
In most cases, do not glue the tracks. Children enjoy changing layouts, solving track problems, and creating new routes. Fixed tracks can look tidy, but removable tracks usually create more play value. If you want a semi-permanent layout, take a photo of the favorite arrangement so it can be rebuilt later.
Safety Tips for a Kids Train Board
Safety matters more than fancy scenery. Use smooth materials, rounded edges, and finishes appropriate for indoor furniture or children’s spaces. Keep small parts away from children under three, and follow age labels on train sets and accessories. Tiny trees, signs, magnets, figures, and loose screws can be choking hazards for younger kids.
Check the board regularly. Tighten loose hardware, sand rough spots, and remove broken toy pieces. If paint chips or the surface becomes sticky, repair it before letting children play again. A good train board should be sturdy enough for normal play, but children should not stand, jump, or climb on it.
Storage Ideas
A train board becomes even more useful when storage is part of the plan. Add shallow bins underneath if the board sits on a low table. Use labeled containers for tracks, trains, bridges, people, buildings, and scenery. If the board slides under a bed, attach a handle to the front edge and store train pieces in a separate rolling bin.
For small homes, a vertical storage approach can work. Add two wall hooks in a closet and hang the board when not in use, as long as the board is light enough and the hooks are securely installed. Another option is to make the board double-sided: train layout on one side and plain activity surface on the other. That turns one project into a train board, puzzle board, block platform, and rainy-day art station.
Budget-Friendly Tips
You do not have to spend a fortune. Use a standard project panel instead of cabinet-grade plywood. Ask the store if there are smaller offcut panels available. Use sample-size paints for roads, grass, rivers, and details. Repurpose leftover wall paint if it is water-based and in good condition. Use scrap trim for borders. The goal is not to create an heirloom that belongs in a design magazine. The goal is to create a sturdy play surface that can survive juice boxes, wooden bridges, and enthusiastic conductors.
Common Mistakes to Avoid
Making the Board Too Big
A huge train board sounds amazing until you need to move it, clean around it, or store it. Choose a size that fits real life, not just your imagination at 11 p.m. after looking at perfect playrooms online.
Skipping the Sanding
Rough edges are uncomfortable and unsafe. Sanding is the difference between a kid-friendly project and a splinter delivery system.
Overdesigning the Surface
Too many painted roads, buildings, and scenery zones can limit how children use the board. Leave open areas for creativity.
Using the Wrong Finish
Choose indoor, water-based paints and finishes. Allow plenty of drying and curing time before play.
Forgetting Storage
The board itself is only half the project. Plan where the trains, tracks, bridges, and tiny accessories will live when playtime ends.
Creative Add-Ons for More Fun
Once the basic board is finished, you can add removable features. Try felt fields, foam mountains, magnetic road signs, cardboard tunnels, wooden blocks for buildings, or a small basket labeled “train repair shop.” A few simple accessories can keep the board fresh without making it complicated.
You can also create themed play days. Monday can be farm delivery day. Tuesday can be mountain rescue day. Wednesday can be “the bridge is closed because a teddy bear is inspecting it” day. These tiny story prompts help children build language, planning, and problem-solving skills while they play.
Experience Notes: What I Learned From Making a Kids Train Board
The first thing you learn when making a kids train board is that children do not play the way adults design. Adults like symmetry. Kids like action. You may carefully paint a charming road around a lake, only to watch your child place the train station in the water because “it is a boat station now.” This is not failure. This is the whole point.
A practical train board should leave room for surprise. The most successful boards are not the ones with the most detailed artwork; they are the ones children can change. A simple green background with a few roads and a pond often works better than a crowded city map. Open space allows kids to add blocks, animals, buildings, and their own strange but brilliant transportation rules.
Another lesson is that storage decides whether the board gets used. If tracks are tossed into one giant bin, playtime begins with frustration. Children spend ten minutes hunting for curved pieces, then someone finds one under the couch, and suddenly the railroad has a labor shortage. Smaller bins or bags make a big difference. Separate straight tracks, curved tracks, trains, bridges, and scenery. It sounds overly organized until the child can set up independently. Then it feels like genius.
Durability also matters more than perfection. A train board will get bumped, scratched, leaned on, and possibly decorated with stickers you did not approve. That is normal. Use finishes that are easy to wipe, and accept that a few scratches are proof of play. A board that looks perfect forever may not be getting used enough.
One of the best design choices is adding a small raised border. Even a low edge prevents trains from sliding off during enthusiastic play. It also creates a visual boundary that helps children understand where the train world begins and ends. This makes cleanup easier because everything has a “home base.”
If you have more than one child, build in passing zones or open areas. A single narrow track loop can create arguments when two children want to control the same train. Extra sidings, roads, parking areas, and station zones give everyone a job. One child can run cargo, another can build the city, and another can create a traffic jam of farm animals. Peace may not last forever, but at least the board gives it a fighting chance.
Finally, the best kids train board is never truly finished. You can repaint a road, add a tunnel, change the landscape, attach new handles, or redesign the layout as your child grows. At first, it may be a toddler train surface. Later, it can become a LEGO city board, a car track, a puzzle platform, or a display base for school projects. Build it well, keep it flexible, and it will earn its square footage many times over.
Conclusion
Learning how to make a kids train board is a rewarding DIY project because it combines creativity, organization, safety, and play. Start with a manageable board size, choose smooth materials, sand every edge, use child-conscious finishes, and design a layout that leaves room for imagination. Whether your board becomes a busy city, a quiet countryside railway, or a wild dinosaur commuter line, it gives children a dedicated space to build stories with their hands.
A homemade train board does not need to be expensive or complicated. It simply needs to be sturdy, safe, easy to store, and fun to use. And when the tiny conductor announces that the train is leaving in “two minutes and seventeen bananas,” you will know the project was worth it.


