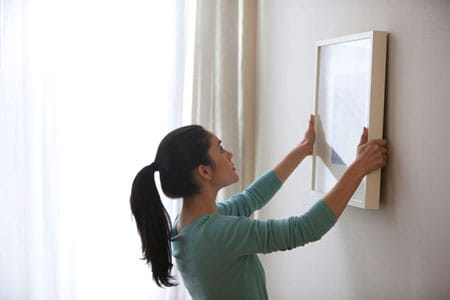

Hanging a picture should be simple: hammer nail, hang frame, admirquickly become a home-improvement thriller involving bent nails, mystery wall dust, crooked artwork, and a mirror that suddenly develops an unhealthy interest in gravity.
The solution is not buying the biggest anchor in the hardware aisle. Choosing the right hanging hardware means matching the fastener to five things: the object’s weight, the wall material, the mounting hardware on the object, the way the load will behave, and the amount of wall damage you are willing to accept.
This guide explains how to choose picture hangers, drywall anchors, screws, French cleats, adhesive strips, and other wall-mounting hardware without relying on guesswork. Whether you are displaying a small photo, mounting a heavy mirror, installing a coat rack, or creating a gallery wall, the same rule applies: the wall, the object, and the fastener must work as a team.
Start With the Object, Not the Hardware Aisle
Before choosing an anchor or picture hook, inspect the item you intend to hang. A lightweight canvas, a framed photograph, and a full-length mirror may occupy similar wall space, but they create very different structural demands. Never estimate weight by holding an object and announcing, “Eh, maybe 15 pounds.” Human arms are not calibrated measuring instruments, especially after carrying groceries. Small objects can be weighed on a kitchen scale. For a larger frame or mirror, weigh yourself on a bathroom scale, then weigh yourself while holding the item. Subtract the first number from the second. Include attached shelves, decorative elements, glass, and anything that will be placed on the object after installation. Select hardware with a rated working capacity comfortably above the measured weight. Ratings are based on specific wall materials, fasteners, installation methods, and test conditions. A hook rated for 50 pounds in drywall may not carry the same load in brittle plaster, damaged wallboard, or an oversized hole. A narrow 30-pound mirror and a six-foot-wide 30-pound artwork do not load a wall in the same way. Wide objects benefit from two attachment points or a French cleat because the weight is distributed across a larger area. Multiple mounting points also reduce tilting and help keep the object level. Deep objects matter too. A shallow frame pulls mostly downward, creating a shear load. A deep shelf or cabinet projects away from the wall and creates leverage that pulls outward on the upper fasteners. This is one reason a plastic picture anchor that works beautifully for artwork may be a terrible choice for a loaded shelf. Static wall art generally stays still. Coat racks, towel bars, floating shelves, plant brackets, and cabinets experience repeated pulling, bumping, and shifting. These dynamic loads need stronger attachment methods, preferably screws driven into studs or solid blocking. A 20-pound framed print is not the same as a rack holding 20 pounds of winter coats that people yank sideways every morning. One is decoration. The other is a small daily wrestling match. The package may say “wall anchor,” but walls are not all interchangeable. Before drilling, determine whether you are working with drywall, plaster, wood, brick, concrete, concrete block, or tile over another substrate. Drywall
Drywall is common in modern American homes and consists of gypsum panels attached to wood or metal framing. A fastener driven into a wood stud provides much stronger support than one installed only in the hollow drywall panel. Use a stud finder to locate framing whenever you are hanging a heavy, valuable, wide, or frequently handled object. When the desired position does not line up with a stud, choose an anchor specifically rated for the drywall thickness and intended load. Traditional plaster is harder and more brittle than drywall. It can crack or crumble when struck aggressively, and some self-drilling drywall anchors are unsuitable for it. Small, hardened picture-hanger nails installed at the recommended angle may work for lightweight art. Heavier objects should be attached to studs, solid wood lath where appropriate, or anchors designed for plaster walls. Drill carefully, avoid hammering oversized fasteners, and stop if the surface begins breaking away around the hole. Solid wood offers an excellent mounting surface. Use an appropriately sized wood screw that penetrates deeply enough into sound wood after passing through drywall, brackets, or other surface material. A screw that barely reaches the stud is not truly “in the stud” in any meaningful sense. Thin decorative paneling should not automatically be treated as solid structural wood. Confirm what is behind it before mounting a heavy item. Masonry requires masonry-rated screws, plugs, or anchors and usually a drill equipped with the correct masonry bit. Match the anchor to the specific material because solid concrete, hollow block, brick, and mortar have different holding characteristics. Wear eye protection while drilling and control the dust. Follow the anchor manufacturer’s instructions for hole diameter, hole depth, cleaning, and tightening. An anchor installed in a dusty, oversized hole may have all the holding power of a breadstick. Tile is typically a finish layer rather than the main supporting material. Determine whether drywall, cement board, masonry, or framing sits behind it. Use a bit intended for the tile type, drill without excessive pressure, and avoid over-tightening the fastener, which can crack the tile. For grab bars and other safety-critical fixtures, connect to structural framing or properly installed blocking instead of relying on ordinary hollow-wall anchors. Traditional metal picture hooks use one or more small nails driven into the wall at an angle. They are convenient for light and medium framed art and typically leave smaller holes than screws or anchors. Check whether the stated capacity applies to drywall, plaster, or a wall stud. Do not assume every hook with a similar shape has the same strength. Sawtooth hangers are small metal strips attached near the top center of a frame. They are inexpensive and easy to use, making them suitable for small, lightweight wooden frames. They are less suitable for large or heavy pieces because they concentrate the load in a small area and can be frustrating to level. For a valuable frame, make sure the sawtooth plate is secured to solid frame material rather than thin cardboard backing. D-rings are attached to the back of a frame with screws. Two D-rings can be hung directly on two wall hooks, creating a stable installation with little side-to-side movement. They can also support properly rated picture wire when the frame and hardware are designed for it. Directly hanging two D-rings is often more stable than using a long wire, especially for heavier mirrors and frames. The challenge is placing both wall fasteners at exactly the right height and spacing, but painter’s tape makes that job much easier. Picture wire allows modest side-to-side adjustment and works well for many framed pieces. Choose wire rated above the object’s weight, secure it to appropriate D-rings or screw eyes, and follow the framing-hardware manufacturer’s instructions. Attach the hardware high enough on the frame that the top does not lean dramatically away from the wall. Avoid excessive slack, damaged wire, improvised knots, and tiny screw eyes installed in weak frame material. Keyhole hardware allows cabinets, plaques, speakers, and decorative objects to sit close to the wall. The enlarged opening slips over the screw head, and the narrow slot locks around the screw shaft. This system looks clean but demands accurate measurement. The screw heads must project the correct distance, and two keyhole slots must be perfectly aligned. Transfer their positions with painter’s tape instead of attempting measurement-based gymnastics while balancing the object on one knee. A French cleat uses two interlocking beveled pieces. One attaches securely to the wall, and the other attaches to the object. When joined, the system distributes weight along the cleat and makes it easier to level wide or heavy items. French cleats are excellent for large mirrors, cabinets, headboards, oversized artwork, and wall-mounted organizers. Whenever possible, attach the wall section across multiple studs. Confirm that the frame or cabinet is structurally strong enough to accept the other half of the cleat. Adhesive picture-hanging strips
Adhesive strips are useful for lightweight frames, rental homes, dorm rooms, and spaces where small holes are undesirable. Choose a product based on both the frame’s weight and maximum dimensions, since a large frame can place extra peeling force on the adhesive. The wall must be clean, smooth, sound, and compatible with the product. Follow instructions concerning surface preparation, strip placement, pressing time, curing time, temperature, and removal. Do not install strips over loose paint, dusty texture, deteriorated wallpaper, or damp surfaces. Adhesive hardware is generally a poor choice for irreplaceable art, heavy mirrors, objects above beds, or anything whose fall could injure someone. “No holes” is convenient. “No mirror on the pillow at 2 a.m.” is even more convenient. Understand the Main Types of Wall Anchors
These anchors fit into predrilled holes and expand as their screws are inserted. They are economical and appropriate for many light-duty applications, but their capacity is limited by the wall material and installation quality. Use the exact drill-bit diameter specified on the package. If the hole is too large, the anchor may spin instead of expanding. Threaded drywall anchors cut into the wallboard and are convenient for light-to-medium objects. Some require no pilot hole, although wall condition and product instructions should guide installation. Do not over-tighten them. Once an anchor strips the gypsum around itself, additional screwdriver enthusiasm will not restore its dignity. Metal hollow-wall anchors, often called molly bolts, expand behind the wall as the screw is tightened. They can provide stronger support than basic plastic plugs and may allow the screw to be removed and reinstalled while the anchor remains in place. They require a correctly sized hole and enough open space behind the wall for the anchor body. Toggle anchors spread the load across the back of the wallboard. Traditional spring-wing toggles require a relatively large hole and may lose their wings inside the wall when the screw is removed. Strap-style toggles hold a metal channel behind the wall and are often easier to position and reuse. These anchors can support substantial loads when properly selected and installed, but their advertised capacity should not be treated as a dare. Wall thickness, edge distance, hole quality, load direction, and wall condition all matter. For heavy shelves, cabinets, cleats, racks, and mirrors, fastening directly to wood framing is usually the preferred solution. Select a screw diameter and length appropriate for the load, bracket, and framing. Drill pilot holes when required to prevent splitting and make installation easier. Never use drywall screws as universal structural fasteners. They are designed primarily for attaching drywall and can be brittle under demanding loads. Choose hardware rated above the object’s measured weight rather than selecting a rating that barely matches it. For valuable, heavy, overhead, or safety-sensitive installations, use a particularly conservative margin and prioritize studs or solid masonry. Do not automatically add the capacities of several anchors together. Two anchors rated for 50 pounds each do not necessarily create a dependable 100-pound installation. The load may not divide evenly, and one fastener can receive more force because of imperfect leveling or frame movement. Use the complete mounting system exactly as its manufacturer specifies. Also inspect the object itself. The wall anchor may be strong enough while the frame corner, D-ring screw, wire, cardboard backing, or cabinet panel is not. A hanging system is only as strong as its weakest connection. On sound drywall, a properly rated picture hook, specialty tool-free drywall hook, or compatible adhesive strip may be sufficient. A small sawtooth hanger can work if it is securely attached to a solid wooden frame. Use two fasteners to improve stability. Screws into studs are ideal when the position allows. Otherwise, select two anchors rated for the wall type and recommended for the load. Measure the D-ring spacing with painter’s tape and transfer the marks to the wall with a level. A French cleat secured across multiple studs is usually a better solution than one hook and a long wire. It distributes the load, resists tilting, and supports the width of the frame. Because users repeatedly pull on coats and bags, fasten the rack to studs or structural blocking. Lightweight picture anchors are not appropriate even when the empty rack weighs very little. Use manufacturer-approved removable strips if the painted surface is smooth, clean, fully cured, and within the product’s limits. Test an inconspicuous location when wall finish compatibility is uncertain. The most useful hanging-hardware lessons usually appear after a project looks finished. The frame is level, the tools are packed away, and then one corner begins drifting downward like it has somewhere else to be. One common scenario involves a medium-size mirror supplied with picture wire. The mirror may not seem especially heavy, so it gets placed on a single general-purpose hook. At first, everything looks fine. Over time, however, the wire shifts toward the hook’s center, the top of the mirror leans away from the wall, and the frame moves whenever a nearby door closes. Replacing the single hook with two properly rated fasteners positioned directly under the D-rings usually creates a flatter, steadier installation. The lesson is simple: included hardware is not automatically the best configuration for every wall. Gallery walls provide another memorable education. Measuring each frame separately sounds logical, but tiny errors multiply. After six frames, the arrangement may resemble a staircase designed by someone who strongly dislikes building codes. Paper templates solve much of the problem. Trace each frame, mark its hanging point on the paper, and tape the templates to the wall. You can adjust spacing, alignment, and overall balance before making holes. Painter’s tape can also capture the distance between two D-rings or keyhole slots and transfer that spacing directly to the wall. nother frequent mistake occurs with self-drilling drywall anchors. Installation begins well, but the anchor is tightened a few turns beyond snug. The drywall around the threads breaks apart, the anchor spins, and the project acquires a larger hole plus several new vocabulary words. Stopping as soon as the anchor seats firmly protects the surrounding gypsum. If it spins freely, remove it and install an appropriate replacement in a fresh location rather than trying to rescue the damaged hole with more torque. Heavy objects teach the value of patience. A wide mirror might arrive with two small brackets that technically fit the frame but make accurate wall placement difficult. A properly attached French cleat can simplify the installation by providing a long, level mounting surface. Securing the wall section to multiple studs takes more preparation, yet lifting the mirror onto the cleat is often easier and safer than trying to guide two hidden brackets onto two isolated screws. Adhesive strips create their own experience-based rule: surface preparation is part of the hardware. Applying strips to dusty paint, textured walls, recently painted surfaces, or humid bathroom walls can produce disappointing results even when the frame is below the advertised weight limit. Cleaning the approved surface, observing the recommended waiting period, and using the specified number of strips are not ceremonial steps. They are what make the system work. Finally, the safest installers know when to change the plan. If the wall is crumbling, the frame is weak, the object is unusually valuable, or the mounting point sits above a bed or crib, forcing a convenient fastener to work is not worth the risk. Moving the object slightly to reach a stud, adding blocking, using a cleat, or hiring a qualified installer may take longer, but it is far less exciting than discovering how loudly a mirror can introduce itself to the floor. Choosing the right hanging hardware is a matching exercise, not a contest to find the anchor with the most impressive number on its package. Start by weighing the object, identifying the wall, examining the existing frame hardware, and considering how the load will behave. Then select a compatible fastener with a sensible safety margin. Light frames may need only a rated picture hook or adhesive strip. Medium objects can often use D-rings, picture wire, or suitable hollow-wall anchors. Heavy, wide, valuable, or frequently handled items deserve structural support through studs, masonry anchors, robust toggle systems, or French cleats. Measure twice, verify the wall once more, and remember that gravity has unlimited free time. A few extra minutes spent choosing and installing the proper hardware can protect your wall, your belongings, and anyone standing underneath them. Note: Hardware capacities vary by manufacturer, wall material, fastener size, wall thickness, and installation method. Always follow the product instructions and use professional assistance for unusually heavy, valuable, overhead, or safety-critical installations.Measure the actual weight
Consider the object’s width and shape
Decide whether the load will move
Identify Your Wall Material
Plaster and lath
Wood studs, paneling, and solid wood
Brick, concrete, and concrete block
Tile
Choose the Correct Type of Hanging Hardware
Picture hooks and angled nails
Sawtooth hangers
D-rings
Picture wire
Keyhole slots and keyhole hangers
French cleats
Plastic expansion anchors
Self-drilling threaded anchors
Molly bolts
Toggle bolts and strap toggles
Wood screws and lag screws
Use a Sensible Safety Margin
A Practical Hardware Selection Checklist
Examples of Matching Hardware to the Job
A four-pound framed photograph
A 22-pound mirror with two D-rings
A wide, 65-pound framed artwork
A wall-mounted coat rack
A small frame in a rental apartment
Common Hanging Hardware Mistakes
Real-World Hanging Lessons: Experience Without the Drama
Conclusion


