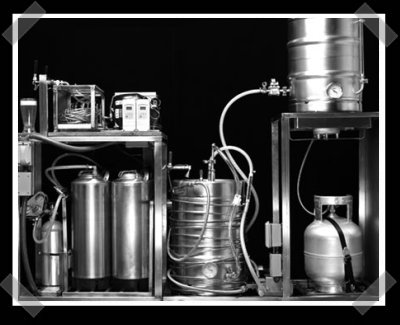

Building a home brewing beer brewery sounds like something that requires a brick building, copper kettles, a forklift, and a beard long enough to qualify as brewing equipment. Good news: it does not. A home brewery can start with a kitchen stove, a stockpot, a fermenter, sanitizer, a recipe kit, and enough curiosity to ask, “What happens if I turn grain water into happy bubbles?”
Home brewing is the small-scale process of making beer for personal enjoyment. It combines cooking, chemistry, patience, and just enough controlled chaos to make every batch feel like a tiny science fair with better snacks. Whether you want to brew a crisp pale ale, a cozy amber, a roasty stout, or a hop-forward IPA, the foundation is the same: water, malt, hops, yeast, cleanliness, temperature control, and time.
This guide walks you through the essentials of setting up a beginner-friendly home brewery, choosing equipment, understanding ingredients, brewing your first batch, avoiding common mistakes, and improving your beer with every brew day. No snobbery, no secret handshake, and absolutely no need to name your garage “The Foam Kingdom” unless you really want to.
What Is a Home Brewing Beer Brewery?
A home brewing beer brewery is simply a dedicated setup for making beer at home. It may be a corner of your kitchen, a basement workbench, a garage station, or a compact apartment brewing area. The goal is not to copy a commercial brewery on a tiny budget. The goal is to create a clean, organized, repeatable space where you can brew safely and consistently.
Most beginners start with extract brewing because it removes the need for full grain mashing. Malt extract gives you the fermentable sugars, while hops add bitterness, flavor, and aroma. Yeast turns those sugars into alcohol and carbon dioxide. Later, many homebrewers move into all-grain brewing, where crushed malted grain is mashed in hot water to create wort, the sweet liquid that becomes beer.
The Four Essential Ingredients in Beer
1. Water
Beer is mostly water, so water quality matters. For a first batch, filtered tap water or spring water is usually fine. Avoid heavily chlorinated water because it can create harsh flavors. Once you gain experience, you can explore water chemistry, minerals, pH, and style-specific water profiles. For now, think clean and pleasant-tasting.
2. Malt
Malt provides the sugars that yeast will ferment. It also gives beer body, color, sweetness, biscuit notes, caramel character, toastiness, roast, and grain flavor. In extract brewing, malt extract comes as syrup or powder. In all-grain brewing, you use crushed malted barley and sometimes wheat, oats, rye, corn, or other grains.
3. Hops
Hops balance malt sweetness with bitterness and add aromas such as citrus, pine, floral, herbal, tropical fruit, spice, or resin. Hops added early in the boil contribute more bitterness. Hops added late in the boil or after fermentation contribute more aroma. That is why IPAs can smell like a fruit basket had a loud conversation with a pine forest.
4. Yeast
Yeast is the tiny workhorse of brewing. It eats sugar and produces alcohol, carbon dioxide, and flavor compounds. Ale yeast usually ferments warmer and often produces fruity or spicy notes. Lager yeast typically ferments cooler and creates a cleaner profile. Treat yeast well with proper temperature and sanitation, and it will reward you. Ignore it, and it may send back a beer that tastes like regret.
Basic Equipment for a Beginner Home Brewery
You do not need to buy every shiny gadget on day one. A practical home brewing beer brewery starts with equipment that helps you boil, ferment, transfer, package, and clean.
- Brew kettle: A large pot used to boil wort. A 5-gallon kettle is common for partial boils, while larger kettles help with full-volume batches.
- Fermenter: A food-grade bucket, glass carboy, or plastic fermenter where yeast turns wort into beer.
- Airlock and stopper: Allows carbon dioxide to escape while helping keep oxygen and contaminants out.
- Sanitizer: Essential for every surface that touches cooled wort or beer.
- Auto-siphon or transfer tubing: Helps move beer without splashing.
- Hydrometer or refractometer: Measures sugar levels so you can estimate alcohol and confirm fermentation progress.
- Thermometer: Helps manage steeping, cooling, and fermentation temperatures.
- Bottles, caps, and capper: Used for packaging if you are bottle conditioning.
- Cleaning supplies: Brushes, brewing cleaner, and plenty of patience.
A beginner starter kit is often the easiest path because it includes the core equipment and a recipe kit. Once you understand the workflow, you can upgrade gradually: wort chiller, larger kettle, temperature-controlled fermentation chamber, kegging setup, grain mill, mash tun, or brew-in-a-bag equipment.
How to Brew Beer at Home: Step-by-Step
Step 1: Choose a Beginner-Friendly Recipe
For your first brew, choose a forgiving style such as amber ale, pale ale, brown ale, porter, or wheat beer. These styles tend to handle small beginner mistakes better than delicate lagers. A recipe kit is useful because it includes measured ingredients and instructions.
Step 2: Clean and Sanitize Everything
Cleaning removes dirt, residue, and old beer gunk. Sanitizing reduces microbes on already-clean surfaces. These are not the same thing. A dirty fermenter cannot be magically saved by a splash of sanitizer. Anything that touches cooled wort or fermented beer must be sanitized, including the fermenter, lid, airlock, spoon, tubing, hydrometer, bottling bucket, bottles, and caps.
Step 3: Heat Water and Steep Specialty Grains
Many extract recipes include specialty grains for color and flavor. Place them in a grain bag and steep them in hot water, usually around 150°F to 170°F, depending on the recipe. Do not boil the grains. Think of it like making tea, except the tea becomes beer and your kitchen smells like a bakery wearing hiking boots.
Step 4: Add Malt Extract
Remove the grain bag, turn off the heat, and stir in malt extract until fully dissolved. Turning off the heat helps prevent scorching. Once dissolved, bring the wort to a boil. Watch carefully because wort loves to boil over at the exact moment you look away.
Step 5: Boil and Add Hops
Most beginner recipes use a 60-minute boil. Hops are added at specific times. Bittering hops usually go in early. Flavor hops may go in with 15 to 30 minutes left. Aroma hops may go in during the final minutes or after the boil. Follow the schedule closely because hop timing affects the finished beer.
Step 6: Cool the Wort Quickly
After the boil, cool the wort as quickly as practical. An ice bath works for small batches. An immersion chiller is faster for larger batches. Quick cooling helps reduce contamination risk and can improve clarity. Once the wort is cool enough for yeast, transfer it to the sanitized fermenter.
Step 7: Pitch the Yeast
Pitching means adding yeast. Check the yeast package and recipe for the recommended temperature. For many ale yeasts, the ideal fermentation range is often in the mid-60s to low-70s Fahrenheit, but yeast strains vary. Too warm can create harsh alcohol notes or fruity flavors that do not belong. Too cold can slow or stall fermentation.
Step 8: Ferment
Seal the fermenter, attach the airlock, and place it somewhere with stable temperature. Fermentation may start within several hours or take a day or more. Bubbling is exciting, but it is not the only sign of fermentation. Gravity readings are more reliable. Most ales need about one to two weeks in primary fermentation, though many brewers allow extra time for yeast to clean up by-products.
Step 9: Package the Beer
Beginners usually bottle condition. This means adding priming sugar before bottling so yeast creates carbonation inside the sealed bottle. Use the correct amount of priming sugar. Too little creates flat beer. Too much creates gushers or dangerous over-carbonation. After bottling, store bottles at room temperature for about two weeks, then chill and taste.
Step 10: Taste, Take Notes, and Improve
Your first beer may not win a medal, but it will teach you more than reading ten brewing books in a recliner. Write down what you brewed, fermentation temperature, timing, original gravity, final gravity, tasting notes, and what you would change next time. Brewing gets better when your memory is not the only record keeper.
Extract Brewing vs. All-Grain Brewing
Extract brewing is the simplest starting point. It uses malt extract, which has already gone through the mashing process. This saves time, equipment, and complexity. It is ideal for new homebrewers who want to learn sanitation, boiling, hop schedules, fermentation, and bottling before managing grain conversion.
All-grain brewing gives you more control over flavor, body, efficiency, and recipe design. You mash crushed grains in hot water so enzymes convert starches into fermentable sugars. Brew-in-a-bag, often called BIAB, is a popular all-grain method because it reduces equipment needs. You mash the grains in a large mesh bag, lift the bag out, drain it, and boil the wort in the same kettle.
Neither method is “real” brewing while the other is fake. Extract brewing can make excellent beer. All-grain brewing can make excellent beer. Both can also make mysterious swamp liquid if you skip sanitation and ferment in a closet that feels like a sauna.
Fermentation Temperature: The Quiet Secret to Better Beer
Many beginners focus on hops, malt, and labels with dragons on them. Experienced brewers often focus on fermentation temperature. Yeast creates different flavors depending on temperature. A beer fermented too warm may taste solvent-like, overly fruity, spicy in the wrong way, or just rough around the edges.
You do not need a professional fermentation chamber immediately. Start by choosing a cool, stable room. You can place the fermenter in a water bath and add frozen water bottles to reduce temperature swings. Later, a used refrigerator with an external temperature controller can become one of the best upgrades in a home brewery.
Common Home Brewing Mistakes to Avoid
Poor Sanitation
Infection can create sour, funky, buttery, medicinal, or unpleasant flavors. Clean first, sanitize second, and do not touch sanitized surfaces with unsanitized hands or tools.
Boil-Overs
Wort foams aggressively at the start of the boil. Use a large enough kettle, reduce heat when foam rises, and keep a spray bottle of clean water nearby.
Fermenting Too Warm
Temperature swings can stress yeast. A stable fermentation temperature usually improves beer more than buying another novelty hop variety.
Bottling Too Early
If fermentation is not complete, bottles may over-carbonate. Confirm stable gravity readings before packaging.
Changing Too Many Things at Once
Experimenting is fun, but change one major variable at a time. If you change yeast, hops, grain bill, water, fermentation temperature, and bottle conditioning all at once, you will not know what caused the result.
Best Beer Styles for New Homebrewers
A beginner home brewing beer brewery should start with styles that are flavorful, forgiving, and not overly dependent on advanced temperature control.
- Amber ale: Balanced malt and hops, friendly to beginners, and easy to enjoy.
- Pale ale: A great way to learn hop additions without going extreme.
- Brown ale: Nutty, malty, and forgiving if fermentation is not perfect.
- Porter: Roasty flavors can hide small flaws while teaching dark malt character.
- Wheat beer: Often quick to ferment and refreshing, especially for warm weather.
Save delicate pilsners, high-gravity Belgian ales, mixed-fermentation sours, and barrel-aged experiments for later. Brewing is like cooking: start with pancakes before attempting a wedding cake shaped like the state of Colorado.
How to Design Your Own Beer Recipe
Once you have brewed a few kits, recipe design becomes tempting. Start with a target style. Decide the original gravity, bitterness level, color, malt profile, hop character, yeast strain, and alcohol range. Use brewing software or a trusted recipe calculator to estimate the numbers.
A simple pale ale might use light malt extract or pale malt as the base, a small amount of crystal malt for sweetness and color, American hops for citrus aroma, and a clean ale yeast. A porter might use pale malt or extract, chocolate malt, black malt, crystal malt, and a balanced hop schedule. Keep early recipes simple. Complexity is not always depth; sometimes it is just confusion wearing a fancy hat.
How to Make Your Home Brewery More Efficient
Organization makes brew day smoother. Prepare ingredients before heating water. Read the full recipe twice. Fill a bucket with sanitizer. Keep a timer nearby. Label hop additions by time. Clean as you go. Create a checklist for brew day, fermentation, bottling day, and tasting notes.
Efficiency also means designing your space around movement. Store clean equipment separately from dirty equipment. Keep small items such as airlocks, stoppers, hydrometer tubes, bottle caps, and tubing in labeled bins. A home brewery does not have to look like a laboratory, but it should not look like a yard sale got into a fight with a spaghetti factory.
Is Home Brewing Legal in the United States?
In the United States, adults may generally produce beer at home for personal or family use without paying federal excise tax, subject to household volume limits and state or local rules. Federal rules commonly reference up to 100 gallons per calendar year for a household with one adult and up to 200 gallons for a household with two or more adults. Homebrew is for personal use, not commercial sale. Always check your state and local regulations before brewing, transporting, serving at events, or entering competitions.
of Real-World Home Brewing Experience
The first thing most new homebrewers learn is that brewing is not difficult, but it is very honest. Beer remembers everything. It remembers whether you cleaned the fermenter properly. It remembers whether you pitched yeast into wort that was still too hot. It remembers whether you left the fermenter in a room that turned into a summer greenhouse at 3 p.m. Beer is basically a delicious diary with carbonation.
A good beginner experience starts the night before brew day. Put the recipe on the counter. Check every ingredient. Make sure the yeast is fresh. Confirm you have sanitizer, bottle caps, tubing, and enough time. There is a special kind of comedy in reaching the bottling stage and discovering you own exactly seven bottle caps. That comedy is less funny when five gallons of beer are staring at you.
On brew day, the best habit is to slow down. Many mistakes happen because beginners rush. They add extract while the burner is roaring and scorch it on the bottom of the kettle. They forget hop timing. They drop unsanitized tools into cooled wort and then stare at the fermenter like it might forgive them. It might not. Brewing rewards calm movement. Read the next step before you need it. Keep a clean spoon nearby. Keep a towel nearby. Actually, keep three towels nearby. Wort has ambitions.
The smell of the first boil is one of the best parts of home brewing. Malt smells warm and bready. Hops smell green, sharp, citrusy, spicy, or earthy depending on the variety. The kitchen fogs up, someone asks whether you are making soup, and you get to say, “Technically, yes, but the soup becomes beer.” That is a proud moment.
Fermentation is where patience gets tested. New brewers often want to open the lid and check. Do not. The yeast is working, and it does not need an audience. If the airlock bubbles, great. If it does not bubble, do not panic. Buckets can leak around the lid, and fermentation may still be happening. Use gravity readings when needed. Trust the process, but verify before bottling.
Bottling day is both satisfying and sticky. Priming sugar must be measured correctly and mixed gently. Bottles should be clean, sanitized, filled with proper headspace, and capped securely. After two weeks of conditioning, the first pour feels ceremonial. Maybe the beer is perfect. Maybe it is slightly under-carbonated. Maybe it tastes good but looks hazy enough to hide a submarine. All of that is useful information.
The biggest lesson is that every batch improves your instincts. You learn how fast your stove reaches a boil, how your favorite yeast behaves, how fermentation temperature changes flavor, and which beer styles your friends mysteriously “sample” until the case is empty. A home brewing beer brewery is not built in one purchase. It is built one batch, one note, one upgrade, and one shared pint at a time.
Conclusion: Start Small, Brew Clean, Learn Every Batch
Creating a home brewing beer brewery is less about owning professional equipment and more about building a reliable process. Start with a simple recipe, clean and sanitize carefully, control fermentation temperature, take notes, and resist the urge to overcomplicate your first few batches. The best homebrewers are not the ones who never make mistakes. They are the ones who notice, adjust, and brew again.
Home brewing gives you control over flavor, creativity, and freshness. It also gives you a deeper respect for every pint you drink. Once you understand how malt, hops, yeast, water, time, and temperature work together, beer stops being just a beverage and becomes a craft you can practice. And yes, sometimes your kitchen will smell like cereal, grapefruit, and ambition. That is part of the charm.
SEO Tags


