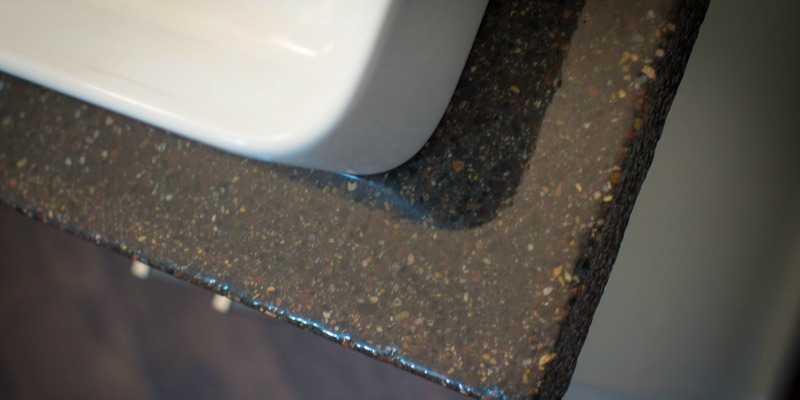

A master bathroom renovation has a funny way of revealing who you really are. Some people discover they love brushed brass. Others learn they have very strong opinions about grout color. And then there are the brave souls who look at a tired vanity and say, “You know what this room needs? A handmade slab of concrete.”
DIY concrete countertops can turn an ordinary master bathroom into a custom, spa-like space with a little industrial edge and a lot of personality. They are durable, sculptural, budget-friendly compared with many stone slabs, and endlessly customizable. Want a soft matte gray vanity top with an undermount sink? You can do that. Prefer a warm taupe tone with subtle veining, rounded edges, and black fixtures? Also possible. Concrete is basically the design world’s responsible rebel: tough, practical, and just dramatic enough to make guests ask, “Wait, you made that?”
That said, concrete countertops are not a “slap it together during commercial breaks” project. They require planning, accurate forms, reinforcement, curing time, polishing, and a good sealer, especially in a humid bathroom where water, toothpaste, face wash, and mystery products from the back of the medicine cabinet may attack the surface daily. This guide walks through the process, design choices, mistakes to avoid, and real-world experience that can help your DIY concrete vanity top look intentional instead of “garage experiment with plumbing.”
Why Choose DIY Concrete Countertops for a Master Bathroom?
Concrete countertops are popular in kitchens, but they can be even more appealing in a master bathroom renovation. A bathroom vanity top is usually smaller than a kitchen island, which makes it a more approachable project for a first-time concrete DIYer. You get the drama of a custom surface without wrestling a twelve-foot slab through a doorway while questioning your life decisions.
The biggest benefit is customization. Concrete can be poured to fit unusual vanity dimensions, floating cabinets, double sinks, wall-mounted faucets, or a narrow bathroom layout where stock countertop sizes simply do not behave. You can choose the thickness, edge profile, color, finish, and sink style. A thick concrete vanity top can make a basic cabinet look architect-designed, while a thinner slab with clean edges can feel modern and minimal.
Concrete also pairs beautifully with bathroom materials. It softens glossy tile, grounds warm wood cabinetry, and looks fantastic with matte black, chrome, nickel, or brass fixtures. In a beautiful master bathroom renovation, it can serve as the visual bridge between natural, modern, and handmade elements.
Planning the Vanity Before You Mix Anything
The best concrete countertops begin long before the bag of mix is opened. Start with exact measurements of the vanity base, wall angles, faucet placement, sink cutout, backsplash plan, and overhang. Bathrooms are notorious for walls that look straight until a tape measure quietly tells the truth. Measure the back, front, left, and right sides separately. If the countertop will touch two walls, create a simple template from thin plywood, cardboard, or hardboard so the slab follows the actual room instead of the fantasy version in your head.
Decide on Cast-in-Place or Precast
There are two main ways to make a DIY concrete bathroom countertop: cast-in-place or precast. Cast-in-place means you build forms directly on top of the vanity and pour the concrete where it will live. This avoids carrying a heavy slab but can be messier and less forgiving in a finished bathroom.
Precast means you build a mold elsewhere, usually on a flat worktable, pour the countertop upside down, cure it, polish it, seal it, and then install it. For many bathroom renovations, precast is the cleaner and more controlled option. The top surface cures against smooth melamine, which can create a refined finish. The tradeoff is weight. Even a vanity-sized concrete countertop can require two strong people, careful lifting, and possibly a short motivational speech.
Choose the Right Sink Style
Concrete works well with vessel sinks, drop-in sinks, and undermount sinks, but each one changes the mold and waterproofing details. A vessel sink is the easiest because it usually requires only a drain hole and faucet holes. A drop-in sink hides the cut edge, which is friendly for beginners. An undermount sink looks sleek and high-end, but the cutout must be precise, smooth, and sealed thoroughly because the exposed concrete edge will be close to water every day.
Materials and Tools You Will Need
For a DIY concrete vanity top, most homeowners use melamine-coated particleboard for the mold because it creates a smooth surface and releases more easily than raw wood. You will also need screws, silicone caulk, a caulk tool or rounded object for neat corners, a drill, a level, a mixing bucket or mixer, reinforcement, concrete countertop mix or high-strength concrete mix, gloves, eye protection, a respirator, polishing pads, and a concrete countertop sealer.
A dedicated concrete countertop mix is helpful because it is designed for strength, flow, and a smoother finish. Some DIYers use high-strength mixes with additives, fibers, or countertop-specific formulas. Whatever you choose, follow the manufacturer’s water ratio carefully. Too much water may make the mix easier to pour, but it can weaken the slab and increase shrinkage. Concrete is like pancake batter with consequences: consistency matters.
Building the Mold for a Clean, Custom Look
The mold determines the shape of your countertop, so take your time here. Cut the melamine base to the exact countertop size, then add side strips equal to the desired slab thickness. Many bathroom vanity tops look great at 1.5 to 2 inches thick, though the best thickness depends on your cabinet strength, design style, and span.
Remember that the countertop is usually poured upside down in the mold. The bottom of the mold becomes the top of the finished counter. That means any dust, bumps, exposed screw heads, sloppy caulk, or trapped debris can show up where everyone will see it. Clean the mold thoroughly before pouring.
Use Silicone for Smooth Edges
Run a bead of silicone caulk along the inside seams of the mold. Then smooth it consistently to create a slight rounded edge. Black or dark silicone is often easier to see against white melamine, making cleanup simpler. Do not rush this step. Messy silicone creates messy edges, and sanding them later is about as fun as cleaning hair out of a shower drain.
Plan Faucet and Drain Holes
Use knockout forms for faucet holes, drain openings, and sink cutouts. PVC pipe, foam, plastic templates, or manufacturer-provided sink templates can work, depending on the design. Secure all knockouts firmly so they do not float or shift when the concrete is poured. A faucet hole that wanders half an inch to the left is not charming; it is a plumbing negotiation.
Reinforcement: Small Detail, Big Difference
Concrete is strong under compression but weaker under tension, which is why reinforcement matters. For bathroom countertops, reinforcement may include wire mesh, fiberglass mesh, rebar, ladder wire, or glass fiber reinforcement, depending on the mix and slab design. The key is to keep reinforcement centered in the slab rather than pressed against the bottom or top surface.
Pay special attention to narrow areas around sink cutouts and faucet holes. These are common stress points. A double-sink master bathroom vanity needs smart reinforcement because the slab may have multiple openings and long spans. If your design includes a large overhang, a very thin profile, or a floating vanity with limited support, consult a professional or choose a lighter countertop material. Confidence is good; gravity is undefeated.
Mixing and Pouring the Concrete
Before mixing, have everything ready: mold cleaned, reinforcement prepared, tools nearby, protective gear on, and a helper available. Concrete does not care that you forgot the trowel in the garage. Once the mix is wet, the clock starts.
Add water according to the mix instructions, then blend until the concrete is consistent and workable. Pour it into the mold in layers, pressing it into corners and around knockouts. Tap the sides of the mold with a rubber mallet or use vibration carefully to help release trapped air bubbles. Do not overdo vibration, because too much can separate the mix and weaken the finish.
Screed and Level the Back Side
Use a straight board to screed the surface level. Since the slab is upside down, this side will usually become the underside, but it still needs to be flat enough to sit properly on the vanity. Check for low spots, fill them, and smooth the surface. Then cover the slab with plastic so it can cure slowly and evenly.
Curing: The Waiting Game That Actually Matters
Curing is not just drying. It is the chemical process that allows concrete to develop strength. Keep the slab covered and protected from rapid moisture loss according to the product instructions. Many countertop mixes can be removed from the mold after a couple of days, but concrete continues gaining strength over time. Handle early slabs with care because they can still be fragile, especially around sink openings.
For a master bathroom renovation schedule, build curing time into the plan. Do not pour the countertop the same weekend you expect to install faucets, hang mirrors, style towels, and host guests. Concrete likes patience. It rewards calm people and punishes “just one more quick thing” energy.
Demolding, Polishing, and Patching
When the slab is ready, remove the mold carefully. If you used melamine and clean silicone, the reveal can be extremely satisfying. You may see small pinholes or air pockets. These can be part of the concrete’s handmade charm, or they can be filled with a slurry made from cement, pigment, and bonding agent, depending on the look you want.
Polishing can range from light sanding for a natural matte finish to progressive diamond polishing for a smoother, more refined surface. For a bathroom vanity top, a satin finish often works beautifully because it hides small water spots better than a high-gloss finish and feels relaxed rather than showroom-stiff.
Do Not Skip Edge Finishing
Edges matter because hands, towels, and eyes constantly meet them. Slightly ease sharp corners with polishing pads. This makes the countertop more comfortable and less likely to chip. A softly rounded edge can still look modern while being friendlier in a bathroom used every morning by half-awake humans.
Sealing Concrete for Bathroom Use
Concrete is porous, so sealing is essential in a bathroom. Water, soap, cosmetics, toothpaste, hair dye, shaving cream, and cleaning sprays can stain or etch an unprotected surface. Choose a concrete countertop sealer designed for interior countertops and wet environments. Common options include acrylic, polyurethane, epoxy, penetrating sealers, and hybrid systems. Each has a different look, maintenance requirement, and level of stain resistance.
For a master bathroom vanity, prioritize water resistance, stain resistance, easy cleaning, and a finish that matches your design. A matte or satin sealer usually feels more natural, while a glossy sealer can make the surface look darker and more polished. Always test your sealer on a sample piece if possible. A test tile can save you from discovering too late that your “soft warm gray” has become “storm cloud in a nightclub.”
Maintenance Tips
Clean sealed concrete with mild soap and water. Avoid harsh acidic cleaners, abrasive pads, and aggressive bathroom chemicals unless the sealer manufacturer approves them. Wipe standing water instead of letting puddles sit around faucets. Reseal or refresh the surface as recommended. With proper care, a concrete bathroom countertop can stay beautiful for years while developing a subtle character that manufactured surfaces often lack.
Design Ideas for a Beautiful Master Bathroom Renovation
A DIY concrete countertop can support many bathroom styles. For a warm modern look, pair a light gray concrete vanity top with white oak cabinetry, creamy wall tile, and brushed brass fixtures. For an industrial spa feel, combine charcoal concrete with matte black faucets, large-format porcelain tile, and warm lighting. For a rustic-modern bathroom, use a natural concrete finish with reclaimed wood shelving and handmade ceramic accessories.
Concrete also loves contrast. A smooth concrete vanity top next to zellige tile creates a handcrafted, layered look. Concrete with a fluted wood vanity feels current without being trendy in a disposable way. A floating vanity with a thick concrete counter can make a small master bathroom feel more open while still giving the room a strong focal point.
Common DIY Concrete Countertop Mistakes to Avoid
The first mistake is underestimating weight. Concrete is heavy, and bathroom vanities must be strong enough to support it. Reinforce the cabinet or wall supports if needed. The second mistake is rushing the mold. A countertop is only as accurate as its form. If the mold is crooked, the finished slab will not suddenly become a perfectionist.
The third mistake is adding too much water. A soupy mix may seem easier, but it can reduce strength and increase surface problems. The fourth mistake is skipping a sample pour. A small test piece helps you practice mixing, vibrating, polishing, coloring, and sealing before committing to the real slab.
The fifth mistake is choosing the wrong sealer. Bathroom countertops need serious protection. A decorative concrete floor sealer may not be ideal for a vanity top that sees water and personal care products daily. Read product instructions carefully and choose a countertop-friendly sealer.
Budget and Time Expectations
DIY concrete countertops can be affordable compared with custom stone, but they are not free. Budget for mold materials, concrete mix, reinforcement, sealer, polishing pads, safety equipment, caulk, pigments if desired, and possible tool rentals. If you already own basic tools, the project becomes much more economical.
Time is the bigger investment. Planning and building the mold may take a day. Pouring can take several hours. Curing requires patience. Polishing and sealing may take additional days depending on drying times between coats. For a master bathroom renovation, the best approach is to complete the concrete countertop before the room is fully finished, so dust, lifting, and sealing do not threaten new paint, mirrors, or flooring.
Is a DIY Concrete Vanity Top Right for You?
A DIY concrete countertop is a great choice if you enjoy hands-on projects, appreciate natural variation, and want a custom surface without paying custom stone prices. It is not ideal if you expect factory-perfect uniformity or zero maintenance. Concrete may show tiny pinholes, subtle color shifts, or faint marks over time. For many homeowners, that is the beauty of it. The surface feels made, not manufactured.
In a beautiful master bathroom renovation, that handmade quality can be the detail that makes the whole room feel personal. Anyone can buy a vanity top. Pouring one yourself gives the space a story, and yes, probably a few moments where you stare at wet concrete and whisper, “Please behave.”
Conclusion
DIY concrete countertops can bring strength, texture, and custom style to a master bathroom renovation. With careful planning, a precise mold, proper reinforcement, patient curing, smooth polishing, and a high-quality sealer, a concrete vanity top can look refined rather than rough. It can make builder-grade cabinetry feel custom, give a bathroom a grounded spa-like atmosphere, and provide the satisfaction of knowing you created one of the room’s most important design features with your own hands.
The secret is respecting the process. Concrete is forgiving in some ways and brutally honest in others. It will record the shape of your mold, the steadiness of your caulk line, the accuracy of your measurements, and the patience of your curing schedule. Treat those steps like part of the design, not chores to survive, and the finished countertop can become the centerpiece of a bathroom that feels expensive, personal, and beautifully original.
Field Notes: of Real-World DIY Experience
The biggest lesson from a DIY concrete countertop project is that confidence should arrive with a checklist. Concrete has a way of making even simple tasks feel official. Once the mix hits the mold, you are no longer “thinking about the project.” You are in it, wearing gloves, tapping the form, watching corners, and trying not to get concrete on the one pair of shoes you still like.
One useful experience is to build a small practice slab before the real bathroom vanity top. It does not need to be fancy. A little tray-sized mold is enough to test your mix, pigment, vibration method, polishing pads, and sealer. This sample tells you more than hours of scrolling ever will. You may discover the color dries lighter than expected, the sealer adds sheen, or your silicone bead needs work. Better to learn that on a practice piece than on the master bathroom countertop your spouse, roommate, or future self will see every morning.
Another practical lesson is to protect the bathroom renovation timeline. Concrete projects involve curing, dust, water, and lifting. If the room already has fresh wallpaper, new sconces, and a perfectly installed mirror, polishing a concrete slab nearby can turn the space into a home improvement crime scene. Set up a separate work area if possible. A garage table, covered floor, and good lighting make the process calmer. Keep the slab level while curing, and resist the urge to poke, flip, or fuss with it too soon.
Installation day deserves planning too. Dry-fit the slab before applying silicone or adhesive. Check faucet alignment, sink fit, wall gaps, and overhang. Have shims ready. Concrete can look perfectly flat until it meets a vanity base that has been quietly leaning since 1998. Small adjustments make a big difference. Use a few dabs of silicone to cushion and secure the slab rather than trapping it in a permanent panic bond.
Living with concrete in a bathroom also teaches you to think differently about maintenance. The surface is tough, but it is not magic. Wipe toothpaste, standing water, and colored cosmetics instead of letting them linger. Use trays for perfume, oils, and grooming products. A small stone, wood, or ceramic tray can protect the sealer and make the vanity look styled on purpose. That is the best kind of maintenance: the kind that also looks like decorating.
Finally, embrace the handmade nature of the finished piece. Tiny variations are not failures. They are the reason a DIY concrete vanity top has soul. A store-bought counter may be flawless, but your concrete countertop has a backstory. It has the afternoon you built the mold, the moment you lifted the slab, the first coat of sealer that made the color deepen, and the satisfaction of washing your hands at a vanity you helped create from powder, water, patience, and a little stubborn optimism.


