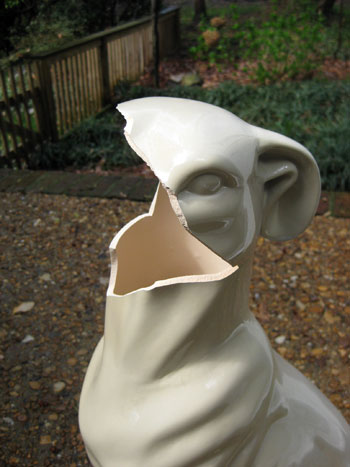

There are household disasters, and then there is the very specific heartbreak of hearing a tiny ceramic paw hit the floor. A mug can be replaced. A plate can be demoted to “plant saucer duty.” But a ceramic dog? That little glossy guardian of the bookshelf, that flea-market find, that gift from someone who knew exactly how much you loved dogs without committing you to actual vet bills? When it breaks, it feels personal.
This guide is for anyone currently staring at a broken ceramic dog figurine and wondering whether the correct response is glue, grief, or both. The good news: many broken ceramic pieces can be repaired at home with patience, the right adhesive, and a little emotional bravery. The even better news: a repaired ceramic dog does not have to be “ruined.” Sometimes the crack becomes part of the story. Sometimes the wobble gives it character. Sometimes you simply turn the repaired side toward the wall and call it “interior design.”
Below, we will cover why sentimental objects hit us so hard, how to assess the damage, what glue works best for ceramic figurine repair, how to fix missing chips, when to try a kintsugi-inspired finish, and how to decide whether to repair, display, repurpose, or lovingly retire your broken ceramic dog.
Why a Broken Ceramic Dog Can Feel Like a Tiny Tragedy
A ceramic dog is rarely just ceramic. It may represent a childhood pet, a family member’s sense of humor, a vacation memory, a vintage collecting phase, or the comforting fact that at least one creature in the house sits still and never sheds. Sentimental objects hold emotional value because they connect us to people, places, and versions of ourselves we do not want to lose.
That is why the first reaction to a broken ceramic dog is often wildly disproportionate to its market value. You may know it is technically a small decorative object, but your brain files it under “memories,” not “home accessories.” The crack does not just split porcelain or earthenware; it interrupts a story. This is especially true if the figurine was inherited, handmade, vintage, or associated with a beloved dog.
Before you rush into repair mode, give yourself a minute. Pick up the larger pieces carefully, move pets and children away from the area, and resist the urge to immediately glue the first two parts you can match. Ceramic repair rewards calm hands. Panic gluing rewards nobody, except possibly the trash can.
Step One: Make the Break Safe Before You Make It Beautiful
Broken ceramic edges can be sharp enough to cut skin, especially when a glazed surface fractures into thin shards. Put on gloves if you have them, sweep slowly, and use a flashlight at floor level to find splinters. If the figurine broke near a rug, gently shake the rug outside or vacuum thoroughly after collecting the visible pieces.
Separate the fragments into three groups: large structural pieces, small decorative chips, and dust-like crumbs. Do not throw away the little pieces too quickly. A tiny ear tip, collar bump, or tail shard may be the difference between a clean repair and a dog that looks permanently surprised by life.
Place all pieces on a towel or tray so they do not slide around. If the ceramic dog has a glossy finish, lay it on a soft cloth to avoid new scratches. Take a few photos before repairing. These photos help you remember where pieces belong, especially if the dog has multiple legs, ears, or a dramatic tail situation.
Step Two: Assess the Damage Like a Ceramic Detective
Not all breaks are equal. A clean break through the body or leg is usually easier to repair than a shattered face with missing glaze. Look closely at the broken ceramic dog and ask four questions:
1. Are all the main pieces present?
If the body, head, legs, ears, and tail are mostly intact, you are in excellent shape. Even if the cracks are visible, the figurine can likely be repaired for display.
2. Is the break load-bearing?
A broken ear is decorative. A broken leg is structural. If the repaired leg must support the figurine’s weight, you need a stronger bond and a longer curing time. You may also need a discreet stand, felt pad, or display base to reduce stress on the joint.
3. Is the ceramic porous or glazed?
Unglazed ceramic absorbs adhesive differently from glossy glazed porcelain. A smooth glazed surface may need careful cleaning and a glue that works well on non-porous materials. A porous break may bond quickly but can also absorb too much adhesive if you flood it.
4. Will the dog be decorative only?
Most repaired ceramic figurines should be treated as decorative items, not toys, food-contact objects, outdoor ornaments, or doorstops for aggressive breezes. A repaired ceramic dog belongs on a shelf, not in a tug-of-war tournament.
Choosing the Best Glue for a Broken Ceramic Dog
The best glue for ceramic depends on the break. For a small, clean figurine repair, a gel-style cyanoacrylate glue, often called super glue, can work well because it stays controlled and bonds quickly. For larger breaks, uneven surfaces, or gaps, a two-part epoxy may be better because it fills space and creates a durable bond after curing.
For a cherished ceramic dog figurine, avoid watery glue that runs across the glaze like a toddler with a marker. A no-run gel formula gives more control, especially on vertical areas such as ears, legs, and tails. A clear-drying adhesive is also helpful when the repair line will be visible.
If the break has missing material, epoxy putty can help rebuild a small chip, paw, or underside gap. Epoxy putty is moldable before it cures and can often be sanded and painted afterward. However, it requires more patience and a steadier finishing hand than a simple glue repair.
Whatever adhesive you choose, read the label. Check the working time, clamping time, full cure time, ventilation instructions, and material compatibility. Many adhesives reach handling strength before they reach full strength. In plain English: just because the ear stays on after ten minutes does not mean your ceramic dog is ready to rejoin society.
How to Repair a Broken Ceramic Dog Figurine
Once you have collected the pieces and chosen your adhesive, it is time to repair the ceramic dog. The secret is preparation. A good repair is often decided before the glue bottle is even opened.
Dry Fit Every Piece First
Practice assembling the broken pieces without glue. This is called a dry fit, and it saves you from discovering, halfway through curing, that the tail piece actually belongs under the left paw. Match the fracture lines carefully. Ceramic breaks often fit together like a puzzle, but only if you do not force them.
Clean the Broken Edges
Dust, oil, and old adhesive can weaken the bond. Wipe the broken edges gently with a dry cloth. If needed, use a small amount of rubbing alcohol on a cotton swab and let the surfaces dry completely. Avoid soaking porous ceramic. The goal is clean, dry edges, not a spa treatment.
Apply a Thin Layer of Adhesive
More glue does not mean more strength. In fact, too much adhesive can create lumps, visible seams, and sliding pieces. Apply a small amount to one or both broken surfaces, depending on the product instructions. Use a toothpick, paper clip, or fine applicator for precision.
Press and Hold the Pieces Together
Align the pieces carefully and press them together. Wipe away obvious squeeze-out only if the adhesive instructions allow it and you can do so without shifting the repair. For some epoxies, excess can be scraped away after partial curing. For fast super glues, touching the seam too much can make things worse.
Support the Repair While It Cures
Use painter’s tape, rubber bands, modeling clay, a folded towel, or a small box to hold the ceramic dog in position while it cures. Be gentle. You are not strapping luggage to a roof rack. You are supporting a tiny injured statue with dignity.
Let It Cure Fully
This is the step most people rush. Do not. If the adhesive says full strength develops in 24 hours, give it the full day. If the repaired section is structural, consider waiting longer before moving it. A ceramic dog with a newly repaired leg should not be immediately returned to a crowded shelf where someone will bump it while reaching for a candle.
What to Do About Missing Chips, Gaps, and Visible Cracks
If your broken ceramic dog is missing a small piece, you have options. The simplest approach is to accept the imperfection. A tiny missing chip under the belly or behind an ear may not matter once the figurine is displayed. If the gap is obvious, epoxy putty can be shaped into the missing area, allowed to cure, then sanded lightly and painted to match.
Color matching is the hardest part of invisible ceramic repair. White is not just white; it is warm white, cool white, old white, glossy white, “sat in Grandma’s cabinet for forty years” white, and “why does this paint look blue now?” white. Use acrylic craft paint in thin layers, mixing gradually until the color blends. Seal only if the product is appropriate for decorative ceramics.
For hairline cracks, you can choose to disguise or celebrate them. A hidden seam can be softened with careful paint. A visible seam can be transformed into a kintsugi-inspired design using gold paint, metallic wax, or a beginner-friendly craft kit. Traditional kintsugi is a Japanese repair art associated with lacquer and precious metal powder, but modern decorative versions often use epoxy and metallic finishes to honor the look without claiming museum-level authenticity.
Should You Try a Kintsugi-Inspired Ceramic Dog Repair?
A kintsugi-inspired repair can be a beautiful choice when the crack is too visible to hide. Instead of pretending the break never happened, you highlight it. On a ceramic dog, this can look surprisingly charming: a gold line across one ear, a bright seam along the back, or a repaired paw that looks like it has returned from a heroic adventure.
This approach works best when the figurine has clean cracks and a simple surface. It may not suit highly detailed painted pieces where gold lines would distract from the original design. It also works better on display-only objects. Metallic paints and decorative finishes should not be assumed food-safe or weatherproof unless the label specifically says so.
The emotional appeal is obvious. A repaired ceramic dog with visible golden seams becomes a little monument to survival. It says, “Yes, I fell off the mantel, but I came back with style.” That is more inspiring than many motivational posters, and significantly less annoying.
When a DIY Repair Is Not the Best Choice
Some ceramic dogs deserve professional help. If the figurine is antique, valuable, rare, signed by an artist, or part of a serious collection, consult a professional ceramic conservator before applying household glue. DIY adhesives can reduce value, stain porous material, or make future restoration more difficult.
You should also pause if the item has already been repaired badly. Old yellow glue, mismatched parts, and thick adhesive blobs can complicate a new repair. Removing old glue may require solvents, tools, and experience. If the ceramic dog matters enough that you would be upset by making it worse, that is a strong sign to ask a professional.
Finally, do not repair anything that will be used for food, drink, heat, or water unless the adhesive is specifically rated for that purpose. A ceramic dog is usually decorative, so this is less of a concern, but the principle matters. The glue that works for a shelf figurine is not automatically suitable for a mug, bowl, or pet dish.
How to Display a Repaired Ceramic Dog Without Tempting Fate
After repair, choose the display location wisely. A narrow windowsill, shaky bookshelf, or table frequently visited by wagging tails is not ideal. Place the ceramic dog on a stable surface away from edges. Add small museum putty or removable mounting putty under the base if appropriate for the surface. This can reduce slipping without making the piece permanently attached.
If the repaired section is weak, rotate the figurine so the repaired area is protected from casual contact. Keep it away from high-traffic spots, curious cats, and enthusiastic dusting. Dust with a soft brush or microfiber cloth rather than lifting it repeatedly. The less you handle it, the longer the repair is likely to last.
You can also create a small display base. A wood slice, shadow box, acrylic riser, or felt-lined tray can make the repaired ceramic dog feel intentional. Instead of looking like “the thing that broke,” it becomes “the treasured piece with a story.” Presentation has power.
Repurpose, Retire, or Remember: What If It Cannot Be Fixed?
Sometimes the broken ceramic dog is too damaged to restore. That does not mean the memory has to go in the trash. You can save a meaningful piece, such as the head, collar, name tag, or painted face, and place it in a small memory box. You can turn larger fragments into mosaic art, a garden marker, or a framed keepsake. You can photograph the pieces before letting them go.
If the object belonged to someone you love, consider writing a short note about its story. Where did it come from? Why did it matter? What did it remind you of? The written memory may become more meaningful than the object itself. A ceramic dog can break, but a good story is surprisingly sturdy.
Letting go is not failure. Repairing is one form of care; releasing is another. The goal is not to preserve every object forever. The goal is to honor what the object meant without letting guilt turn your home into a museum of emotional pressure.
Common Mistakes to Avoid When Repairing Ceramic Figurines
Using Too Much Glue
Excess adhesive creates messy seams and can make pieces slide out of alignment. Use the smallest amount that creates full contact.
Skipping the Dry Fit
Never assume you know where every shard goes. Ceramic pieces can be sneaky. Dry fitting helps prevent backwards ears and crooked paws.
Moving the Piece Too Soon
Handling the figurine before the adhesive fully cures can weaken the joint. Give the repair time, even if the dog looks ready for its comeback tour.
Ignoring Safety
Gloves, ventilation, and careful cleanup matter. Adhesives can irritate skin, and ceramic shards can cut. A beautiful repair should not come with a bandage collection.
Expecting Perfection
Home repairs often leave small visible signs. That is normal. The goal is a stable, attractive repair, not a time machine.
A 500-Word Personal Experience: What My Broken Ceramic Dog Taught Me
The first time I broke a ceramic dog, I reacted as if I had personally betrayed the entire canine kingdom. It was a small brown figurine with floppy ears, the kind of object that probably cost very little but somehow carried the emotional weight of a family heirloom. It had sat on a bookshelf for years, quietly judging my dusting habits. One ordinary afternoon, I reached for a book, bumped the shelf, and watched the dog perform a short, tragic dive onto the hardwood floor.
The sound was ridiculous: one sharp crack, followed by tiny skitters as pieces ran in different directions. I froze. Then I did what many mature adults do in a crisis: I said, “No, no, no,” to an inanimate object, as though negotiation might reverse gravity.
At first, I wanted to fix it immediately. I grabbed the largest pieces and tried to match them while my hands were still shaky. That was mistake number one. Emotional repair and ceramic repair move at different speeds. The dog needed glue; I needed a minute. So I made coffee, took a breath, and came back with a towel, a flashlight, and a more respectful attitude toward physics.
The break was not as hopeless as it looked. One ear had snapped off, one front paw had separated, and a small chip was missing from the chest. I dry fit the pieces several times before opening the glue. That step felt oddly comforting. Every piece that clicked into place seemed to say, “See? Not everything is lost.” I used a gel adhesive for the ear and paw, then supported the body with a folded dish towel so the repaired paw would not bear weight too soon.
The hardest part was waiting. I kept wanting to touch it, test it, admire it, worry at it. But I left it alone overnight. The next morning, the little dog was whole again, though not perfect. A fine line ran across one ear. The chest chip was still visible. From one angle, the repaired paw looked slightly more determined than the others. But the figurine had not lost its charm. In fact, it had gained a tiny biography.
That experience changed how I think about broken sentimental objects. I used to believe repair meant hiding damage so well that nobody could tell anything happened. Now I think repair can mean making an object stable enough to keep telling its story. The crack is not always the enemy. Sometimes it is proof that something was loved enough to save.
My ceramic dog went back on the shelf, but not in the same risky spot. I placed it on a wider ledge with a little removable putty under the base. Every time I saw it, I remembered not just the original gift, but also the afternoon I learned to slow down, gather the pieces, and trust that broken does not always mean finished. That may be a lot to learn from a small ceramic dog, but honestly, dogs have always been good teachers.
Conclusion: Broken Is Not the End of the Story
Being broken up about a broken ceramic dog makes perfect sense. Sentimental objects carry memory, humor, affection, and identity in ways that are hard to explain until one of them hits the floor. Fortunately, many ceramic figurines can be repaired with careful cleaning, dry fitting, the right adhesive, patient curing, and realistic expectations.
Whether you choose an invisible repair, a kintsugi-inspired gold seam, a rebuilt chip, or a memory-box retirement, the important thing is to honor the object without demanding perfection from it. A broken ceramic dog can become a repaired ceramic dog, a repurposed keepsake, or simply a reminder that the things we love are sometimes fragileand still worth loving.


