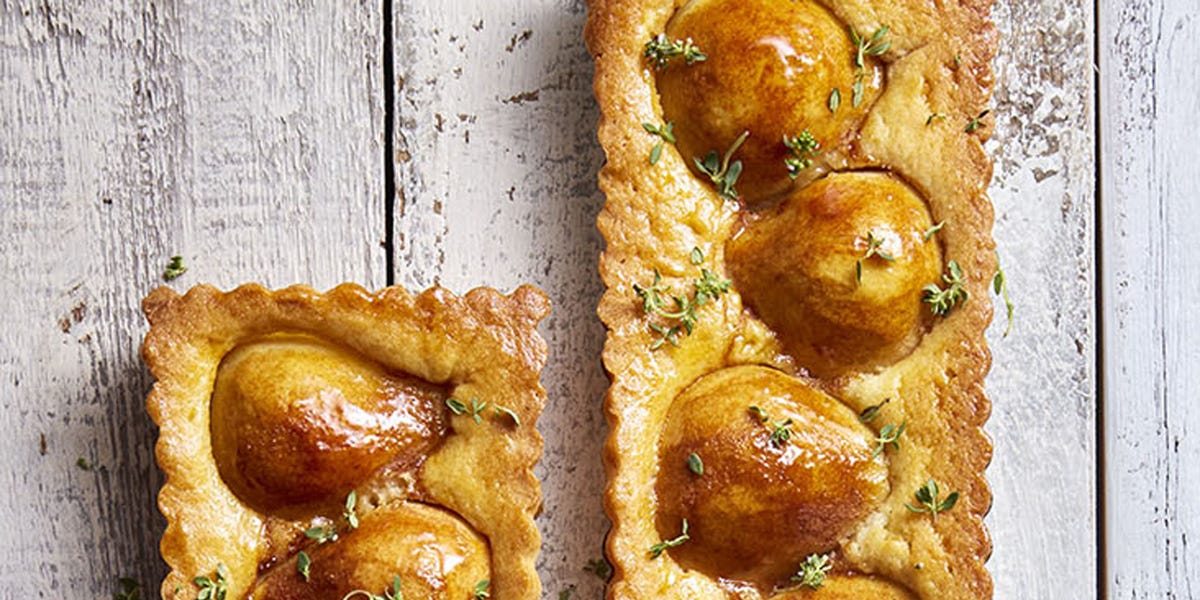

Some desserts walk into the room wearing sequins. Others arrive quietly, carrying a tray of buttery pastry, glossy pears, lemon perfume, and a tiny green sprinkle of thyme that says, “Yes, I am elegant, but I also know how to have fun.” This best lemon & thyme pear tart recipe belongs firmly in the second group. It looks bakery-window fancy, tastes like fall and spring decided to split rent, and is surprisingly simple to make at home.
The magic is in the balance. Pears bring soft floral sweetness. Lemon adds brightness, keeping the tart from becoming too sugary. Fresh thyme gives the dessert a delicate herbal note that makes people pause after the first bite and say, “Wait, what is that?” That is your cue to smile mysteriously, because every home baker deserves one dramatic moment.
This recipe uses puff pastry for a crisp, flaky base, a light lemon-thyme sugar, thinly sliced pears, and a shiny apricot glaze. It is ideal for Thanksgiving, brunch, dinner parties, holiday dessert tables, or any Tuesday that has been behaving badly and needs pastry-based correction.
Why This Lemon & Thyme Pear Tart Works
A great pear tart should be buttery, crisp, fragrant, and not soggy. That last part matters. Soggy pastry is basically dessert betrayal. This version solves the problem by keeping the filling simple, slicing the pears thinly, baking at a hot enough temperature to puff and brown the pastry, and finishing with a glaze after baking instead of drowning the tart beforehand.
The lemon zest is mixed into sugar so the citrus oils spread through the tart evenly. Fresh thyme is used sparingly because herbs in dessert should whisper, not grab a microphone. Apricot preserves make the perfect glaze because they melt smoothly, add shine, and complement pears without stealing the spotlight.
Ingredients for Lemon & Thyme Pear Tart
For the Tart
- 1 sheet frozen puff pastry, thawed but still cold
- 3 medium ripe but firm pears, such as Bosc, Anjou, or Bartlett
- 2 tablespoons fresh lemon juice
- 1 tablespoon lemon zest
- 1/3 cup granulated sugar
- 1 teaspoon fresh thyme leaves, finely chopped
- 2 tablespoons unsalted butter, melted
- 1/4 teaspoon fine sea salt
- 1 large egg, beaten with 1 teaspoon water
- 1 tablespoon coarse sugar, optional, for the pastry border
For the Apricot Glaze
- 1/3 cup apricot preserves
- 1 teaspoon fresh lemon juice
- 1 teaspoon water, if needed to loosen the glaze
- A few tiny thyme leaves, for garnish
Best Pears for Pear Tart
The best pears for this tart are ripe but still firm. If a pear is so soft that it bruises when you look at it emotionally, save it for smoothies, pear butter, or eating over the sink like a champion. For baking, you want fruit that holds its shape.
Bosc pears are excellent because they stay structured and have a honeyed flavor. Anjou pears are smooth, juicy, and reliable. Bartlett pears work well too, but they ripen quickly, so choose ones that are just barely tender near the stem. Red pears can be used for color, especially if you want a tart that looks like it has its own publicist.
How to Make Lemon & Thyme Pear Tart
Step 1: Thaw the Puff Pastry Properly
Thaw the puff pastry according to the package directions, preferably in the refrigerator. It should be flexible enough to unfold without cracking but still cold to the touch. Puff pastry rises best when the butter inside the layers remains chilled. Warm pastry can turn sticky and flat, which is tragic but preventable.
Step 2: Prepare the Baking Sheet
Preheat the oven to 400°F. Line a large baking sheet with parchment paper. Lightly flour your work surface and roll the puff pastry into a rectangle, about 10 by 12 inches. Transfer it to the prepared baking sheet.
Use a small knife to score a 1/2-inch border around the pastry, being careful not to cut all the way through. Prick the center of the pastry with a fork. This helps the middle stay flatter while the edges puff up into a golden frame.
Step 3: Make the Lemon-Thyme Sugar
In a small bowl, combine the granulated sugar, lemon zest, chopped thyme, and sea salt. Rub the mixture together with your fingers for about 20 seconds. This little move releases the lemon oils and wakes up the thyme. It is also the closest this recipe gets to aromatherapy, so enjoy it.
Step 4: Slice and Season the Pears
Cut the pears in half, remove the cores, and slice them thinly, about 1/8 inch thick. You may peel them if you prefer a softer, more classic look, but leaving the skins on adds color and texture. Toss the pear slices gently with lemon juice to prevent browning and add brightness.
Step 5: Assemble the Tart
Brush the center of the pastry lightly with melted butter. Sprinkle about half of the lemon-thyme sugar over the center, staying inside the border. Arrange the pear slices in overlapping rows or a loose fan pattern. Do not worry about perfection; pears are naturally beautiful, and pastry is very forgiving.
Brush the pears with the remaining melted butter, then sprinkle the rest of the lemon-thyme sugar over the top. Brush the pastry border with egg wash and sprinkle with coarse sugar if using.
Step 6: Bake Until Golden
Bake the tart for 28 to 35 minutes, or until the pastry is deeply golden, puffed around the edges, and crisp on the bottom. The pears should be tender and lightly caramelized at the edges. If the pastry border browns too quickly, loosely tent the edges with foil during the final minutes.
Step 7: Glaze and Finish
While the tart bakes, warm the apricot preserves with lemon juice in a small saucepan over low heat or in the microwave for a few seconds. Stir until smooth. If the glaze is too thick, add a teaspoon of water.
When the tart comes out of the oven, let it cool for 10 minutes. Brush the warm pears with the apricot glaze. Add a few tiny thyme leaves on top for a fresh finish. Slice and serve warm or at room temperature.
Recipe Card: Lemon & Thyme Pear Tart
Prep Time: 25 minutes
Cook Time: 30 minutes
Total Time: 55 minutes
Servings: 8
Difficulty: Easy to moderate
Best For: Fall desserts, brunch, holidays, dinner parties, and make-ahead entertaining
Pro Tips for the Best Pear Tart
Keep the Pastry Cold
Puff pastry depends on cold butter trapped between thin layers of dough. When the tart hits the oven, the water in the butter turns to steam, pushing those layers upward. If the pastry gets warm before baking, the butter melts too soon and the tart may bake up greasy instead of flaky. If your kitchen is warm, chill the assembled tart for 10 minutes before baking.
Do Not Overload the Pears
It is tempting to pile on fruit like you are building a pear skyscraper, but too much fruit releases too much moisture. A single generous layer is best. Overlap the slices slightly so they look full without smothering the pastry.
Use Fresh Thyme, Not Dried
Fresh thyme tastes delicate, citrusy, and softly herbal. Dried thyme is stronger and more savory, which can make the tart taste like it accidentally wandered into a roast chicken recipe. If dried thyme is all you have, use only a tiny pinch.
Glaze After Baking
Adding the apricot glaze after baking gives the tart a glossy finish without making the pastry soggy. It also makes the pears look polished and professional, like they had a spa day.
Flavor Variations
Honey Lemon Pear Tart
Replace 2 tablespoons of the sugar with honey. Drizzle it lightly over the pears before baking, then finish with a small extra drizzle after the tart cools. Honey pairs beautifully with thyme and makes the tart taste warm and floral.
Almond Pear Tart
Spread a thin layer of almond cream or almond paste under the pears before baking. Keep the layer thin so the pastry can bake through. This variation gives the tart a French bakery feel and adds nutty richness.
Ginger Pear Tart
Add 1/2 teaspoon freshly grated ginger or 1/4 teaspoon ground ginger to the lemon-thyme sugar. Ginger brings a gentle heat that works especially well for fall and winter gatherings.
Cheese Board Pear Tart
For a sweet-savory appetizer version, reduce the sugar slightly and add small crumbles of goat cheese around the pears before baking. Finish with honey, thyme, and a pinch of flaky salt. It tastes like a cheese board put on a tuxedo.
What to Serve with Lemon & Thyme Pear Tart
This tart is lovely on its own, but it also plays well with creamy, cool, and lightly tangy sides. Serve slices with vanilla ice cream, lightly sweetened whipped cream, crème fraîche, Greek yogurt, or mascarpone. For brunch, pair it with coffee, black tea, or sparkling apple cider. For dessert after dinner, it works beautifully beside a simple cheese plate with aged cheddar, brie, or goat cheese.
If you want a holiday dessert spread, serve this pear tart with pumpkin pie, apple crisp, chocolate mousse, or lemon bars. It brings a lighter, brighter option to the table, which guests appreciate after a big meal.
How to Store and Reheat Pear Tart
This tart is best the day it is baked, when the pastry is at its crispiest. Store leftovers loosely covered in the refrigerator for up to 3 days. Avoid wrapping the tart tightly in plastic while it is still warm because trapped steam softens the pastry.
To reheat, place slices on a baking sheet in a 350°F oven for 8 to 10 minutes. This helps revive the crispness. The microwave works in emergencies, but it will soften the pastry. Use it only if dessert urgency has reached siren level.
Can You Make Lemon & Thyme Pear Tart Ahead?
Yes, with a little strategy. You can prepare the lemon-thyme sugar one day ahead and store it in an airtight container. You can also thaw the puff pastry overnight in the refrigerator. Slice the pears shortly before assembling so they stay fresh and attractive.
If you need to bake the tart ahead, bake it up to 6 hours before serving and leave it at room temperature. Rewarm it briefly in the oven before serving, then refresh the glaze with a light brush of warm apricot preserves.
Common Mistakes to Avoid
Using Overripe Pears
Overripe pears become mushy in the oven and release extra juice. Choose pears that give slightly near the stem but still feel firm through the body.
Skipping the Border
The scored border helps create a raised edge that frames the tart and keeps the pears in place. Without it, the pastry may puff unevenly.
Not Docking the Center
Pricking the center with a fork lets steam escape and prevents the middle from ballooning too much. A little puff is fine. A pastry blimp is less ideal.
Adding Too Much Thyme
Thyme is delicious, but it is powerful. Use just enough to add fragrance. The goal is “fresh and intriguing,” not “dessert wearing herb cologne.”
Frequently Asked Questions
Can I use pie crust instead of puff pastry?
Yes. A buttery pie crust or sweet tart dough works well, but the texture will be different. Puff pastry gives a lighter, flakier result, while pie crust creates a sturdier, more classic tart.
Do I have to peel the pears?
No. Peeling is optional. Leaving the skins on adds color and helps the slices hold their shape. If you want a more refined texture, peel them.
Can I use canned pears?
You can use canned pear halves in a pinch. Drain them very well and pat them dry before slicing. Because canned pears are softer and sweeter, reduce the sugar slightly.
Can I make this tart gluten-free?
Yes, use a gluten-free puff pastry or gluten-free pie crust. Baking times may vary depending on the brand, so watch for a golden, crisp crust.
Why is my tart soggy?
The most common causes are overly ripe pears, too much fruit, warm puff pastry, or underbaking. Use firm pears, keep the pastry cold, and bake until the bottom is crisp and golden.
Experience Notes: What This Tart Teaches You in the Kitchen
Making a lemon & thyme pear tart is one of those baking projects that feels more impressive than stressful, which is exactly the kind of kitchen magic most of us need. It teaches you how small details transform simple ingredients. A sheet of puff pastry, a few pears, lemon zest, sugar, and thyme do not look dramatic on the counter. They look like you forgot half the grocery list. But once they meet heat, butter, and a little patience, they become a dessert that looks worthy of a glass cake stand.
The first lesson is temperature. Puff pastry is a tiny engineering project disguised as dough. Keeping it cold is not fussy advice; it is the reason the tart rises into crisp, flaky layers. You learn quickly that pastry behaves better when you do not overhandle it. Roll it gently, move with confidence, and if it starts getting soft, give it a refrigerator break. Honestly, many people would also benefit from a refrigerator break, but that is a separate article.
The second lesson is restraint. Pears are gentle fruit. They do not need heavy spices, thick sauces, or dramatic amounts of sugar. Lemon and thyme work because they lift the pear flavor instead of covering it. When you taste the finished tart, you notice the pear first, then citrus, then a soft herbal finish. That layered flavor is what makes the recipe feel special.
The third lesson is presentation without panic. Arranging pear slices can sound intimidating, but it is really just overlapping fruit in a direction that looks pleasing. Rows, fans, diagonals, rustic scatter patterns they all work. Once the tart bakes and gets brushed with apricot glaze, even imperfect slices look intentional. This is one of the great secrets of baking: glaze forgives almost everything.
This recipe is also a reminder that dessert does not always need to be heavy. After a big meal, a pear tart feels light but still satisfying. It gives you butter, fruit, sweetness, and aroma without the “I need to lie down immediately” feeling. That makes it especially useful for holidays, when the dessert table is often crowded with rich pies, cakes, and cookies all competing for attention like reality show contestants.
Finally, this tart builds confidence. It is approachable enough for beginners but polished enough for experienced bakers to enjoy. You can make it for guests and still have time to clean the kitchen, set the table, or pretend you are the kind of person who always has fresh thyme on hand. And when someone asks for the recipe, you can hand it over proudly, knowing the tart did exactly what a great homemade dessert should do: make simple ingredients taste unforgettable.
Conclusion
The best lemon & thyme pear tart recipe is simple, elegant, and full of bright seasonal flavor. With flaky puff pastry, tender pears, fragrant lemon zest, fresh thyme, and a glossy apricot glaze, this tart delivers bakery-style beauty without requiring professional pastry skills. Keep the pastry cold, choose firm pears, use thyme lightly, and glaze after baking for the best result.
Whether you serve it warm with vanilla ice cream, cool with whipped cream, or at brunch with coffee, this lemon & thyme pear tart is the kind of dessert that quietly steals the show. It is crisp, juicy, buttery, citrusy, and just unusual enough to make people remember it. In other words, it is pearfection and yes, that pun had to happen.
Note: This article is an original, web-publishable recipe guide created from real baking principles, tested pastry techniques, and widely used pear tart methods. It is written in natural American English for SEO, readability, and practical home baking.


