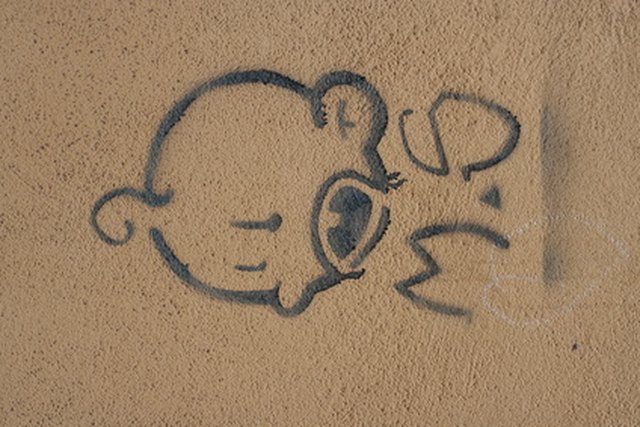

Stencil paint looks charming when it lands exactly where you planned. When it sneaks under the stencil, dries in the wrong spot, or outlives your design mood, it becomes the tiny, colorful villain of your wall, floor, shirt, glass jar, or furniture project. The good news: most stencil paint can be removed or softened without turning your surface into a crime scene. The trick is choosing the right method for the paint type and the surface underneath.
Before You Start: Identify the Paint and the Surface
The best way to remove stencil paint depends on two things: what kind of paint you used and what it was painted on. Many stencil projects use acrylic craft paint, latex wall paint, chalk paint, spray paint, fabric paint, or oil-based paint. Each one behaves differently once dry. Acrylic and latex paints usually respond to water, dish soap, rubbing alcohol, or gentle scraping. Oil-based paint and spray paint may require mineral spirits, paint thinner, acetone, or a commercial paint stripper.
The surface matters just as much. A razor blade is great on glass but terrible on a painted wall. A chemical stripper may help on metal or solid wood, but it can ruin plastic, soften finishes, or leave stains on porous stone. Translation: do not attack every stencil mistake like you are scraping ice off a windshield in January.
Basic Supplies You May Need
- Microfiber cloths or clean white rags
- Warm water and mild dish soap
- Plastic scraper, old credit card, or putty knife
- Soft-bristle brush or old toothbrush
- Rubbing alcohol or denatured alcohol
- Mineral spirits or paint thinner for oil-based paint
- Acetone or nail polish remover for glass, metal, or very stubborn spots
- Commercial paint remover or citrus-based stripper
- Fine-grit sandpaper or sanding sponge
- Painter’s tape, primer, and touch-up paint if repainting is needed
- Gloves, safety glasses, and a respirator or mask when using solvents or sanding
Important safety note: If the painted surface is in a home built before 1978, assume lead paint may be present unless testing proves otherwise. Avoid dry sanding, aggressive scraping, or heat guns on old paint until you know it is lead-safe. Lead dust is not a “DIY souvenir” you want in your lungs, carpet, or coffee mug.
Start With the Gentlest Method First
When removing stencil paint, always begin with the least aggressive approach. This protects the surface underneath and saves you from creating a bigger repair. Think of it like negotiating with the paint before calling in the heavy equipment.
Step 1: Blot or Wipe Fresh Paint Immediately
If the stencil paint is still wet, move fast. Blot the paint with a clean cloth instead of rubbing it. Rubbing spreads the paint and pushes it deeper into porous materials. For water-based acrylic or latex paint, dip a cloth in warm soapy water, wring it out well, and gently wipe the area. Repeat with a clean damp cloth, then dry the surface.
Step 2: Soften Dried Paint
For dried stencil paint, place a warm, damp cloth over the design for several minutes. This can loosen latex or acrylic paint enough for gentle scraping. Use a plastic scraper or the edge of an old gift card to lift the paint. Keep the scraper low and flat so you do not gouge the surface.
Step 3: Test a Solvent in a Hidden Spot
If soap and water do not work, test rubbing alcohol on an inconspicuous area. Rubbing alcohol can soften acrylic and latex paint, but it can also dull some finishes or remove wall paint. Apply a small amount to a cloth, not directly to the surface. Dab, wait a minute, and check for damage. If the surface looks fine, continue slowly.
How to Remove Stencil Paint From Painted Walls
Painted walls are common stencil victims. Maybe the stencil bled under the edges, maybe the quote in the dining room no longer feels inspirational, or maybe “Live, Laugh, Laundry” has served its time. Removing stencil paint from a wall requires patience because the base wall paint may come off with the stencil paint.
For Fresh Wall Stencil Paint
- Blot wet paint with a clean damp cloth.
- Mix warm water with a few drops of dish soap.
- Wipe gently in small circles, avoiding heavy pressure.
- Rinse with a clean damp cloth.
- Dry with a soft towel.
For Dried Wall Stencil Paint
Start with warm soapy water and a soft sponge. If the stencil remains, dab rubbing alcohol on a cloth and gently work the edge of the design. Do not soak the wall. Too much liquid can soften drywall paper, especially on matte or flat finishes. If the stencil paint is thicker than the wall paint, you can carefully level raised edges with a fine sanding sponge.
If a shadow or “ghost” remains, the cleanest fix is often to sand lightly, prime the area, and repaint. This is especially true if the stencil was dark and the wall is light. Paint has a way of remembering, like an elephant with a roller brush.
Best Fix for Wall Damage
If removal creates dull spots or uneven color, feather-sand the area, apply stain-blocking primer if needed, and repaint from corner to corner when possible. Touch-ups work best on newer paint, satin or eggshell finishes, and walls with leftover paint from the original job. Flat paint is less forgiving and may flash, meaning the repaired area catches light differently.
How to Remove Stencil Paint From Wood
Wood surfaces include furniture, trim, cabinets, floors, signs, and craft boards. The challenge is removing the stencil paint without stripping the wood finish underneath. If the wood is unfinished, removal is easier. If it is stained, varnished, or painted, proceed carefully.
Use Soap and a Plastic Scraper First
For acrylic or latex stencil paint on sealed wood, try warm soapy water and a plastic scraper. Let the damp cloth sit on the paint for a few minutes, then scrape gently with the grain. Avoid metal scrapers unless you are planning to refinish the wood, because they can leave scratches faster than a cat near new furniture.
Try Rubbing Alcohol for Acrylic Paint
Rubbing alcohol can soften many acrylic stencil paints. Apply it to a cloth and rub the paint gently. If the finish gets tacky, cloudy, or sticky, stop immediately. That means the alcohol is affecting the topcoat.
Use Paint Stripper for Heavy or Old Stencil Paint
For thick, stubborn, or oil-based stencil paint, a gel paint stripper may be the best option. Gel formulas cling to vertical surfaces and give you more control. Apply according to the product directions, wait for the paint to bubble or soften, then scrape with a plastic or putty knife. Clean away residue thoroughly before refinishing.
Sand and Refinish When Needed
If the stencil has soaked into unfinished wood grain, sanding may be unavoidable. Start with fine-grit sandpaper and work with the grain. After removing the paint, wipe off dust, then stain, seal, or repaint the wood. For hardwood floors, be extra cautious. A tiny stencil mistake should not become a full-room sanding saga unless absolutely necessary.
How to Remove Stencil Paint From Glass and Mirrors
Glass is one of the easiest surfaces for stencil paint removal because it is nonporous and hard. That does not mean you should go wild with a razor like an action hero in a hardware aisle. The goal is to loosen the paint and scrape safely.
Use Warm Soapy Water and a Razor Blade
- Wet the painted glass with warm water and dish soap.
- Keep the area slippery while you work.
- Hold a fresh razor blade at about a 45-degree angle.
- Push gently under the paint edge.
- Wipe away loosened paint and repeat.
Never scrape dry glass. Keeping it wet reduces the risk of scratches. Use a new blade because a chipped or rusty blade can scratch glass.
Use Vinegar, Acetone, or Lacquer Thinner for Stubborn Paint
Hot white vinegar can help loosen water-based paint. For spray paint, frosted glass paint, or stubborn stencil paint, acetone or lacquer thinner may work better. Apply solvent to a cloth, keep it away from painted frames or plastic seals, and use good ventilation. Do not use acetone on acrylic “glass” or plastic windows because it can cloud or melt the surface.
How to Remove Stencil Paint From Fabric
Fabric stencil paint is designed to stay put, which is wonderful for custom tote bags and less wonderful for accidental smears on jeans. Act quickly if the paint is fresh.
Fresh Paint on Fabric
- Scrape off excess paint with a spoon or dull knife.
- Rinse from the back of the stain with cool water.
- Apply dish soap or liquid laundry detergent.
- Gently work the fabric with your fingers or a soft brush.
- Rinse and repeat before laundering.
Do not put the item in the dryer until the stain is gone. Heat can set paint permanently, and then your shirt becomes modern art whether you wanted that or not.
Dried Paint on Fabric
For dried acrylic or latex paint, scrape off what you can, then dab the stain with rubbing alcohol. Blot from the outside toward the center. For oil-based paint, use the thinner recommended on the paint label, but test first and avoid delicate fabrics. If the item is dry-clean-only, take it to a professional and tell them exactly what type of paint was used.
How to Remove Stencil Paint From Concrete, Brick, or Stone
Concrete, brick, and stone are porous, which means stencil paint can sink into tiny holes. Outdoor stencils on patios, basement floors, garden pavers, and masonry walls may need a stronger approach.
Start With Scrubbing
Use warm water, dish soap, and a stiff nylon brush. Avoid wire brushes on soft stone because they can leave marks or metal residue. Rinse thoroughly and let the surface dry.
Use a Masonry-Safe Paint Remover
If scrubbing does not remove the stencil, use a paint stripper labeled for concrete, masonry, brick, or stone. Apply it according to the directions, let it dwell, then scrub or scrape the softened paint. Rinse thoroughly so residue does not interfere with future coatings.
Pressure Washing Can Help Outdoors
On exterior concrete or brick, pressure washing may remove loosened paint. Use caution around mortar joints, older brick, and decorative stone. Too much pressure can damage the surface. When in doubt, start with a lower setting and increase gradually.
How to Remove Stencil Paint From Metal
Metal is generally durable, but it can scratch or rust if handled poorly. Removing stencil paint from metal signs, trays, furniture, hardware, or decorative pieces usually involves scraping, solvent, or stripper.
For Small Metal Items
If the item is unpainted metal and heat-safe, soaking it in hot water can soften some water-based paints. After soaking, scrape gently with a plastic scraper or nylon brush. Dry the metal completely to prevent rust.
For Stubborn Paint
Use mineral spirits for oil-based paint or a commercial paint stripper for heavier coatings. Apply the product, allow it to work, then scrape away softened paint. Wear gloves and eye protection. After removal, clean the metal, dry it well, and apply primer or protective coating if needed.
How to Remove Stencil Paint From Plastic
Plastic is tricky because many solvents that remove paint can also damage plastic. Acetone, lacquer thinner, and strong paint removers can soften, cloud, or melt plastic surfaces.
Safe First Steps
- Wash with warm soapy water.
- Use a plastic scraper to lift edges.
- Try rubbing alcohol on a hidden area.
- Use a nylon brush for textured plastic.
If rubbing alcohol causes dullness or stickiness, stop. For valuable plastic items, it may be better to repaint the surface than to chase every last speck of stencil paint.
Common Mistakes to Avoid
Using the Strongest Chemical First
Going straight to acetone or paint stripper can cause avoidable damage. Start mild and move stronger only when needed.
Skipping the Spot Test
A hidden test area tells you whether a cleaner will remove only the stencil paint or everything else too. Five minutes of testing can save hours of repair.
Scrubbing Too Hard
Heavy scrubbing can create shiny spots on painted walls, scratches on wood, and fuzzing on fabric. Let the cleaner do the work.
Mixing Chemicals
Never mix cleaning products or solvents. Some combinations can create dangerous fumes. Use one product at a time, rinse or wipe thoroughly, and ventilate the area.
Ignoring Ventilation
Solvents and paint removers can produce strong fumes. Open windows, use fans, and wear appropriate protection. Your lungs are not optional accessories.
When Repainting Is Better Than Removing
Sometimes the smartest way to remove stencil paint is to stop removing it. If the stencil is on a painted wall and the base coat is coming off, repainting may be faster and cleaner. Sand raised edges, wipe away dust, prime if the stencil color is dark, and apply two thin coats of wall paint.
For furniture, repainting can also be the best option if the stencil paint has bonded tightly to the finish. Light sanding and a quality primer can create a smooth surface for a fresh design. Consider this the DIY version of “new year, new me,” except the dresser does not need a gym membership.
Real-World Experience: What Actually Works When Removing Stencil Paint
In real home projects, stencil paint removal is rarely as neat as a product label makes it sound. The most successful jobs usually start with patience, not power. One common example is a painted accent wall with a repeating stencil pattern. The homeowner tries to wipe away one crooked section and discovers that the stencil paint is tougher than the wall paint underneath. In this case, rubbing alcohol may remove the stencil, but it can also dull the base paint. The practical solution is often to remove the raised texture, prime the pattern, and repaint the wall. It feels less dramatic than “chemical removal,” but it usually looks better.
Another experience comes from wood furniture. A stenciled tabletop may look cute for a few years, then suddenly feel like it belongs in a country kitchen museum. On sealed wood, warm soapy water may do almost nothing once acrylic paint has cured. Rubbing alcohol can help, but only if the clear finish is strong enough to tolerate it. If the stencil sits on top of polyurethane, careful scraping and light sanding may remove the design. If the paint has settled into the grain, a full sand-and-refinish job gives the most professional result. The lesson: wood remembers everything, including your 2 a.m. craft phase.
Glass is usually the most satisfying surface. Dried stencil paint on a mirror, jar, or window often comes off cleanly with soapy water and a razor scraper. The key is keeping the glass wet and using a fresh blade. People run into trouble when they scrape dry or use an old blade with a nick in it. That tiny nick can leave a permanent scratch. On frosted spray stencil designs, acetone or lacquer thinner may be needed, but it should be kept away from painted trim and plastic parts.
Fabric is the least predictable. If the paint is fresh, quick rinsing and detergent can save the item. If the paint has dried and the garment has gone through the dryer, expectations should be lowered to a respectful crouch. Rubbing alcohol may fade the stain, but fabric paint is designed to bond with fibers. At that point, the best fix may be covering the mistake with a larger stencil, embroidery, a patch, or confidently telling people it is “intentional mixed-media fashion.”
Concrete and brick usually require the most muscle. A stencil on a patio or garage floor may need scrubbing, masonry-safe stripper, and pressure washing. Because porous surfaces absorb paint, a faint shadow may remain even after the top layer is gone. If the area is large, it may be easier to clean the whole surface and apply a fresh coating or stain rather than obsess over one ghost image. Outdoor surfaces are forgiving, but only when the repair blends with the surrounding area.
The biggest takeaway from hands-on stencil paint removal is simple: match the method to the surface. Do not use a razor on drywall, do not pour acetone on plastic, do not sand old paint without checking for lead risk, and do not expect one magic cleaner to solve every problem. Start gentle, test first, work slowly, and know when repainting is the smarter finish. In DIY, victory is not always removing every molecule of paint. Sometimes victory is making the surface look good again and pretending the whole thing was part of the plan.
Conclusion
Learning how to remove stencil paint is mostly about restraint. Begin with warm water, dish soap, and gentle scraping. Move to rubbing alcohol, mineral spirits, acetone, or paint stripper only when the paint type and surface can handle it. Painted walls may need touch-up paint. Wood may need sanding or refinishing. Glass often needs a razor and patience. Fabric needs fast action. Concrete and brick may require masonry-safe remover and scrubbing.
Stencil paint mistakes are annoying, but they are usually fixable. Work slowly, protect yourself, test before committing, and remember: every DIY project has at least one moment where you stare at the wall and whisper, “Well, that was educational.”
SEO Tags
Note: Always test any cleaner, solvent, scraper, or paint remover in a hidden area first. For homes built before 1978, check for lead paint risk before sanding, scraping, or disturbing old coatings.


