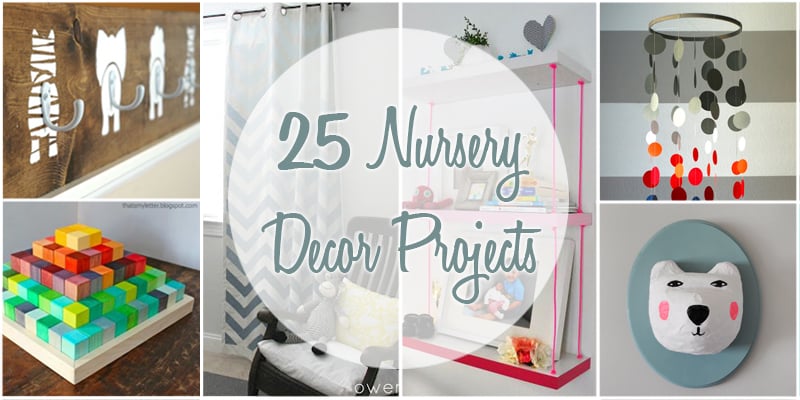

Decorating a nursery is one of those rare home projects where a tiny room carries enormous expectations. It should feel calm at 2:00 a.m., cheerful at 10:00 a.m., organized during a diaper emergency, and stylish enough that adults enjoy being there too. No pressure, right?
The best nursery decor projects balance personality with function. Designers frequently recommend starting with a flexible foundation, adding visual interest through paint, artwork, textiles, and storage, and choosing pieces that can grow into a toddler or big-kid room. That approach saves money and prevents the nursery from becoming a museum dedicated to one extremely specific cartoon giraffe.
Start With a Safe, Practical Nursery Plan
Before opening a paint can or buying twelve matching baskets, map the room into zones for sleeping, changing, feeding, dressing, and reading. Keep the crib simple: a firm, flat mattress with a snug fitted sheet and no pillows, bumpers, quilts, loose blankets, or stuffed toys. The American Academy of Pediatrics and the U.S. Consumer Product Safety Commission consistently emphasize a bare sleep space for infants.
Anchor dressers, bookcases, and other tall furniture to the wall. Choose cordless window coverings, keep the crib and climbable furniture away from windows, and route baby-monitor cords at least three feet from the sleep area. These details are not glamorous, but neither is discovering that the cute nursery setup has quietly created a climbing gym with electrical accessories.
For painting and renovation, ventilate the room, follow product instructions, and consider low- or zero-VOC finishes. In homes built before 1978, disturbing old paint can release lead dust, so test first and use lead-safe renovation practices. Pregnant people and children should stay away from work that disturbs suspected lead-based paint.
Wall and Ceiling Nursery Decor Projects
1. Build a One-Page Nursery Mood Board
Gather six to ten images, then identify one base color, two accent colors, a wood tone, and a repeating motif. Your motif might be clouds, woodland animals, wildflowers, or geometric shapes. Keeping the plan to one page prevents “theme drift,” the mysterious process by which a woodland nursery suddenly acquires rockets, sailboats, and a flamingo lamp.
2. Paint a Soft Arch Behind the Dresser
A painted arch creates an inexpensive focal point without covering an entire wall. Use a pencil, string, and level to mark the shape, tape the straight edges, and paint two thin coats. Position the arch behind an anchored dresser or reading chair rather than using it to frame loose decor above the crib.
3. Add a Scalloped Painted Border
Create a playful border around the upper third of the room using a cardboard circle template. Trace overlapping half-circles, outline them with painter’s tape where possible, and fill them with a small angled brush. A muted color keeps the effect sweet instead of making the walls look like a cupcake shop exploded.
4. Install a Removable Wallpaper Panel
Instead of wallpapering four walls, apply peel-and-stick wallpaper inside a large framed rectangle or on the wall behind a book nook. This delivers pattern with less cost and commitment. Choose a design with several colors already in it; those shades can guide your rug, baskets, art, and textiles.
5. Paint a Simple Storybook Mural
A mural does not require art-school credentials. Start with forgiving shapes such as rolling hills, clouds, stars, trees, or abstract rainbows. Sketch lightly in pencil, work from the largest color areas to the smallest details, and stop before every square inch becomes “interesting.” Negative space is decor too.
6. Turn the Ceiling Into a Quiet Feature
Paint the ceiling a pale sky blue, warm blush, misty green, or creamy yellow. For extra character, stencil widely spaced stars or tiny dots. A decorated ceiling gives babies something gentle to look toward while leaving walls flexible for storage. Use restrained contrast so nighttime feedings do not feel like entering a planetarium.
7. Create Budget-Friendly Wall Paneling
Use thin wood molding to form picture-frame rectangles, or install simple board-and-batten on the lower half of a wall. Caulk gaps, sand carefully, prime, and paint everything one color. This project adds architectural depth and can transition easily from nursery to child’s room, especially when paired with removable artwork.
Personalized Art and Display Projects
8. Frame Fabric Scraps as Coordinated Art
Place leftover curtain fabric, a vintage handkerchief, or patterned cotton inside lightweight frames. A trio of coordinating textiles looks polished and costs very little. Hang frames securely on a wall away from the crib and changing area, where curious hands cannot turn your tasteful gallery into a gravity experiment.
9. Make a Sentimental Mini Gallery Wall
Combine a family photo, a meaningful card, a favorite children’s-book illustration, and a small piece of handmade art. Use matching mats to unify different objects. Lay the arrangement on the floor first, photograph it, and transfer the spacing to the wall. Sentimental decor gives the room personality without relying on expensive matching sets.
10. Craft an Oversized Initial or Name Plaque
Cut an initial from smooth plywood or buy an unfinished wood letter. Paint it in a color pulled from the rug or wallpaper, then seal it with an appropriate water-based finish. Mount it securely on a non-crib wall. The goal is personalized charm, not a large wooden letter hovering dramatically over a sleeping infant.
11. Build Front-Facing Book Ledges
Shallow picture ledges display book covers like artwork and make favorite stories easy to rotate. Install the ledges into studs or with hardware rated for the wall and expected load. Place them near the reading chair but outside the crib zone. A row of colorful books becomes useful decor rather than a stack waiting to avalanche.
12. Make a Decorative Corner Mobile
Create a lightweight mobile from felt shapes, paper clouds, or wooden rings, then hang it from a secure ceiling hook in a reading or feeding cornernot within reach of the crib. Check knots and attachments regularly. Any mobile attached to a crib should follow its manufacturer’s instructions and be removed as the baby becomes able to push up or reach it.
Storage and Organization Nursery Projects
13. Refinish a Dresser as a Changing Station
A sturdy dresser can work longer than a dedicated changing table. Clean it, sand lightly, prime, and paint or stain it. Add a secured changing pad according to the product instructions, organize supplies within adult reach, and anchor the dresser to the wall. Adaptable furniture is especially valuable in small nurseries.
14. Upgrade Drawers With Playful Knobs
Replace ordinary hardware with painted wood knobs in several coordinated colors. For a more custom look, add tiny dots, stripes, or simple faces before sealing them. Tighten the knobs firmly and inspect them periodically. It is a fast project, yet it can make a plain dresser look as though it has suddenly developed a personality.
15. Create Labeled Closet Dividers
Cut rings from sturdy cardstock or thin wood and label them by size: newborn, 0–3 months, 3–6 months, and so on. Slide them over the closet rod to separate clothing. This project prevents the heartbreaking discovery of an adorable outfit two weeks after the baby has outgrown it.
16. Install a High, Secure Peg Rail
A wall-mounted peg rail can hold a diaper bag, lightweight clothing, or tomorrow’s outfit. Install it high enough to remain inaccessible to a mobile child and secure it into studs when possible. Avoid long straps, necklaces, or cords. Use the rail as adult-operated vertical storage, not as a toddler-accessible accessory buffet.
17. Assemble a Rolling Feeding and Diaper Cart
Give each tier a purpose: feeding supplies on top, diapers and wipes in the middle, backup clothing and burp cloths below. Add removable labels so the cart can later become art storage or a bedside organizer. Locking casters are useful, and the cart should be parked away from the crib and any route used at night.
18. Make Matching Basket Labels
Cut simple tags from leather scraps, sealed wood, or heavy washable fabric. Label baskets for blankets, toys, books, laundry, and supplies. Open baskets reduce visual clutter while preserving one-handed accessan important design feature when the other hand is occupied by a baby who has strong opinions about being put down.
19. Build Low-Profile Under-Crib Storage
Use shallow lidded bins or build slim plywood drawers with smooth edges and recessed pulls. Store outgrown clothing, spare sheets, or unopened supplies. Check the crib manufacturer’s clearance guidance, keep ventilation unobstructed, and make sure containers cannot interfere with hardware. Add felt pads so late-night drawer movement does not sound like road construction.
Comfort, Lighting, and Finishing Projects
20. Add a Cordless Blackout Window Layer
Install a properly fitted cordless blackout shade inside the window frame, then add decorative curtain panels if desired. Secure rods and hardware, avoid loose tie cords, and keep the crib and climbable furniture away from the window. The result improves light control without introducing dangling hazards.
21. Customize a Washable Area Rug
Choose a low-pile, washable rug and add a nonslip pad cut slightly smaller than the rug. For a DIY touch, use a manufacturer-approved fabric treatment or stencil on a plain rug intended for customization. Keep the surface smooth to reduce tripping during sleepy walks across the room.
22. Build a Parent-and-Baby Reading Nook
Place a supportive chair near book ledges, a small anchored table, and a soft but easy-to-clean rug. Add a basket for current favorites and a dimmable light positioned so its cord is inaccessible. This corner will serve feeding sessions first, picture books later, and eventually very serious negotiations about reading one more story.
23. Refresh a Lampshade With Fabric Trim
Upgrade a plain shade with cotton ribbon, bias tape, or a narrow fabric band attached using a heat-appropriate method. Keep embellishments away from bulbs and ventilation openings, and use the correct bulb type and wattage. The project can connect the lamp to the room’s palette without requiring a costly designer fixture.
24. Make a Removable Growth Chart
Paint measurement marks on a smooth wood board rather than directly on the wall. Add the child’s name, simple icons, or a subtle pattern, then mount the board securely. A portable growth chart can move with the family and avoids losing years of pencil marks when a landlord decides the security deposit is feeling adventurous.
25. Create a Rotating Memory Display
Use a secure wall frame with a hinged front or a fabric-covered display board placed outside the child’s reach. Rotate ultrasound images, birth announcements, family photos, and later, the child’s artwork. Limiting the display to a defined area keeps sentimental items visible without allowing every keepsake to colonize the entire room.
Experience-Based Lessons From Real-World Nursery Projects
The most successful nursery projects usually begin with function, not shopping. A room can photograph beautifully and still become frustrating if the wipes are across the room from the changing surface or the feeding chair has nowhere to hold a bottle. Before decorating, walk through an imaginary nighttime routine. Enter the room with one arm “occupied,” dim the lights, and notice which supplies would be difficult to reach. This simple rehearsal often changes the floor plan more effectively than another hour of scrolling through inspiration photos.
Another recurring lesson is that the largest visual decision should be made early. Choose the wallpaper, mural, rug, or paint treatment first, then allow it to set the palette. Buying small accessories before selecting a focal element often produces a collection of individually adorable objects that behave like strangers at a bus stop. A limited paletteusually one quiet base, two supporting colors, and a few natural texturescreates enough unity for handmade projects to look intentional.
DIY timing matters too. Painting, sanding, drilling, and furniture assembly are easier well before the final weeks of pregnancy or the baby’s arrival. Build in time for finishes to dry, odors to dissipate, and hardware to be rechecked. Complicated projects should be simplified ruthlessly. A clean painted arch completed safely is better than a half-finished mountain mural surrounded by ladders, drop cloths, and regret.
Storage works best when it reflects how items are actually used. Deep bins may look tidy but can hide small clothing and supplies. Shallow drawers, open baskets, front-facing books, and clearly labeled zones reduce searching. Leave some storage empty; babies attract equipment with the efficiency of a startup attracting email newsletters. Flexible storage also makes the nursery easier to convert as diapers give way to blocks, books, art materials, and collections of mysterious pebbles.
Durability is another practical difference between a nursery that merely looks good and one that remains pleasant. Washable paint, wipeable surfaces, low-pile rugs, sturdy hardware, and machine-washable textiles tolerate real family life. Delicate decor should be limited to areas adults control. Anything within a future crawler’s reach should be evaluated for stability, sharp edges, detachable parts, loops, and cords. The baby will eventually test the room more thoroughly than any design editor.
Finally, personalization is most effective when it tells a family story rather than simply displaying a name in twelve places. A framed note, a photo from the parents’ childhood, a handmade quilt displayed safely outside the crib, or a book chosen by a grandparent can give the space emotional depth. The nursery does not need to be finished all at once. Leaving room for future photos, gifts, and the child’s emerging interests keeps it from feeling frozen on opening day.
These 25 nursery decor projects show that a memorable baby room is built through thoughtful layers: a safe layout, a flexible color plan, practical storage, comfortable lighting, and a few meaningful handmade details. Focus first on what makes daily care easier, then add personality where it can be enjoyed safely. The finished room should support the family, evolve with the child, and remain calm enough that nobody resents the wallpaper during the fourth wake-up of the night.
SEO Tags


