
There are home upgrades that whisper, and then there are upgrades that dramatically improve your life every evening at 7:13 p.m. when the overhead light is either “interrogation room bright” or “why is it so gloomy in here?” A dimmer switch belongs in that second category. It gives you control, improves mood, can help reduce energy use, and makes a room feel a little more custom without requiring a full renovation or a reality-TV budget.
That said, installing a dimmer switch is not the same thing as changing throw pillows. Electricity has a no-nonsense personality. So while this guide explains how to install a dimmer switch, it focuses on the smart, safe, publishable version of the job: choosing the right dimmer, understanding what kind of switch setup you have, avoiding common compatibility mistakes, and following a careful installation overview without pretending every wall box in America is wired exactly the same way.
If you want the short version, here it is: buy the right dimmer for the right bulb and circuit, shut off the breaker, confirm the power is really off, document the old switch setup, follow the manufacturer’s wiring diagram for your exact model, and call a licensed electrician the second anything seems odd, crowded, warm, damaged, or suspiciously 1974.
Why Install a Dimmer Switch in the First Place?
A dimmer switch does more than create “restaurant lighting” in your dining room. It gives you flexible control over brightness throughout the day, which is especially useful in living rooms, bedrooms, dining spaces, and media rooms. A bright setting is handy for cleaning, homework, and finding the one black sock that vanished into the universe. A lower setting works better for relaxing, entertaining, or not blinding yourself during a late-night kitchen raid.
Dimmer switches can also support energy savings, particularly when paired with compatible LED lighting. And let’s be honest: they make a room feel more expensive. The light didn’t get a promotion, but it now behaves like it owns a tailored blazer.
Before You Install: Choose the Right Dimmer
The biggest mistake people make is assuming a dimmer is a dimmer is a dimmer. It is not. Picking the wrong device can lead to flickering, buzzing, poor dimming range, lights that pop on instead of fading smoothly, or a switch that simply refuses to cooperate like a moody teenager on chore day.
1. Match the Dimmer to the Bulb Type
If you’re using LED bulbs, you need a dimmer specifically rated for dimmable LEDs. Older dimmers were often designed around incandescent loads, and many of them do not play nicely with modern LEDs. Even when an LED bulb says “dimmable,” that does not automatically mean it will dim well with every switch. Compatibility still matters.
Incandescent and halogen bulbs are generally more forgiving. LEDs are more efficient, but they are also pickier. In real life, that means the package label and the dimmer model matter. If smooth performance is your goal, check the dimmer maker’s compatibility resources before you buy.
2. Know Whether You Have a Single-Pole or 3-Way Switch
This is the part that trips up a lot of homeowners. A single-pole switch controls one light or group of lights from one location. A 3-way setup controls the same light from two different locations, such as at the top and bottom of a staircase or at two entrances to a room.
If only one wall switch controls the light, you likely need a single-pole dimmer. If two switches control the same fixture, you need a dimmer that is designed for a 3-way application. Buy the wrong one and your installation will become an expensive lesson in reading packaging more carefully.
3. Check the Load Rating
Every dimmer has a maximum load rating. That rating should meet or exceed the total wattage of the bulbs or fixtures on that circuit. If the dimmer is underrated for the connected load, performance and safety can both suffer.
For example, if a dimmer controls several fixtures, don’t think only about one bulb. Add up the total connected lighting load. This matters even more in older homes where circuits may already be doing the absolute most.
4. Make Sure the Light Fixture Is Actually Dimmable
Some LED fixtures are dimmable, some are not, and some require very specific control types. Do not assume. Check the fixture label, bulb packaging, or product documentation. A non-dimmable fixture on a dimmer is basically a complaint waiting to happen.
Where a Dimmer Switch Should Not Go
Not every switch in your house wants to become a dimmer, and forcing the issue can cause problems.
- Ceiling fans: Use a fan speed control, not a standard light dimmer. A regular dimmer can damage the motor or cause poor performance.
- Most fluorescent lighting: Many fluorescent setups are not compatible with standard dimmers unless the fixture and ballast are specifically designed for dimming.
- Motor loads: Exhaust fans, attic fans, and similar motor-driven devices need controls made for that purpose.
- Non-dimmable LEDs: This one sounds obvious, yet it keeps happening.
The moral of the story: dimmers are for compatible lighting loads, not for every switch just because the room could use a little ambience.
Tools and Prep Work
You do not need a truck full of gear to install a dimmer switch, but you do need to be prepared. Typical basics include a screwdriver, a non-contact voltage tester, and the manufacturer’s instructions for the specific dimmer model. Read those instructions before touching the wall box, not halfway through while standing in a hallway wondering why there are more conductors than expected.
It also helps to have good lighting, a phone for taking reference photos, and enough patience to avoid the dangerous classic phrase: “Eh, that’s probably fine.” It is rarely fine.
How To Install a Dimmer Switch: The Safe, High-Level Overview
Because household electrical work can be risky, this section explains the overall process without turning into a wire-by-wire field manual. The exact connection method depends on your dimmer model, your circuit type, and the wiring already in the wall.
Step 1: Turn Off Power at the Breaker
Do not turn off the light switch and call it good. Shut off power at the breaker panel. Then verify the circuit is actually de-energized with a known working tester. This is not paranoia. This is good judgment wearing work boots.
Step 2: Remove the Wall Plate and Pull the Existing Switch Forward
Take off the cover plate, remove the mounting screws, and gently pull the existing switch out far enough to inspect it. Do not yank. You are investigating, not starting a lawn mower.
At this stage, look for clues about what kind of setup you have. Is it a single-pole switch? A 3-way switch? Is the box crowded? Do the wires look damaged, brittle, scorched, or poorly spliced? If anything looks wrong, stop and bring in a licensed electrician.
Step 3: Document the Existing Configuration
Before disconnecting anything, take clear photos. Label conductors if needed. In a 3-way circuit, identifying the common conductor matters. This simple step saves headaches later and makes reassembly far less dramatic.
Step 4: Compare the Existing Setup With the New Dimmer Instructions
This is where packaging and manuals earn their keep. Dimmers do not all wire the same way, and smart dimmers may have different requirements than standard models. Some devices are built for single-pole only, some support 3-way applications, and some have different installation expectations depending on whether a neutral is present.
Match the existing circuit to the manufacturer’s diagram for your exact device. If the diagram does not match what you see in the box, stop. Do not improvise with electrical wiring because you watched half a video and feel spiritually ready.
Step 5: Make the Connections According to the Manufacturer Diagram
Once you have confirmed the correct model and circuit type, make the connections exactly as directed by the manufacturer. Secure the device in the box without crimping, pinching, or overstuffing wires. Attach the wall plate, restore power, and test the dimmer slowly.
If the lights flicker, fail to dim smoothly, hum excessively, or behave oddly, turn the circuit back off and troubleshoot compatibility before assuming the device is defective.
Common Problems After Installation
Flickering or Flashing
This is usually a compatibility issue. The bulb may be dimmable but not compatible with that dimmer, or the dimmer may not be optimized for the LED load. In many cases, the fix is not redoing the installation. It is choosing a better-matched bulb-and-dimmer combination.
Buzzing or Humming
A little faint noise may happen in some systems, but noticeable buzzing is a sign to check bulb compatibility, load type, or the quality of the dimmer itself. Some loads are simply noisier than others, but “concert-level hum” is not the goal.
The Switch Feels Warm
Some dimmers run slightly warm during normal use. Hot is different. If the switch or faceplate feels unusually warm or hot to the touch, stop using it and have the wiring checked. Heat is a clue, not a personality trait.
Lights Don’t Turn On at All
Start with the simple possibilities: the breaker, the bulb, the compatibility, and the correct dimmer type. Also make sure the fixture itself is meant to dim. A mismatch can make a perfectly good installation act like it never received the memo.
Red Flags That Mean “Call an Electrician”
There is no prize for pushing through electrical uncertainty. Call a licensed electrician if any of the following show up:
- The box is overcrowded or the conductors are jammed in tightly.
- You discover aluminum branch-circuit wiring.
- The insulation looks brittle, cracked, frayed, or heat-damaged.
- The switch or plate smells burnt or feels hot.
- You are dealing with a confusing multi-switch arrangement and the wiring does not match the dimmer instructions.
- You are installing a smart dimmer and the setup requires conditions your box does not clearly meet.
Aluminum wiring deserves special respect. Devices for aluminum wiring must be specifically rated for it, and that work is best left to a qualified electrician. Likewise, if your current switch shows scorch marks, loose conductors, or mystery splices from home-improvement adventures past, back away slowly and call a pro.
Dimmer Switch Styles Worth Considering
Once you move beyond “on” and “off,” the dimmer world gets surprisingly fancy. Your best option depends on how you use the room.
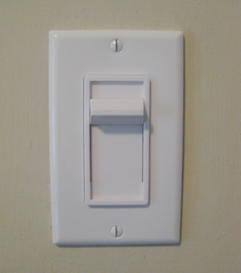
Slider Dimmers
These are popular because they are intuitive. Slide up for more light, down for less. No decoding required.
Rotary Dimmers
Classic, simple, and a little old-school in a charming way. Great if you like tactile controls and don’t need modern extras.
Preset Dimmers
These let lights return to a preferred brightness level instead of blasting back to full output every time. Tiny luxury, big payoff.
Smart Dimmers
Smart dimmers add app control, schedules, scenes, voice assistant support, and remote operation. They can be excellent, but only when the wiring conditions and product requirements line up correctly. “Smart” should describe the switch, not the gamble.
Does Installing a Dimmer Switch Increase Home Appeal?
Usually, yes. It is one of those small upgrades that buyers notice without necessarily naming out loud. Better lighting control makes rooms feel layered and intentional. In practical terms, it can make a dining room feel warmer, a living room feel cozier, and a bedroom feel less like a dentist’s office.
In homes with lots of LED lighting, dimmers also show that the electrical finish choices were made thoughtfully rather than by grabbing whatever was hanging on the nearest store pegboard.
Real-World Experience: What People Learn After Living With Dimmers
The funniest thing about dimmer switches is that most people think about them as a “nice extra” until they install one. Then, about three days later, they start wondering why every room doesn’t have one. It is the home-improvement equivalent of discovering that warm cookies exist and asking, “Wait, we could have been doing this the whole time?”
One common experience is that the installation itself is not usually the hardest part. The hardest part is buying the correct dimmer the first time. Plenty of people head to the store convinced they need “a dimmer,” only to discover there are options for single-pole circuits, 3-way circuits, LED loads, smart systems, companion controls, and fan-specific devices. That first aisle visit often feels less like shopping and more like speed dating with electrical terminology.
Another very relatable lesson is that LED compatibility matters more than people expect. Someone installs a shiny new dimmer, turns the breaker back on, and then gets a light show nobody asked for: flickering, popping on suddenly, or a dimming range that goes from “sunlight” to “still basically sunlight.” When that happens, the issue is not always poor installation. Often it is just a mismatch between the dimmer and the bulb. Once the right combination is in place, the whole room behaves better.
Many homeowners also notice that dimmers change how they use a room. A living room becomes more flexible for movie nights, casual conversation, and cleaning. A dining room feels less harsh. A bedroom becomes easier to wind down in at night. Even a hallway can feel more polished with softer evening lighting. It is one of those upgrades that affects everyday comfort in a way that is hard to appreciate until you have it.
There is also a psychological side to it. Lighting control makes a home feel intentional. You stop living under one default brightness setting and start adjusting the room to the moment. Bright for tasks, low for relaxing, somewhere in the middle for guests who arrived too early and caught you still assembling the snack board.
People with older homes often report a different experience: the project starts as a quick Saturday task and turns into a reality check about old boxes, awkward wiring, or switches that seem to have been installed during a historical period known as “before labels.” That does not mean dimmers are a bad idea. It just means older homes sometimes reveal their opinions slowly. In those situations, calling an electrician is not giving up. It is refusing to let a modest lighting upgrade become the origin story of a bigger repair bill.
And then there is the appreciation factor. Once a dimmer is in place and working properly, people tend to notice it every day in small ways. The room feels calmer. The light feels less blunt. The house looks better in the evening. It is not flashy, but it is useful, and useful upgrades are often the ones that age best. A dimmer switch will never go viral on social media, but unlike a lot of trendy home ideas, it keeps earning its place long after the excitement of installation is over.
Conclusion
Learning how to install a dimmer switch starts long before you remove a wall plate. The smartest approach is choosing a compatible device, understanding whether your circuit is single-pole or 3-way, verifying the lighting load, and treating safety as the first step rather than the boring step. Once those basics are in place, the installation itself becomes much more manageable.
The best dimmer switch projects feel easy not because electricity is casual, but because the prep work was solid. Buy the right dimmer, respect the breaker, verify the power is off, follow the manufacturer’s diagram, and do not ignore red flags like crowded boxes, hot switches, aluminum wiring, or damaged insulation. Get that part right, and you end up with better lighting, better atmosphere, and one of the most satisfying little upgrades you can make to a home.


