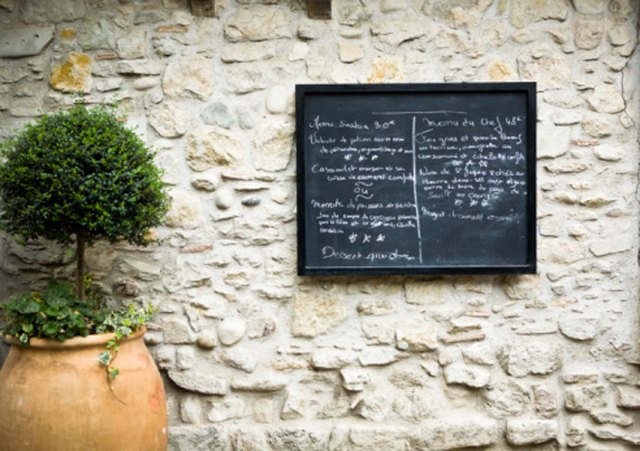

Chalkboard spray paint is one of those DIY products that feels almost suspiciously powerful. One minute you are holding a plain wooden board, a tired cabinet door, a thrift-store tray, or a boring flowerpot. A few coats later, it becomes a writable, erasable, message-ready surface. Suddenly, your kitchen has a menu board, your office has a brainstorming zone, and your kids have a legal place to draw on the wall. That last part alone deserves applause.
But while chalkboard spray paint is beginner-friendly, it is not magic in a can. The best results come from proper surface prep, smart spraying technique, enough drying time, and one often-forgotten step: conditioning the chalkboard surface before writing on it. Skip these basics and you may get streaks, peeling, ghost marks, or a finish that looks like it lost a wrestling match with a piece of chalk.
This guide explains how to use chalkboard spray paint correctly, what surfaces work best, how long to let it dry, how to season the finish, and how to avoid common mistakes. Whether you are making a DIY chalkboard wall, a labeled pantry system, a kids’ art board, or a reusable party sign, the goal is simple: smooth finish, clean writing, easy erasing, and zero DIY drama.
What Is Chalkboard Spray Paint?
Chalkboard spray paint is a specialty coating that creates a matte, writable surface designed for regular chalk. Unlike ordinary black paint, chalkboard paint dries to a harder, more slate-like finish that can accept chalk marks and erase more cleanly. Spray versions are especially useful for small and medium projects because they apply evenly without brush marks.
Most chalkboard spray paints are intended for interior use and can be applied to surfaces such as wood, metal, glass, plaster, hardboard, paperboard, and some plastics when properly prepared. The exact surface list depends on the brand, so always check the label before spraying. A can may look small, but it can usually cover several square feet, making it ideal for signs, trays, cabinet inserts, frames, doors, and decorative objects.
Best Projects for Chalkboard Spray Paint
Chalkboard spray paint works best when the surface is smooth, stable, and not constantly wet. Here are a few practical and fun ideas:
Kitchen Menu Boards
Paint a framed board, a cabinet panel, or the inside of a pantry door. Use it for grocery lists, weekly menus, coffee orders, or dramatic reminders like “Buy eggs or breakfast becomes sadness.”
Reusable Labels
Spray small wooden tags, jar lids, storage bins, or drawer fronts. Chalkboard labels are perfect when your organizing system changes often, which is a polite way of saying life happens.
Kids’ Art Boards
A plywood panel or framed board can become a reusable drawing space. Mount it low enough for children to use comfortably, and keep chalk nearby in a small cup or basket.
Home Office Message Boards
Create a chalkboard calendar, task board, or brainstorming area. It is excellent for people who like productivity systems but also enjoy erasing things with great satisfaction.
Party and Wedding Signs
Spray picture frames, foam boards, or wooden plaques to make signs for seating charts, drink menus, dessert tables, or welcome messages.
Tools and Materials You Need
Before you begin, gather everything in one place. Spray paint projects move faster when you are not wandering around looking for sandpaper while wearing one glove and holding a paint can like a confused statue.
- Chalkboard spray paint
- Primer suitable for your surface
- Fine-grit sandpaper or sanding sponge
- Tack cloth or lint-free cloth
- Mild soap and water or a suitable cleaner
- Painter’s tape
- Drop cloth, cardboard, or plastic sheeting
- Disposable gloves
- Safety glasses
- Respirator or mask rated for paint fumes
- Regular calcium carbonate chalk
- Chalk eraser or soft cloth
Step 1: Choose the Right Surface
The smoother the surface, the better your finished chalkboard will perform. Chalk catches on bumps, scratches, dust, and raised grain, so avoid rough or flaky surfaces unless you are willing to sand and repair them first.
Wood is one of the easiest materials to paint, especially plywood, MDF, and smooth craft boards. Metal can also work well, but it usually needs cleaning, light sanding, and primer for good adhesion. Glass and plastic are trickier because they are slick, so primer becomes especially important. Drywall and plaster can work for chalkboard walls, but they must be clean, patched, sanded, and primed before paint goes on.
If you are painting something old, check whether the existing coating is peeling. Chalkboard spray paint will not fix loose paint. It will simply become fancy loose paint. Remove unstable material, sand the area smooth, and clean away dust before continuing.
Step 2: Prepare the Work Area
Spray paint travels farther than optimism. Work outdoors or in a very well-ventilated space such as an open garage. Cover nearby floors, furniture, walls, and anything else you do not want wearing tiny black freckles. Cardboard boxes make excellent small spray booths for craft projects.
Keep the project away from open flames, pilot lights, heaters, and sparks. Aerosol paints are pressurized and often flammable, so safety is not the boring partit is the part that lets you keep doing projects tomorrow.
If you are sanding or painting in a home built before 1978, be careful. Older homes may contain lead-based paint. Do not sand, scrape, or disturb old painted surfaces unless you understand proper lead-safe practices or have consulted a qualified professional.
Step 3: Clean the Surface
Paint sticks best to surfaces that are clean, dry, and dull. Remove grease, dust, wax, fingerprints, and mystery grime. For many surfaces, mild soap and water are enough. For greasy cabinet doors or kitchen items, use a cleaner appropriate for the material, then rinse and let everything dry completely.
Do not rush this step. Dust under spray paint creates bumps. Grease creates adhesion problems. Moisture can interfere with drying. A clean surface is the quiet hero of every good paint job.
Step 4: Sand for Better Adhesion
Lightly sand glossy, rough, or previously painted surfaces. You do not need to remove every bit of old finish unless it is damaged. The goal is to dull the surface and give the primer something to grip. For wood, sanding also smooths raised grain and helps create a better writing surface.
After sanding, wipe the surface with a tack cloth or lint-free cloth. Do not leave sanding dust behind. Dust may look harmless, but under paint it becomes texture, and texture is not your friend when you want clean chalk lines.
Step 5: Prime the Surface
Primer is strongly recommended for bare wood, metal, glass, plastic, paperboard, hardboard, and any surface with stains or uneven color. It improves adhesion, helps the chalkboard paint cover evenly, and reduces the risk of peeling. Use a primer made for your material. For slick surfaces like glass or plastic, choose a bonding primer if the paint label recommends it.
Apply primer in light, even coats and let it dry according to the product instructions. If the primer leaves a rough texture, lightly sand it smooth after it dries. A smooth primed surface gives chalkboard spray paint a much better chance of looking professional instead of “I did this during a thunderstorm.”
Step 6: Shake the Can Thoroughly
Shake the chalkboard spray paint can for at least one to two minutes after the mixing ball starts rattling. This feels longer than expected. Your arm may begin questioning your life choices. Keep shaking anyway.
Chalkboard spray paint contains pigments and binders that must be mixed well for an even matte finish. If you do not shake enough, the paint may spray thin, uneven, or blotchy. Shake again during the project, especially if you pause between coats.
Step 7: Test Spray First
Before spraying your actual project, test the paint on scrap cardboard. This helps you check the spray pattern, distance, and flow. It also clears any initial spatter from the nozzle. A test spray takes five seconds and can save your project from a surprise paint sneeze.
Hold the can about 10 to 12 inches from the surface unless your product label says otherwise. If the paint looks dry and dusty, you may be too far away. If it puddles or runs, you are probably too close or spraying too heavily.
Step 8: Apply Light, Even Coats
Use steady, overlapping passes. Start spraying slightly before the edge of the project, move across the surface, and release the nozzle after passing the opposite edge. This prevents heavy buildup at the edges.
Keep the can moving. Do not hover in one spot. Chalkboard spray paint should be applied in two or more thin coats rather than one heavy coat. A heavy coat may drip, wrinkle, dry unevenly, or stay soft longer than expected. Thin coats dry smoother and create a more durable chalkboard finish.
Most projects need at least two coats. Glass or light-colored surfaces may need additional coats for full coverage. Follow the recoat window on the can. Some chalkboard sprays allow a second coat within about one hour or after a full waiting period, such as 24 hours. When in doubt, trust the label, not your impatience.
Step 9: Let the Paint Dry and Cure
Dry time and cure time are not the same thing. Dry to the touch means you can lightly touch the surface without paint transferring. Cure time means the coating has hardened enough for normal use. Chalkboard spray paint may feel dry in 15 to 20 minutes, but many products need about 24 hours before initial use, and some finishes continue curing for several days.
Temperature and humidity matter. Paint dries best in moderate weather with lower humidity and good airflow. Cold, damp, or very hot conditions can slow drying or affect the finish. Avoid spraying outside on windy days unless you want your chalkboard project to collect leaves, dust, and one heroic mosquito.
Step 10: Condition the Chalkboard Surface
This step is essential. Once the paint is fully dry according to the product instructions, condition the surface before writing on it. Take the side of a piece of regular chalk and rub it over the entire chalkboard. Cover the surface vertically and horizontally, then erase it with a soft cloth or felt eraser.
Conditioning leaves a fine layer of chalk dust in the microscopic pores of the finish. This helps future writing erase more evenly and reduces ghosting. If you skip conditioning and write directly on the fresh surface, your first words may leave a stubborn shadow. Choose those first words wisely if you ignore this advice, because “Taco Night” could haunt your wall forever.
Step 11: Use the Right Chalk
Regular calcium carbonate chalk is usually the safest choice for chalkboard-painted surfaces. Some paint labels warn against harder chalks or certain chalk markers because they may scratch or stain the finish. Liquid chalk markers can look beautiful, but they do not work equally well on all chalkboard paint surfaces. Test them in a small hidden area first.
For daily writing, keep it simple: standard chalk, soft eraser, gentle pressure. Chalkboard spray paint creates a usable writing surface, but it is still a painted coating, not an indestructible schoolhouse slate from 1892.
How to Clean a Chalkboard Spray Paint Surface
For routine cleaning, erase with a felt eraser or dry microfiber cloth. If chalk dust builds up, use a lightly damp cloth after the surface has fully cured. Some products recommend waiting several days before wet cleaning, so check your label.
Avoid harsh scrubbers, abrasive cleaners, and soaking the surface. Too much water can damage edges, especially on wood or paperboard projects. After a deep clean, condition the chalkboard again by rubbing chalk over the entire surface and erasing it.
Common Mistakes to Avoid
Spraying Too Heavy
Thick coats cause runs, tackiness, and uneven texture. Use multiple light coats instead.
Skipping Primer
Primer helps paint bond and cover evenly. It is especially important on slick, porous, stained, or bare surfaces.
Writing Too Soon
If the surface has not dried or cured long enough, chalk can damage or mark the finish. Let the coating harden before use.
Forgetting to Condition
Conditioning improves erasability and helps prevent permanent-looking first marks.
Using the Wrong Chalk Marker
Liquid chalk markers may stain some painted chalkboards. Test first before decorating the entire board with your finest café-style lettering.
Creative Examples for Using Chalkboard Spray Paint
A framed chalkboard near the front door can become a family command center for reminders, appointments, and cheerful notes. A painted tray can serve snacks during parties and label cheeses, cookies, or whatever mysterious dip someone brought. Cabinet doors can become hidden memo boards. Terra cotta pots can turn into labeled herb planters. A child’s tabletop can become a drawing surface for rainy afternoons.
For small businesses, chalkboard spray paint is useful for reusable sale signs, menu boards, booth displays, and photo props. For teachers, it can transform storage bins, classroom signs, and activity boards. For home organizers, it can make labels that change as often as your pantry does.
Troubleshooting Chalkboard Spray Paint Problems
The Finish Feels Rough
Roughness usually comes from spraying too far away, painting in hot or windy conditions, or dust landing on the surface. Let the paint dry, lightly sand with very fine sandpaper, wipe clean, and apply another light coat.
The Paint Is Dripping
Drips happen when the coat is too heavy or the can is too close. Let the paint dry completely, sand the drip smooth, and recoat lightly.
The Chalk Will Not Erase Cleanly
The surface may not have been conditioned, or the chalk may be too hard or waxy. Recondition the board with regular chalk. If liquid chalk marker caused staining, follow the marker instructions and test gentle cleaning methods carefully.
The Paint Is Peeling
Peeling usually points to poor prep, skipped primer, grease, dust, or painting over a glossy surface. Remove loose paint, sand, clean, prime, and repaint.
My Real-World Experience Using Chalkboard Spray Paint
The first time I used chalkboard spray paint, I was wildly overconfident. I had a small wooden board, one can of paint, and the dangerous belief that reading instructions was something other people did. I gave the board a quick wipe, sprayed one very enthusiastic coat, and stood back like I had just restored the ceiling of the Sistine Chapel. Ten minutes later, the surface had a drip shaped like Florida and a fuzzy texture that made chalk writing feel like dragging a crayon across toast.
That project taught me the first rule: chalkboard spray paint rewards patience. The second attempt went much better. I sanded the wood until it felt smooth, wiped off every speck of dust, sprayed primer, sanded lightly again, and then applied three thin coats of chalkboard paint. Instead of trying to cover everything in one pass, I moved the can steadily and let each coat build the finish gradually. The difference was huge. The surface looked flatter, darker, and more even, and the chalk actually glided instead of skipping.
I have also learned that the work area matters more than people think. Spraying outside on a breezy day sounds pleasant until a gust of wind pushes half the paint sideways and decorates your drop cloth, your shoes, and possibly the neighbor’s recycling bin. A cardboard spray booth or a protected garage opening makes small projects much easier. Good airflow is important, but uncontrolled wind is not your creative partner.
Another lesson: do not skip conditioning. I once made a cute kitchen sign and wrote “Dinner at 6” on it before rubbing chalk across the whole surface. The words erased, technically, but a ghost version remained like the board had developed a memory. After that, I always season the surface first. I rub chalk vertically, then horizontally, then erase. It feels unnecessary until you compare the results. A conditioned board simply behaves better.
For best results, I prefer using chalkboard spray paint on removable items rather than spraying directly on a wall. A board, cabinet insert, tray, or framed panel is easier to move, spray, dry, and replace later. Wall projects can look fantastic, but they require more masking, more ventilation planning, and more commitment. A removable board gives you flexibility. If you change your mind, you move the board. If you painted an entire wall and change your mind, congratulations, you now have a weekend plan.
My favorite project was a set of pantry labels made from small wooden rectangles. I sprayed them black, conditioned them, and tied them to baskets with twine. They looked charming for about three days, until someone labeled one basket “snacks I am hiding from myself.” That is the beauty of chalkboard surfaces: they invite usefulness, creativity, and just enough mischief to keep a home from looking like a catalog no one lives in.
The biggest takeaway from experience is simple: chalkboard spray paint is easy, but it is not a shortcut around preparation. Clean well, sand lightly, prime when needed, spray thin coats, let the finish cure, and condition before use. Do those things and your project will look intentional, not accidental. And when someone asks where you bought your chalkboard sign, you get the great pleasure of saying, “I made it,” while pretending it was no big deal.
Conclusion
Learning how to use chalkboard spray paint is mostly about respecting the process. Choose a smooth surface, clean it carefully, sand when needed, use the right primer, and apply several light coats instead of one heavy blast. Let the paint dry and cure, then condition the surface with chalk before writing. These steps turn a simple spray paint project into a durable, writable, erasable chalkboard surface that looks clean and functions well.
Chalkboard spray paint is a smart choice for DIY signs, pantry labels, kitchen menu boards, office planners, kids’ art spaces, and creative home décor. It is affordable, flexible, and funas long as you do not treat the can like a tiny fire extinguisher full of black paint. Spray lightly, wait patiently, and let the chalkboard magic happen.


