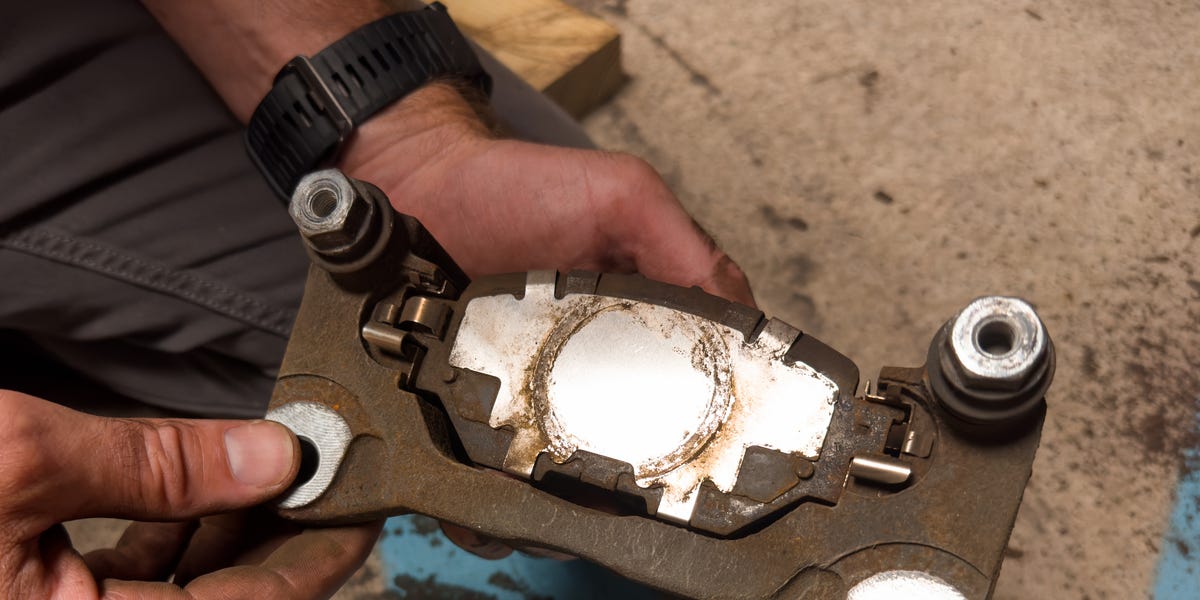

If your brakes have started squealing, grinding, or making your morning commute sound like a haunted shopping cart, you may be wondering whether you can handle the repair yourself. The answer is: sometimes, yes. Replacing your own brake pads and rotors is one of the most approachable DIY auto repair jobs for many car owners, especially if your vehicle uses standard disc brakes and you have the right tools, a safe workspace, and enough patience to resist turning one rusty bolt into a full emotional event.
This guide walks through how to change your car’s brakes yourself, what tools you need, the safety rules you absolutely should not ignore, and the common mistakes that turn a simple brake job into a long afternoon filled with regret and brake cleaner. The focus here is on disc brakes, since that is the setup most DIYers will deal with on modern passenger vehicles.
How Do You Know Your Brakes Need Replacing?
Before you grab a jack and start feeling like a weekend pit crew, make sure your brakes actually need service. Some of the most common signs include:
- Squealing or screeching when you brake
- Grinding noises, which can mean the pads are badly worn
- Vibration or shaking through the steering wheel or pedal
- Longer stopping distances
- A vehicle that pulls to one side during braking
- Visible thin brake pad material during inspection
In many vehicles, a small wear indicator on the pad will start making noise when the friction material gets low. If you wait until the brakes grind, you are often no longer dealing with “just pads.” At that point, the rotors may also need replacement. That is why catching brake wear early matters.
Should You Replace Brake Pads Only, or Pads and Rotors Together?
For many DIY brake jobs, replacing the pads and rotors together makes the most sense. Old rotors can be grooved, glazed, rusted, or uneven, and installing fresh pads against a tired rotor is a bit like putting brand-new running shoes on a treadmill made of gravel. Technically possible. Not exactly ideal.
If the rotor is below minimum thickness, badly scored, cracked, warped, or heat-damaged, replace it. If it is still within spec and in excellent condition, some people reuse it or have it resurfaced. But for the average home mechanic, new pads plus new rotors is often the cleaner, more predictable route.
Before You Start: Read This First
1. Check your owner’s manual or service information
Brake systems vary by vehicle. Some rear calipers require a screw-in piston tool. Some vehicles with an electronic parking brake need service mode before you can retract the caliper. Others use specific hardware, torque specs, or pad sensors. The general process is similar across many cars, but the details matter.
2. Replace brakes in pairs
Always replace the left and right brakes on the same axle together. Doing one side only can lead to uneven braking and uneven wear. Front and rear axles also wear differently, so do not assume all four corners need service at once.
3. Work safely or do not do it at all
Brakes are not the system to “kind of” fix. Use wheel chocks, a hydraulic jack, and jack stands on solid ground. Never trust the jack alone. Never crawl under a vehicle supported only by optimism and a floor jack. Optimism is not load-rated.
Tools and Supplies You’ll Likely Need
- Replacement brake pads
- Replacement rotors, if needed
- Jack and jack stands
- Wheel chocks
- Lug wrench or breaker bar
- Ratchet and socket set
- Torque wrench
- C-clamp or brake piston tool
- Screwdriver or small pry bar
- Brake cleaner
- High-temperature brake grease
- Bungee cord or hook to support the caliper
- Gloves, eye protection, and a dust mask
Depending on your vehicle, you may also need hex bits, Torx bits, a caliper bracket socket, an impact driver, or a screw-in rear piston tool.
How to Change Your Car’s Brakes Yourself
Step 1: Park, secure, and loosen the lug nuts
Park on a flat surface. Put the transmission in Park or in gear for a manual, set the parking brake if appropriate for the wheels you are not servicing, and chock the wheels. Loosen the lug nuts slightly before lifting the vehicle. Do not fully remove them yet.
Step 2: Lift the vehicle and remove the wheel
Use the correct jacking point. Raise the vehicle, place it securely on jack stands, and remove the wheel. Give the car a gentle stability check before getting to work. If it wobbles, stop and reset the supports.
Step 3: Inspect everything before disassembly
Now is the time to look for uneven pad wear, torn caliper slide pin boots, leaking brake fluid, deep rotor grooves, or heat spots. If one pad is much thinner than the other, a slide pin or caliper may be sticking. If you see fluid leaks or serious damage, this may be the point where the smart DIY move is calling a pro.
Step 4: Check the brake fluid reservoir
Before compressing the caliper piston, check the brake fluid reservoir under the hood. As the piston goes back in, the fluid level may rise. If the reservoir is already too full, you may need to remove a little fluid carefully. Keep the cap in place loosely if your vehicle instructions suggest it, and protect painted surfaces because brake fluid is not friendly.
Step 5: Remove the caliper
Locate the caliper bolts or guide pin bolts on the back of the caliper. Remove them and lift the caliper off. Do not let it hang by the brake hose. Support it with a hook, wire, or bungee cord.
This is one of the biggest beginner mistakes. The brake hose is strong, but it is not a hammock for your caliper.
Step 6: Remove the old pads and hardware
Slide out the old pads. Remove old clips or shims if your new pad kit includes replacements. Pay attention to how everything is arranged. Taking a quick photo is not a bad idea, even if you are feeling confident. Brake confidence has been known to disappear around reassembly time.
Step 7: Remove the caliper bracket and rotor, if replacing rotors
If you are changing the rotor, remove the caliper bracket bolts and take off the bracket. Then remove the rotor. Some rotors slide right off. Others act like they signed a long-term lease with the hub. Rust can bond them in place, so a few taps with a hammer may help break them free.
Once the rotor is off, clean rust from the hub face so the new rotor sits flush. A rotor mounted on a rusty, uneven hub can cause vibration later.
Step 8: Install the new rotor
Clean the new rotor with brake cleaner to remove protective oil. Install it on the hub. If needed, thread on a lug nut hand-tight to keep it in place while you work.
Step 9: Service the caliper bracket and slide pins
Clean the bracket where the pad hardware clips sit. Install the new clips from the pad kit. Inspect and lubricate the slide pins with the correct brake grease if your vehicle design allows for it. Make sure the pins move freely.
Do not smear grease on the pad friction material or rotor face. That is not “extra lubrication.” That is how you invent exciting new stopping distances.
Step 10: Compress the caliper piston
Use a C-clamp or piston tool to slowly compress the caliper piston back into the bore. Go slowly and evenly. On some rear brake setups, the piston must be turned while being pushed in. On vehicles with electronic parking brakes, you may need to place the system into service mode first.
If the piston resists severely, binds, or the rubber boot twists badly, stop and reassess. Forcing it can damage the caliper.
Step 11: Install the new pads
Fit the new pads into the bracket and confirm they seat properly in the new hardware. Some pads are directional or have specific inner and outer positions, so match them correctly. If your kit includes anti-rattle clips, shims, or wear sensors, install them as directed.
Step 12: Reinstall the caliper and bracket
Reinstall the bracket if removed, then position the caliper over the new pads and rotor. Tighten all fasteners to the manufacturer’s torque spec. This is not the place for guesswork or “that feels tight enough.” Use a torque wrench.
Step 13: Reinstall the wheel and torque the lug nuts
Put the wheel back on and hand-thread the lug nuts. Lower the vehicle until the tire just contacts the ground enough to keep it from spinning, then torque the lug nuts in the proper star pattern to spec. Fully lower the vehicle afterward.
Step 14: Pump the brake pedal before driving
This step is non-negotiable. Before moving the car, pump the brake pedal several times until it feels firm. This seats the pads against the rotor and restores pedal feel. If you skip this step and back out of the driveway immediately, you may get a very memorable lesson in why the brake pedal suddenly feels like a sponge.
Step 15: Check fluid and test carefully
Inspect the brake fluid reservoir and top off only with the correct type if needed. Then do a low-speed test in a safe area. Listen for abnormal noises, confirm normal braking, and verify that the car does not pull left or right.
Step 16: Bed in the brakes
New pads and rotors often need a break-in procedure, commonly called bedding. Follow the pad manufacturer’s instructions. In general, bedding involves a series of controlled stops to transfer an even layer of friction material to the rotor and promote smoother, quieter braking.
Common DIY Brake Job Mistakes to Avoid
- Using a jack without jack stands
- Replacing only one side of an axle
- Letting the caliper hang by the hose
- Forgetting to clean new rotors before installation
- Skipping slide pin inspection and lubrication
- Failing to torque bolts and lug nuts properly
- Not pumping the pedal before driving
- Ignoring signs of a bad caliper, leaking hose, or damaged hardware
- Trying to “wing it” on an electronic parking brake system
When You Should Not DIY Your Brake Repair
There is no shame in knowing your limits. You should consider professional service if:
- Your vehicle has an electronic parking brake and you do not have the right procedure
- The caliper is leaking or seized
- The brake pedal stays soft after proper installation
- You see damaged brake lines or torn hoses
- The rotor or hub fitment seems wrong
- You are dealing with drum brakes and have never done them before
- You do not have the correct tools or a safe work area
DIY auto repair should save money, not create a second repair bill plus a towing fee plus a story that starts with, “You are not going to believe what happened in my driveway.”
Is Replacing Your Own Brakes Worth It?
For many drivers, yes. Doing your own brake job can save labor costs, help you understand your vehicle better, and give you the deeply satisfying feeling of fixing something important with your own hands. It is one of the better entry points into DIY car maintenance because the parts are accessible on many vehicles and the repair is straightforward when everything comes apart as planned.
Of course, “as planned” is doing a lot of work there. Rusty bolts, stuck rotors, missing tools, and rear calipers that need to be twisted instead of compressed can all turn a simple repair into an advanced vocabulary exercise. Still, if you prepare well, follow instructions carefully, and prioritize safety, replacing brake pads and rotors at home is absolutely realistic for many car owners.
Final Thoughts
Learning how to change your car’s brakes yourself is one of those DIY skills that feels intimidating right up until the moment it starts making sense. Then it becomes a repeatable maintenance job instead of mysterious garage wizardry. The keys are simple: identify the problem early, buy quality parts, use the right tools, follow the vehicle-specific procedure, and never cut corners on safety.
If the job goes smoothly, you save money and gain confidence. If the job reveals a stuck caliper, damaged hose, or electronic parking brake complication, you still win by catching a safety issue before it gets worse. Either way, the goal is not just to replace parts. The goal is to keep your car stopping predictably, quietly, and safely every time you press the pedal.
DIY Brake Repair Experiences: What the Job Really Feels Like
The first time most people change their own brakes, the job feels like a mix of courage, YouTube confidence, and a small amount of fear disguised as enthusiasm. On paper, it sounds simple: remove the wheel, take off the caliper, swap the pads, maybe replace the rotor, put it all back together, and enjoy your money-saving glory. In real life, the experience is usually a little messier and a lot more educational.
A common first-timer experience is discovering that the hardest part is not the brakes themselves. It is often the little things around the brakes. Lug nuts that were tightened by a superhero with an impact gun. A rotor that refuses to leave the hub like it pays rent there. Caliper bolts hidden at an angle that seems designed by someone who dislikes knuckles. None of these issues are impossible, but they teach an important lesson fast: brake jobs reward preparation more than bravado.
Another real-world experience is realizing how useful it is to work on one side at a time. Even confident DIYers get halfway through a reassembly and suddenly wonder where a clip faces, how a shim sits, or whether the inner pad and outer pad just swapped identities. Having the untouched side available as a reference can save a surprising amount of guesswork and prevent the classic “extra hardware on the floor” moment.
Many people also notice that the emotional turning point in the job comes when the caliper piston has to be compressed. This is where the repair starts to feel like actual brake work instead of simple disassembly. If the piston goes in smoothly, confidence rises. If it fights back, the internal monologue usually changes tone immediately. That moment teaches another valuable DIY lesson: when something feels wrong, stop forcing it. Brakes reward patience. They do not reward stubbornness.
Then there is the famous post-installation moment: climbing into the driver’s seat, starting the car, pressing the brake pedal, and feeling it sink lower than expected before the pads seat. This is why experienced DIYers never skip the pedal-pumping step. Once the pedal firms up, the relief is immediate. You stop feeling like a person who may have made a terrible mistake and start feeling like someone who just successfully completed a real repair.
The low-speed test drive is another memorable part of the experience. Most DIYers listen to every tiny sound with the intensity of a bomb technician. A slight scrape? Panic. A normal bedding noise? Still panic, but quieter. Over time, you learn the difference between normal break-in sounds and genuine trouble signs. That kind of confidence only comes from doing the work carefully and paying attention.
In the end, the biggest experience people take away from a DIY brake job is respect. Respect for the braking system, respect for proper torque specs, respect for quality parts, and a huge respect for jack stands. It is satisfying work because it is meaningful work. When the car stops smoothly and quietly afterward, you do not just feel proud that you saved money. You feel proud that you handled a repair that actually matters every time the road demands a safe stop.
SEO Tags


