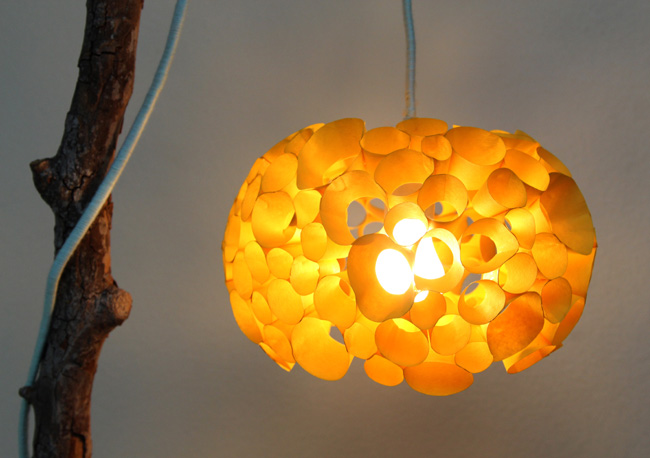

A coral-inspired lamp brings the relaxed charm of the coast into your home without requiring a beachfront address, a snorkeling license, or sand permanently hiding in your shoes. With its branching silhouette, chalky texture, and soft ambient glow, this DIY lamp can look like an expensive designer accessory while being built from ordinary craft materials and a dependable lamp kit.
The project combines a sturdy lamp base, flexible wire, lightweight filler, plaster cloth, paint, and a simple shade. The organic shape is forgiving, too. Real coral colonies grow as branches, pillars, plates, mounds, fans, and other irregular forms, so your sculpture does not need perfect symmetry. In fact, a slightly crooked branch may be the detail that makes the finished lamp look convincing rather than factory-produced.
This guide explains how to make a coral inspired lamp safely, shape a believable faux-coral base, create a durable finish, and choose proportions that make the lamp look polished rather than like an enthusiastic science-fair entry.
Why a Coral Inspired Lamp Works in So Many Rooms
Coral forms sit comfortably between sculpture and natural history. Their complex outlines add movement, yet a single-color finish keeps them from overwhelming a room. A white coral lamp can complement coastal, traditional, transitional, cottage, or minimalist interiors. Terracotta, sandy beige, faded blush, or deep navy can give the same design a more contemporary personality.
The lamp also delivers texture without demanding a busy pattern. Place it on a pale wood console for a breezy coastal look, on a dark dresser for high contrast, or beside a linen sofa where its irregular surface can play against softer fabrics.
Best of all, this is faux coral. You can admire reef-inspired shapes without removing anything from the ocean. NOAA describes many reef-building corals as colonies of tiny polyps that produce hard calcium-carbonate structures over time. Re-creating the form with art materials gives you the aesthetic while leaving the real reef exactly where it belongs.
Materials and Tools
Materials
- A stable wood, ceramic, resin, or weighted metal lamp base
- A UL-listed, indoor-rated make-a-lamp kit or prewired lamp assembly
- Threaded lamp pipe, washers, nuts, harp, and finial as required by the kit
- A medium-base LED bulb compatible with the socket
- Soft aluminum armature wire
- Aluminum foil, kraft paper, or lightweight paper filler
- Painter’s tape or masking tape
- Plaster cloth or plaster gauze
- Lightweight patching compound or acrylic modeling paste
- Acrylic primer or suitable spray primer
- Matte acrylic paint in white, ivory, coral, blush, beige, or another chosen color
- Optional darker and lighter paints for dimensional shading
- Clear matte water-based sealer
- A properly sized lampshade
- Felt pads for the bottom of the base
Tools
- Wire cutters
- Needle-nose pliers
- Scissors
- Small disposable bowl
- Craft brushes
- Fine-grit sanding sponge
- Drop cloth
- Protective gloves
- Safety glasses
- Dust mask for sanding
Plaster cloth is especially convenient for this project because it can be cut, briefly dipped in water, and layered over wire armatures and other forms. Once dry, it creates a rigid shell that is lighter and easier to sculpt than a solid mass of plaster.
Plan the Lamp Before You Start Sculpting
Before bending wire with the confidence of an abstract artist who has had three coffees, decide how the lamp will be assembled.
The safest and simplest approach is to begin with a commercially manufactured lamp base or a solid decorative vessel that can accept a listed lamp kit. Make sure the electrical cord has a clear route through or around the base and that the socket will remain centered and firmly supported.
UL evaluates portable lamps for risks including electric shock, fire, burns, instability, and mechanical failure. For a home project, choosing listed components and following the kit manufacturer’s instructions is far wiser than improvising electrical parts from the mysterious drawer where old chargers go to retire.
Test-fit the lamp pipe, socket, harp, shade, and finial before applying any sculptural material. Confirm that the switch remains accessible, the cord is not pinched, and the shade clears the coral branches.
How to Make a Coral Inspired Lamp Step by Step
Step 1: Establish a Stable Central Structure
Secure the threaded lamp pipe or prewired lamp assembly to the base according to the manufacturer’s directions. Do not cover access points, switches, fasteners, ventilation openings, or electrical connections with plaster.
If the kit requires electrical wiring beyond plugging together manufacturer-designed connectors, unplug everything before working and follow the included wiring diagram exactly. This Old House recommends inspecting sockets and cords for cracks, fraying, brittleness, corrosion, or other damage and avoiding work on energized wiring. Call a licensed electrician when you are uncertain about a connection.
Set the shade temporarily on the harp and study the overall height. The coral should appear to grow around the lamp stem, not attack the shade like a determined sea monster.
Step 2: Build the Main Coral Branches
Cut several lengths of aluminum armature wire. Wrap their lower ends securely around the non-electrical structural portion of the base or attach them to a separate support surrounding the lamp pipe. Never wrap wire around exposed electrical terminals or allow sculpting wire to damage the cord.
Form three to seven primary branches. Vary their height, direction, and angle. Natural branching corals develop primary and secondary branches, and coral colonies often resemble bushes, trees, fans, or antlers. Use that variety as permission to avoid ruler-straight repetition.
Keep the silhouette fuller near the lower half of the lamp and gradually narrower toward the socket. Leave several inches of open space below the bulb and shade hardware.
Step 3: Add Secondary Branches
Wrap shorter pieces of wire around the primary stems. Add forks, knobs, and blunt tips. Some branches can divide once; others may divide twice. Avoid placing every fork at the same height.
Rotate the lamp frequently while shaping. A coral base that looks magnificent from the front may resemble a startled chicken from the side. Viewing it from every direction helps create a balanced three-dimensional form.
Press down lightly on the base after adding several branches. If the lamp rocks or feels top-heavy, shorten the outer branches or add more weight inside the base before continuing.
Step 4: Bulk Out the Wire Framework
Wrap small amounts of crumpled foil or paper around the wire stems. Secure the filler with painter’s tape. Make the branches thicker where they meet the base and gradually thinner toward their tips.
Do not make every branch perfectly cylindrical. Add occasional bulges, flattened areas, and uneven transitions. Coral-inspired sculpture looks more realistic when its surface changes subtly rather than resembling a bundle of plumbing pipes wearing beach makeup.
Keep the finished framework relatively lean. Plaster cloth and texture compound will add more thickness than expected.
Step 5: Apply Plaster Cloth
Cut the plaster cloth into narrow strips before mixing or dipping anything. Pieces between 1 and 4 inches long are easier to control around small branches than one heroic strip that immediately wraps around your glove.
Dip one strip into water according to the product directions, remove excess water gently, and wrap it around a branch. Smooth the plaster with damp fingertips. Overlap each piece and cover the framework with at least two thin layers, adding a third layer around joints and the base.
Keep plaster away from the socket, cord, switch, threaded hardware, harp saddle, and any removable lamp components. Allow the sculpture to dry completely. Drying time depends on thickness, humidity, and the product used, so trust the manufacturer’s instructions rather than poking the lamp every twelve minutes.
Step 6: Refine the Surface
Once the plaster shell is hard and dry, inspect the branches for weak spots. Reinforce any flexible areas with additional plaster cloth.
Apply a thin coat of lightweight patching compound or acrylic modeling paste to visible seams. Use a stiff brush, sponge, wooden skewer, or fingertip to create small pores and irregular ridges. Avoid covering the lamp in identical dots; nature is wonderfully inconsistent.
For a cleaner designer finish, smooth most of the surface and reserve heavier texture for branch joints and tips. For a more rustic reef look, stipple the entire base.
Step 7: Sand Carefully
When the texture coat has dried fully, sand only the sharp points, major ridges, and distracting seams. Wear a dust mask and work over a protected surface.
The goal is not to make the coral glossy-smooth. Preserve enough texture to catch shadows after painting. A perfectly smooth coral lamp tends to look more like melted candle wax, which is a separate aesthetic adventure.
Step 8: Prime the Sculpture
Remove sanding dust with a dry brush or clean cloth. Apply a primer compatible with the plaster, filler, and base material. Primer improves paint adhesion and helps create an even finish over surfaces that absorb paint at different rates. Home Depot’s finishing guidance recommends cleaning, sanding when needed, removing debris, and using primer before the final coats.
Brush-on primer offers excellent control around electrical components. Spray primer can reach complicated branch intersections, but use it only in a well-ventilated location and follow all label precautions. Mask the socket, switch, cord, and threaded parts completely before spraying. Sherwin-Williams likewise recommends proper surface preparation and notes that primer can improve topcoat adhesion.
Step 9: Paint the Coral Finish
For a classic look, apply two thin coats of warm white or ivory acrylic paint. Thin coats preserve texture and are less likely to collect in branch intersections.
To add depth, mix a small amount of beige or gray into the base color. Brush this slightly darker mixture into crevices and around branch joints. Before it dries completely, soften the edges with a clean brush. Finish by dry-brushing a lighter color over raised texture.
Other attractive palettes include:
- Natural reef: ivory, sand, and pale taupe
- Blush coral: muted pink with cream highlights
- Modern terracotta: clay orange with a matte finish
- Moody coastal: navy or charcoal with subtle bronze accents
- Playful statement: turquoise, mustard, or glossy red
Allow the paint to cure fully before adding an optional matte sealer. A suitable craft sealer can help protect painted papier-mâché and sculptural surfaces from light handling and dust.
Step 10: Install the Bulb and Shade
Choose an LED bulb that matches the socket, fixture rating, desired brightness, and dimmer requirements. ENERGY STAR advises shopping by lumens for brightness and then selecting an efficient wattage. Certified LED products can produce light far more efficiently than traditional incandescent bulbs, making them a practical choice for a decorative lamp surrounded by craft materials.
Never exceed the maximum wattage marked on the socket or lamp kit. Keep all sculptural branches clear of the bulb, socket, and shade.
Add the harp and shade, then secure the finial. Lampshade proportion matters: a shade that is too small can make the base look bulky, while an oversized shade may visually flatten the coral sculpture. Better Homes & Gardens recommends considering the relationship among the base, harp, shade height, and shade width rather than choosing a shade by style alone.
A simple linen drum or tapered empire shade usually works well because it allows the coral base to remain the star. White fabric gives a light coastal effect, while natural linen creates a warmer, collected look.
Safety Checks Before Using the Lamp
- Confirm that the lamp stands flat and does not tip easily.
- Check that the socket and harp are firmly attached.
- Make sure the cord is not pinched, cut, stretched, or trapped beneath the base.
- Verify that no plaster, wire, foil, tape, paint, or sealer touches the bulb.
- Use only the bulb type and wattage permitted by the lamp kit.
- Keep the lamp indoors and dry unless every component is specifically rated for outdoor use.
- Unplug the lamp immediately if the socket becomes loose, the cord feels unusually warm, or you notice flickering, sparks, odor, or discoloration.
Strain relief, proper polarization, suitable wire size, and secure connections are important protections in portable electrical products. That is another reason to use a listed lamp kit rather than assemble a cord and socket from unrelated parts.
Common Problems and Easy Fixes
The Branches Keep Drooping
The wire may be too thin, the branches may be too long, or too much wet material may have been applied at once. Shorten the branch, twist in a second wire for reinforcement, and work with thinner plaster layers.
The Lamp Looks Too Symmetrical
Bend one branch outward, shorten another, and add a small secondary fork in an unexpected location. Natural coral colonies rarely resemble perfectly matched candelabras.
The Texture Looks Heavy
Sand the highest ridges and apply a thin coat of patching compound diluted according to its instructions. Smooth it with a damp tool, let it dry, and repaint.
The Base Is Top-Heavy
Do not attempt to disguise instability with felt pads. Reduce the branch spread or rebuild the project on a broader, heavier base. A decorative lamp should illuminate the table, not leap from it.
The Paint Looks Flat
Add a translucent shadow color to recessed areas and dry-brush a lighter shade across the tips. The difference can be subtle; strong black shadows may make the coral look as though it recently escaped a chimney.
Experiences and Lessons From Making a Coral Inspired Lamp
The first lesson this project teaches is that wire has opinions. You may draw a graceful branching design on paper, only to discover that the armature prefers interpretive dance. That is not necessarily a problem. The most convincing results often appear after abandoning exact symmetry and responding to the shape developing in your hands.
Building the form in stages makes a major difference. On an early attempt, it is tempting to attach every possible branch before adding plaster. The result can become crowded, fragile, and nearly impossible to wrap. A better approach is to form three or four strong primary branches, assess the silhouette, and then add secondary details only where the design needs movement.
It also helps to photograph the framework from the front, back, and both sides before applying plaster. A photograph flattens the silhouette and reveals awkward gaps that are easy to miss while rotating the piece. One branch may appear elegant in person but line up directly behind another in the lamp’s normal viewing position. A small adjustment before plastering can save an hour of corrective surgery later.
Another useful discovery is that less filler produces a better result. Thick foil bundles seem efficient, but they can turn delicate coral into oversized tree roots. Starting with slender branches leaves room for plaster cloth, texture paste, primer, and paint. Every layer adds volume, much like putting on four sweaters and then wondering why the jacket feels tight.
Plaster cloth is pleasantly forgiving, although it rewards preparation. Cutting all strips in advance keeps the process moving and prevents wet plaster fingerprints from migrating to scissors, faucets, cabinet handles, and somehow the family dog. Small pieces work best around forks. Longer strips are useful near the base, where additional strength matters more than fine detail.
Drying patience is equally important. A surface may feel firm while moisture remains beneath thicker joints. Painting too soon can trap dampness, weaken the finish, or create uneven color. Letting the sculpture dry longer than seems emotionally necessary usually leads to a cleaner result.
Choosing the finish may be the most enjoyable stage. Warm white is safe and elegant, but pure bright white can sometimes make the sculpture look overly new. Mixing a drop of beige, gray, or pale peach into the base coat creates a softer mineral quality. A nearly dry brush loaded with cream paint can then skim the high points and reveal details that seemed invisible after priming.
The lampshade can transform the project more dramatically than expected. A wide white drum shade creates a modern coastal lamp, while a narrower natural-linen shade makes the piece feel collected and traditional. Testing several shades before buying one is worthwhile. Even a beautifully sculpted base can look confused beneath a shade that resembles either a tiny hat or a patio umbrella.
The most practical lesson is to keep sculpture and electricity separate. Build decorative material around a sound lamp structure, not over its working parts. Leave the socket, switch, cord, fasteners, and bulb area accessible. This makes the lamp safer, easier to inspect, and much less frustrating if a component eventually needs replacement.
Finally, accept the imperfections. Handmade coral should have slight bumps, uneven pores, and branches that do not agree on a common direction. Those irregularities catch light and create the sculptural shadows that make the lamp interesting. A branch that initially appears odd may become the feature that gives the finished piece personality.
Conclusion
Making a coral inspired lamp is an approachable way to combine sculpture, lighting, and coastal décor in one useful project. The strongest results begin with a stable lamp base and listed electrical components, followed by a lightweight wire framework, carefully layered plaster cloth, subtle texture, and a paint finish that emphasizes the organic form.
Work slowly, check the silhouette from every angle, and resist the urge to add seventeen more branches simply because wire remains on the roll. Once paired with an appropriately sized shade and an efficient LED bulb, the finished lamp can provide a soft glow and an impressive handmade focal point for a bedroom, living room, entryway, or home office.
Note: This project creates decorative faux coral and should not use coral collected from reefs. Electrical components must remain accessible, dry, undamaged, and installed according to the lamp-kit manufacturer’s instructions. Consult a licensed electrician when you are unsure about wiring or component compatibility.


